
Azure DevOps Knowledge Base
Step-by-step guides for both ADL Connect apps — the Salesforce → Azure DevOps integration (AppExchange) and the Azure DevOps → Salesforce integration (Marketplace).
Azure DevOps Guide: Watch the Full Setup Video
A short walkthrough of connecting Salesforce and Azure DevOps with ADL Connect — from install to your first synced work items.
Salesforce ↔ Azure DevOps
Full connector setup, start to finish
- 01 Install ADL ConnectAdd the app from Salesforce AppExchange in a couple of clicks.
- 02 Connect Azure DevOpsAuthenticate your Salesforce org and Azure DevOps account securely.
- 03 Map fields both waysMatch objects, fields & picklists so data lines up perfectly.
- 04 Go live with syncSwitch on real-time, two-way sync and watch work items update instantly.
Introduction to ADL Connect
ADL Connect - Salesforce - Azure DevOps Integration
ADL Connect is a powerful, bidirectional integration tool that connects Salesforce with Azure DevOps, enabling a unified workflow across Sales, Support, and Engineering teams. Available on the Salesforce AppExchange, the connector allows users to synchronize Azure DevOps work items, comments, attachments, and status updates directly within Salesforce. By consolidating cross-system activities, ADL Connect eliminates manual updates, reduces context switching between applications, and improves overall response times.
Its intuitive configuration interface and secure authentication model ensure accurate, reliable data synchronization across both platforms.
Purpose
The primary objective of ADL Connect is to provide a frictionless bridge between Salesforce users and Azure DevOps users, ensuring customer issues, development tasks, and product enhancements move efficiently through their lifecycle.
This integration is especially valuable for the following roles:
- Salesforce Administrators
- Configure and manage a secure, flexible integration that supports internal teams.
- Developers
- Gain consistent visibility into Azure DevOps work items directly linked to Salesforce records.
- Project Managers & Product Owners
- Reduce duplicate work and improve communication between business and engineering teams.
- Support & Operations Teams
- Create, view, and track Azure DevOps issues directly from Salesforce without switching tools.
By establishing a single source of truth, ADL Connect improves collaboration and accelerates issue resolution across customer-facing and engineering teams.
1. Core Features of ADL Connect
An overview of the key capabilities, including:
- Create and update Azure DevOps work items directly from Salesforce
- Bidirectional synchronization of fields, comments, and attachments
- Search for and link existing Azure DevOps items to Salesforce records
- Secure authentication using API tokens
- Configurable field and object mapping between Salesforce and Azure DevOps projects
These features ensure seamless workflows and data consistency across systems.
2. Installation and Initial Setup
A high-level walkthrough of the setup process, including:
- Installing ADL Connect from the Salesforce AppExchange
- Authenticating Salesforce and Azure DevOps using secure API tokens
- Configuring initial project mappings and data models
This setup establishes the foundation required to activate and use the integration successfully.
3. How Salesforce and Azure DevOps Data Sync Works
An explanation of the bidirectional synchronization model, covering:
- Outbound sync: Salesforce updates pushed to Azure DevOps
- Inbound sync: Azure DevOps updates reflected back in Salesforce
- Field mapping, record ID mapping, and synchronization rules
- Handling of comments and attachments across both platforms
This section helps users understand how data behaves once the connector is configured.
4. Key Benefits for Operational Teams
Organizations using ADL Connect gain several practical advantages:
- Reduced manual data entry and administrative overhead
- Improved visibility into engineering progress for customer-facing teams
- Faster issue resolution through centralized communication
- Stronger collaboration between Sales, Support, and Development
- Increased data consistency, traceability, and auditability
Together, these benefits drive better cross-functional alignment and improved service delivery.
Installation and Connection Setup
Installation and Connection Setup
To begin using ADL Connect, the first step is to install the package from the Salesforce AppExchange and complete the initial connection configuration. This setup establishes a secure communication channel between Salesforce and Azure DevOps, enabling all subsequent synchronization activities.
1. Install the ADL Connect Package
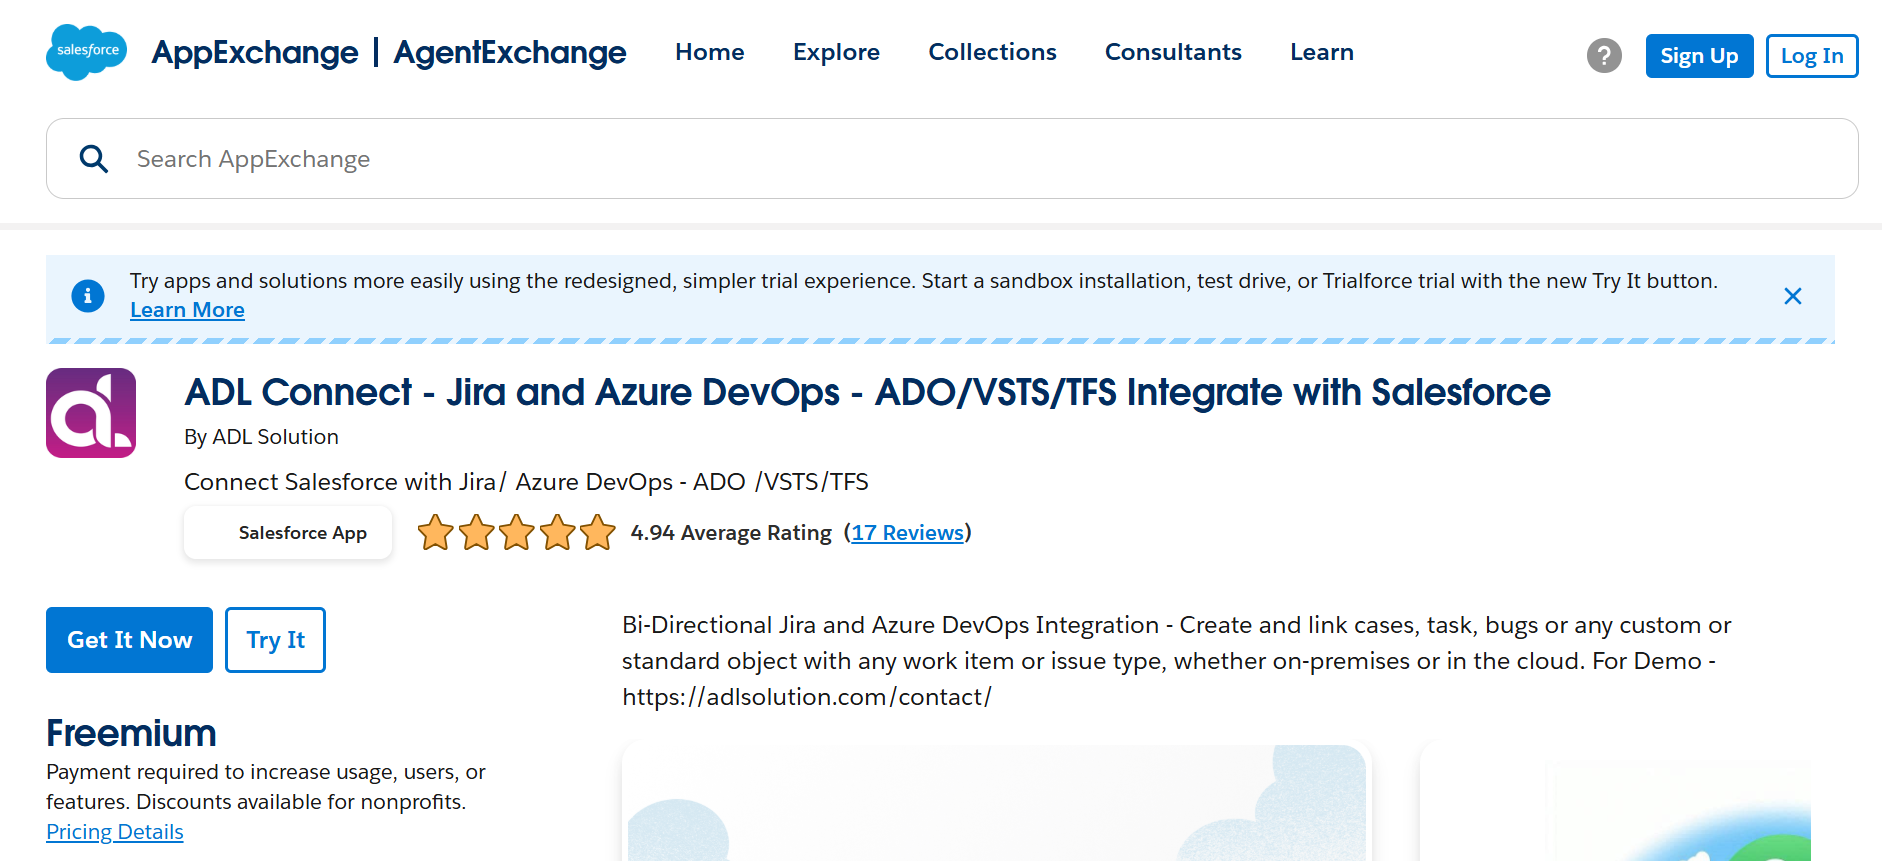
Navigate to the Salesforce AppExchange and locate the ADL Connect listing. Select Get It Now to initiate the installation process.
During installation:
- Choose the target environment (Production or Sandbox)
- Review and approve the required permissions
- Install the package for Administrators only or All Users, based on organizational requirements
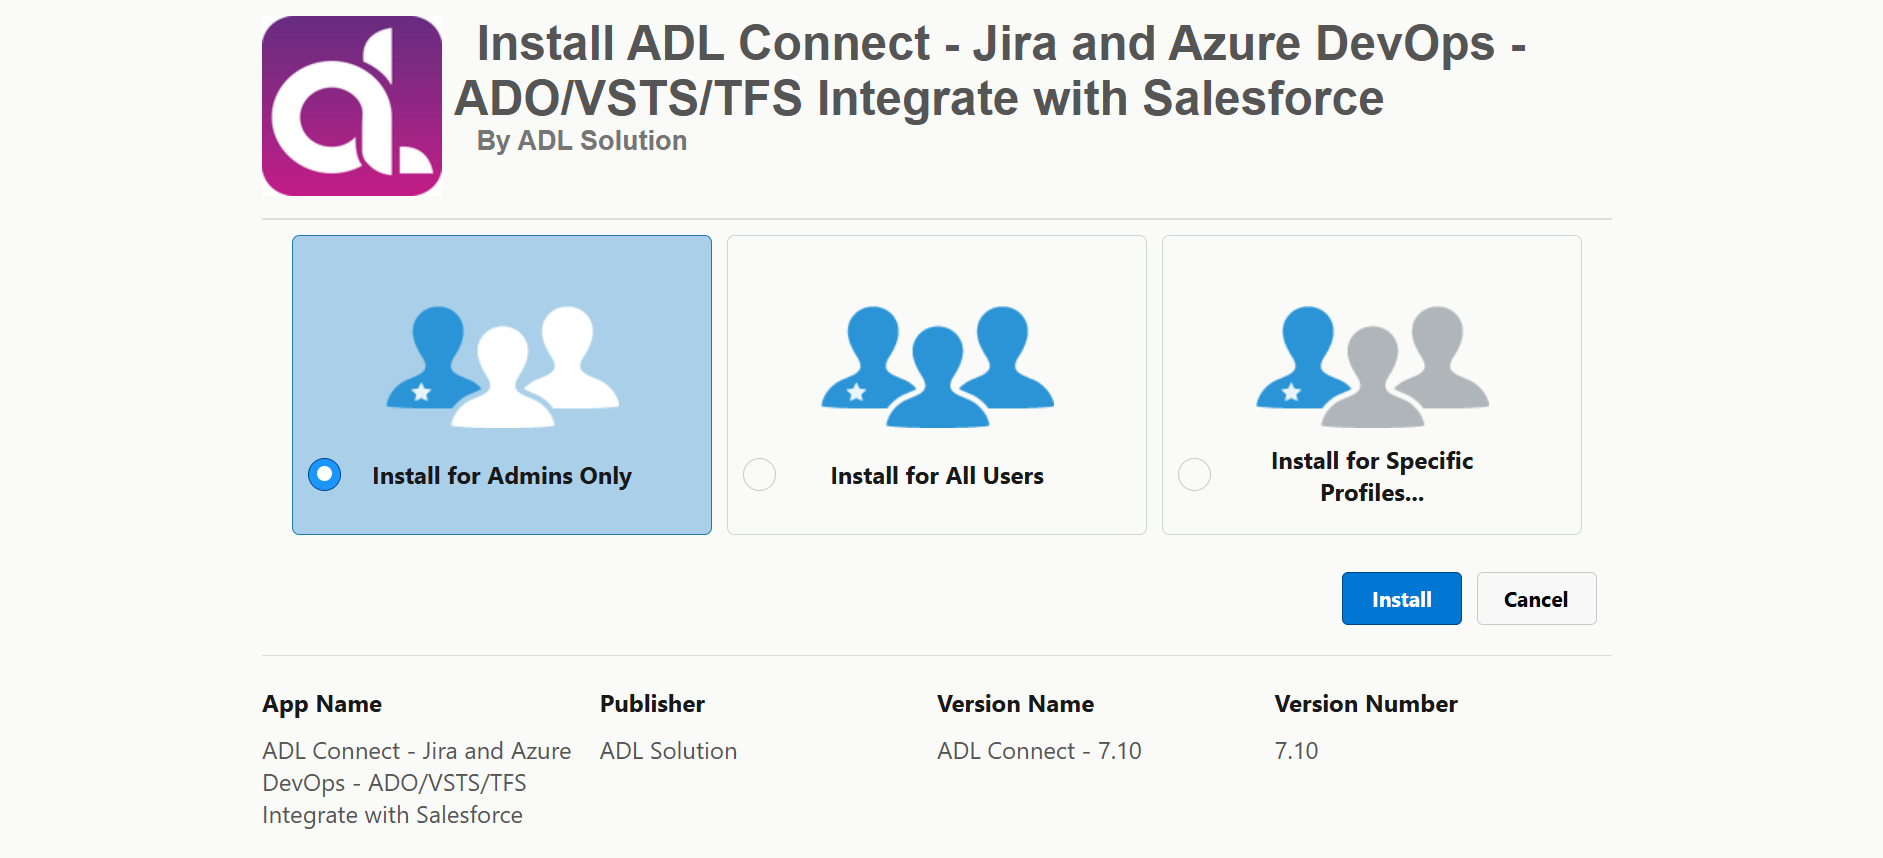
Once the installation is complete, ADL Connect becomes available in the Salesforce App Launcher and is ready for configuration.
2. Launch the Configuration Console
After installation, open the ADL Connect Setup Console from the App Launcher.
This console serves as the central workspace for:
- Providing authentication details
- Configuring Azure DevOps project mappings
- Defining field mapping rules
- Managing inbound and outbound synchronization settings
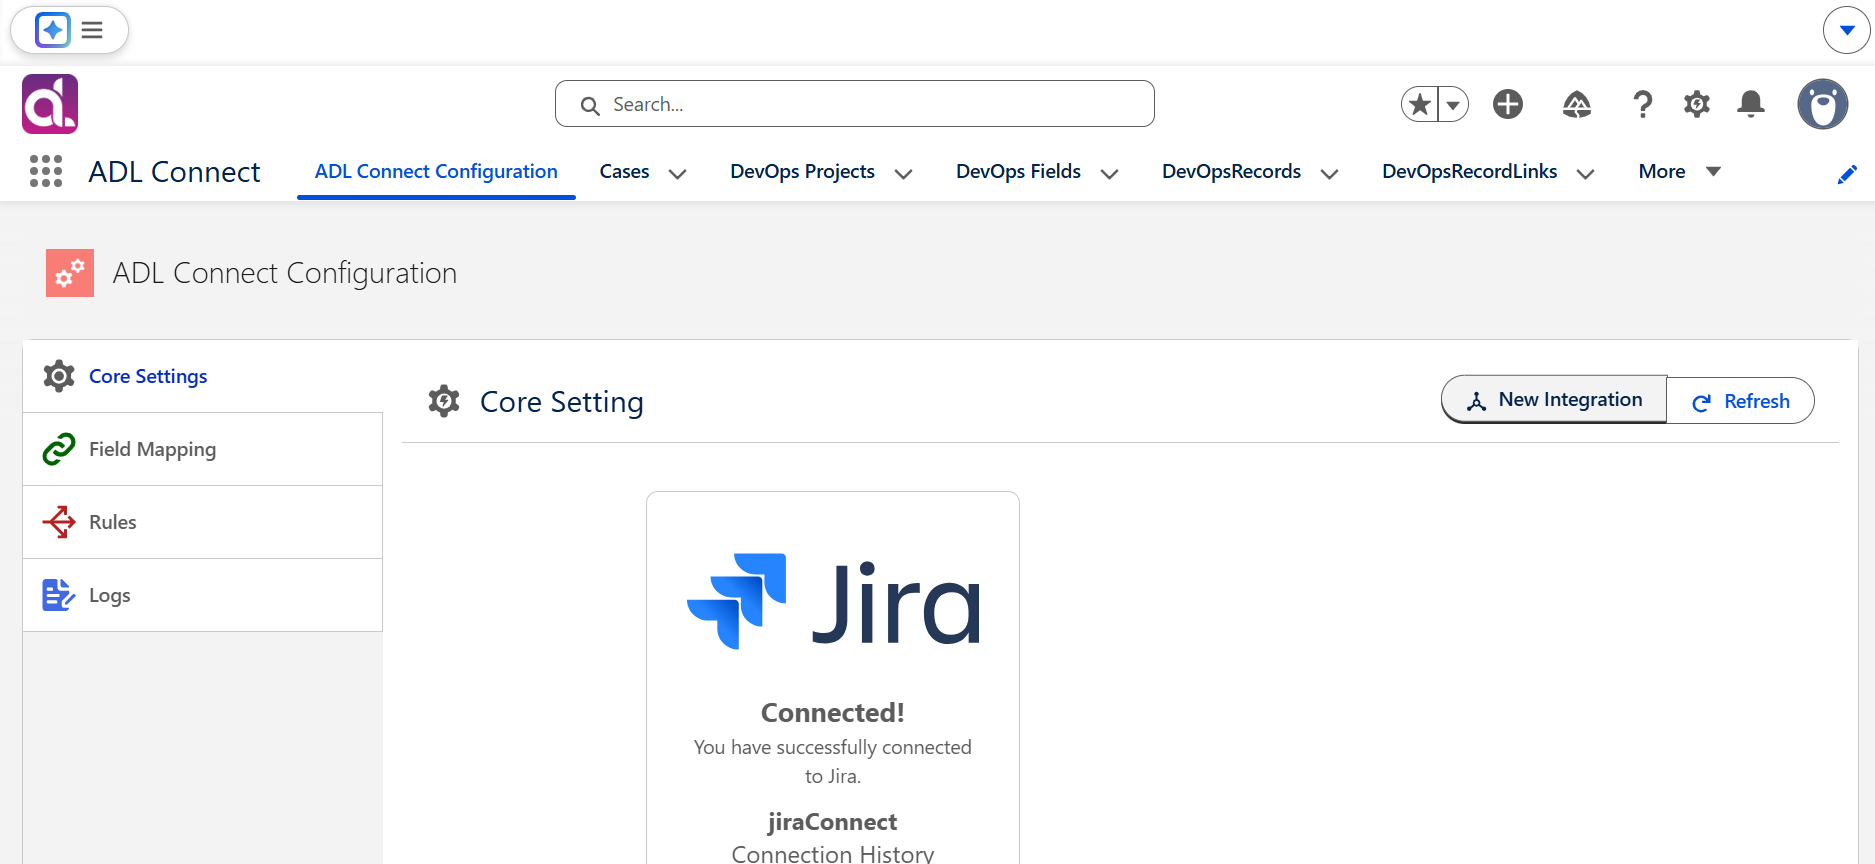
The configuration console is designed to simplify both the initial setup and the ongoing administration of the integration.
Generate an Azure DevOps API Token
Azure DevOps is retiring Global Personal Access Tokens to reduce security risk. Per Microsoft’s Sprint 270 release notes, December 1, 2026, all existing global PATs will be fully decommissioned and stop working.
New connections should be built on OAuth 2.0 instead of a Personal Access Token — see Setup OAuth 2.0.
How to Generate an API Token from Your Microsoft Account
To establish a secure connection between Salesforce and Azure DevOps, a Personal Access Token (API token) must be generated from your Microsoft account. This token replaces password-based authentication and provides a secure method for external applications such as ADL Connect to access Azure DevOps data.
Follow the steps below to generate and configure a new API token.
Step 1: Sign in to Your Microsoft Account
- Open a web browser and navigate to:
- https://azure.microsoft.com/
- Sign in using your Microsoft (Azure DevOps) email address and password.
- Complete multi-factor authentication if it is enabled for your account.
Step 2: Access Personal Access Token Settings
- After signing in, click User Settings located at the top-right corner near your profile avatar.
- From the dropdown menu, select Personal Access Tokens.
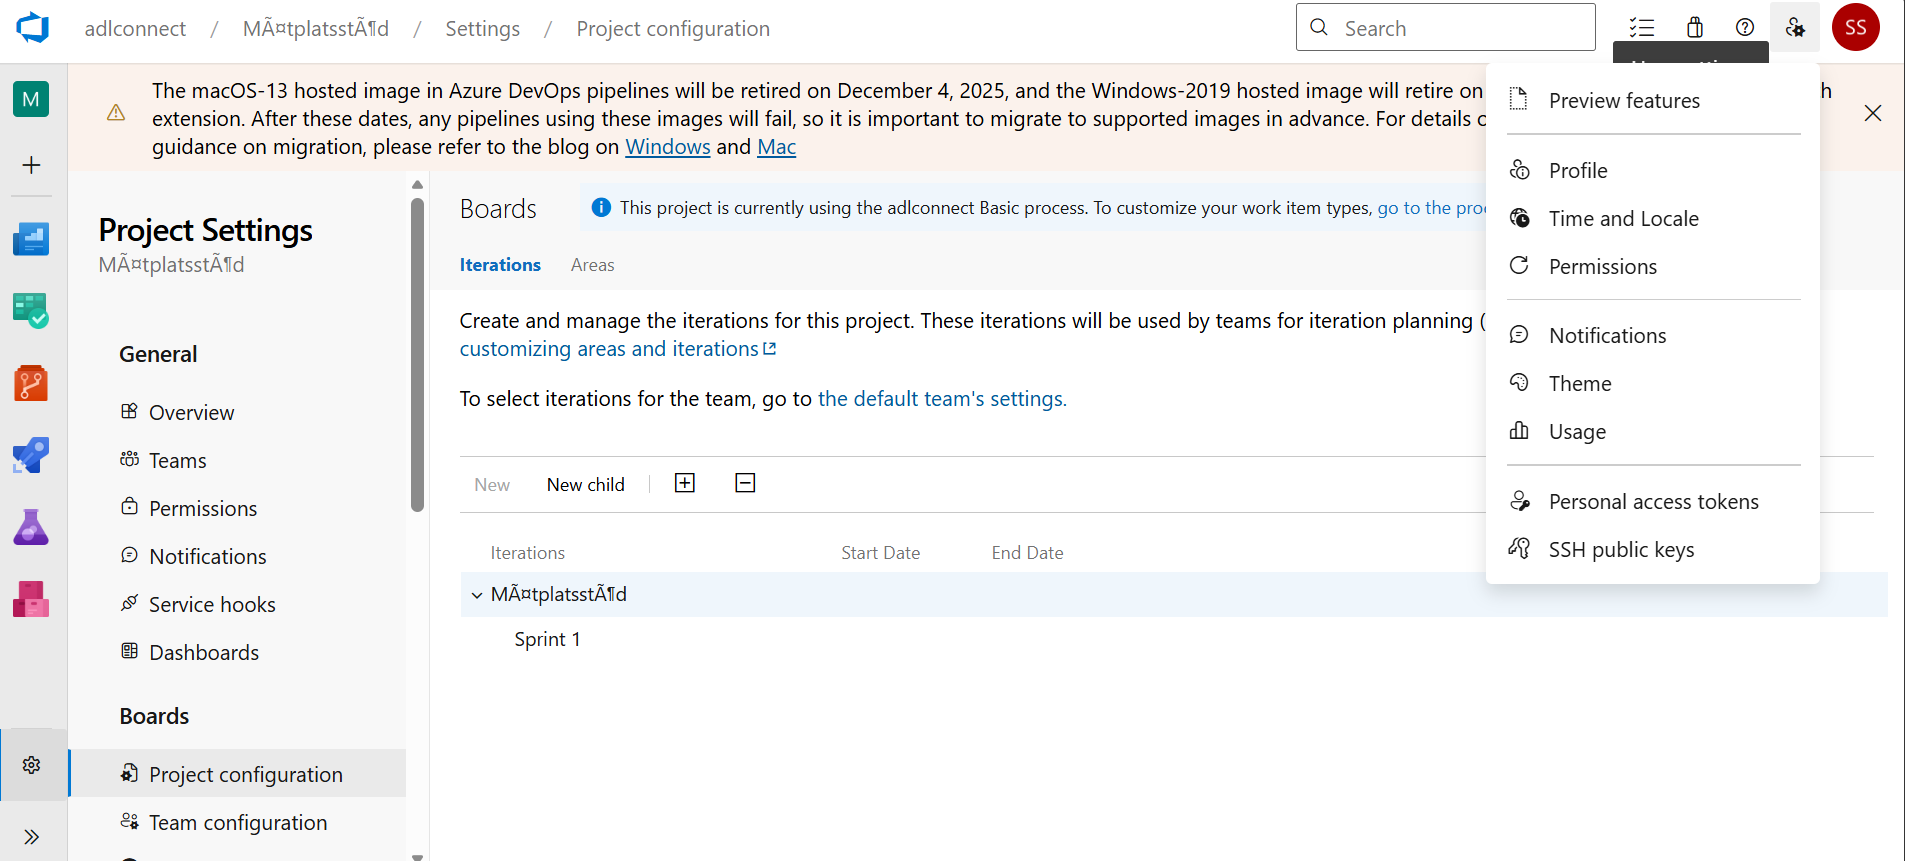
This section allows you to create, manage, and revoke API tokens used by external integrations.
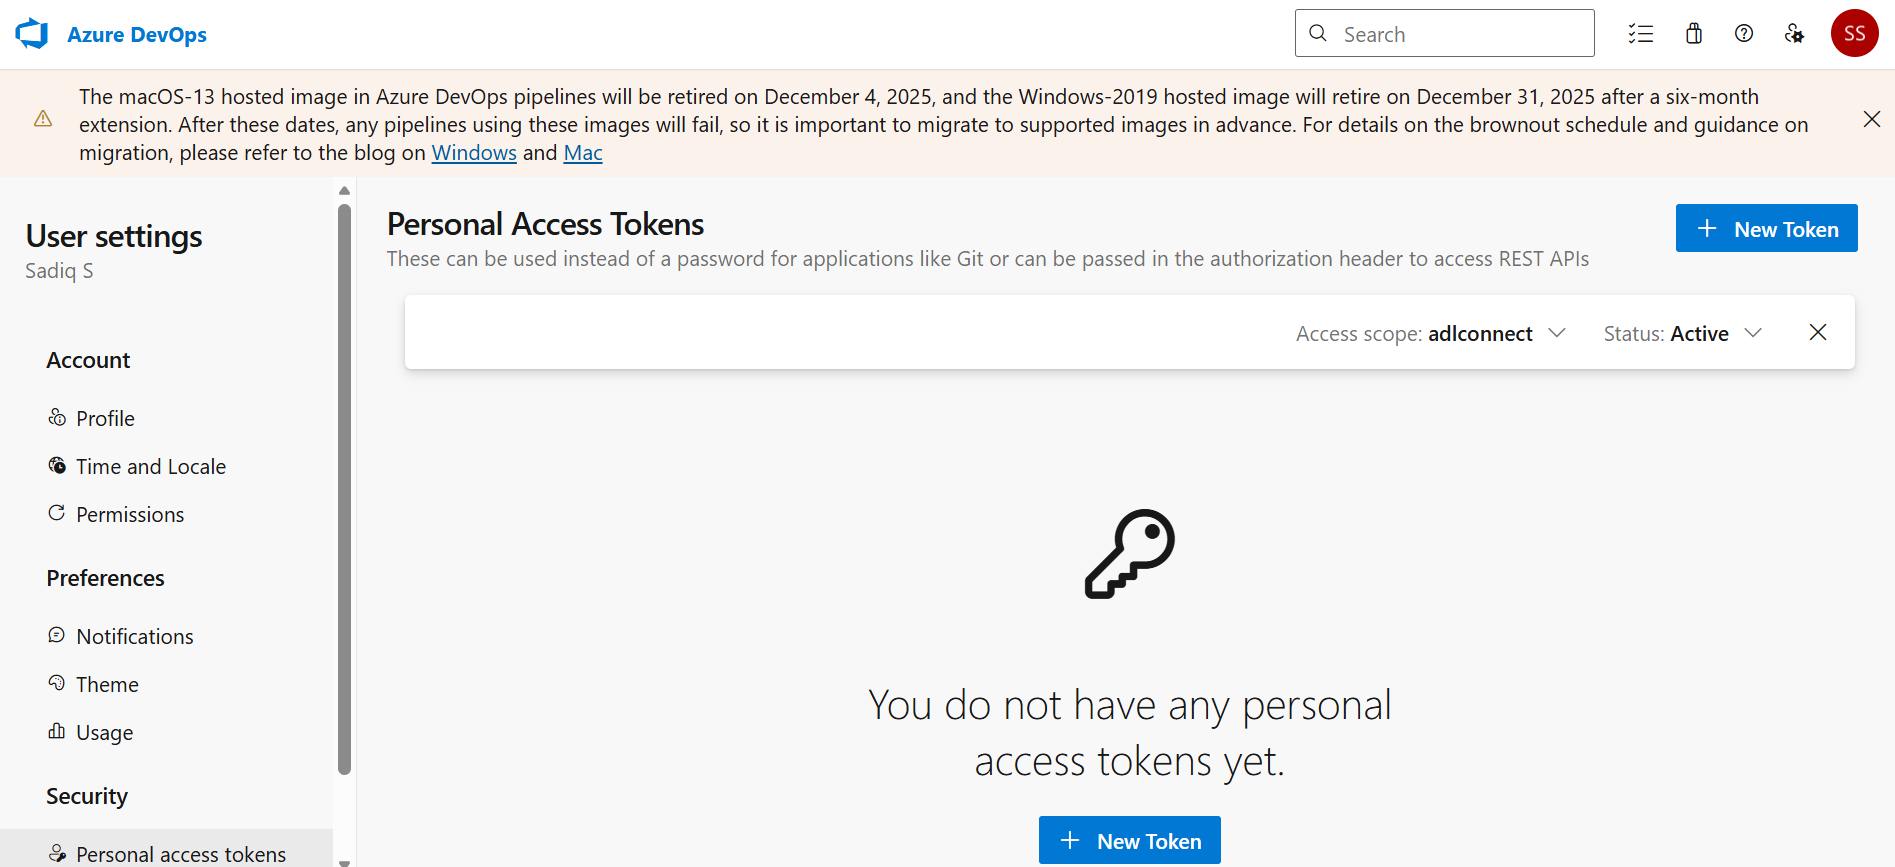
Step 3: Create a New API Token
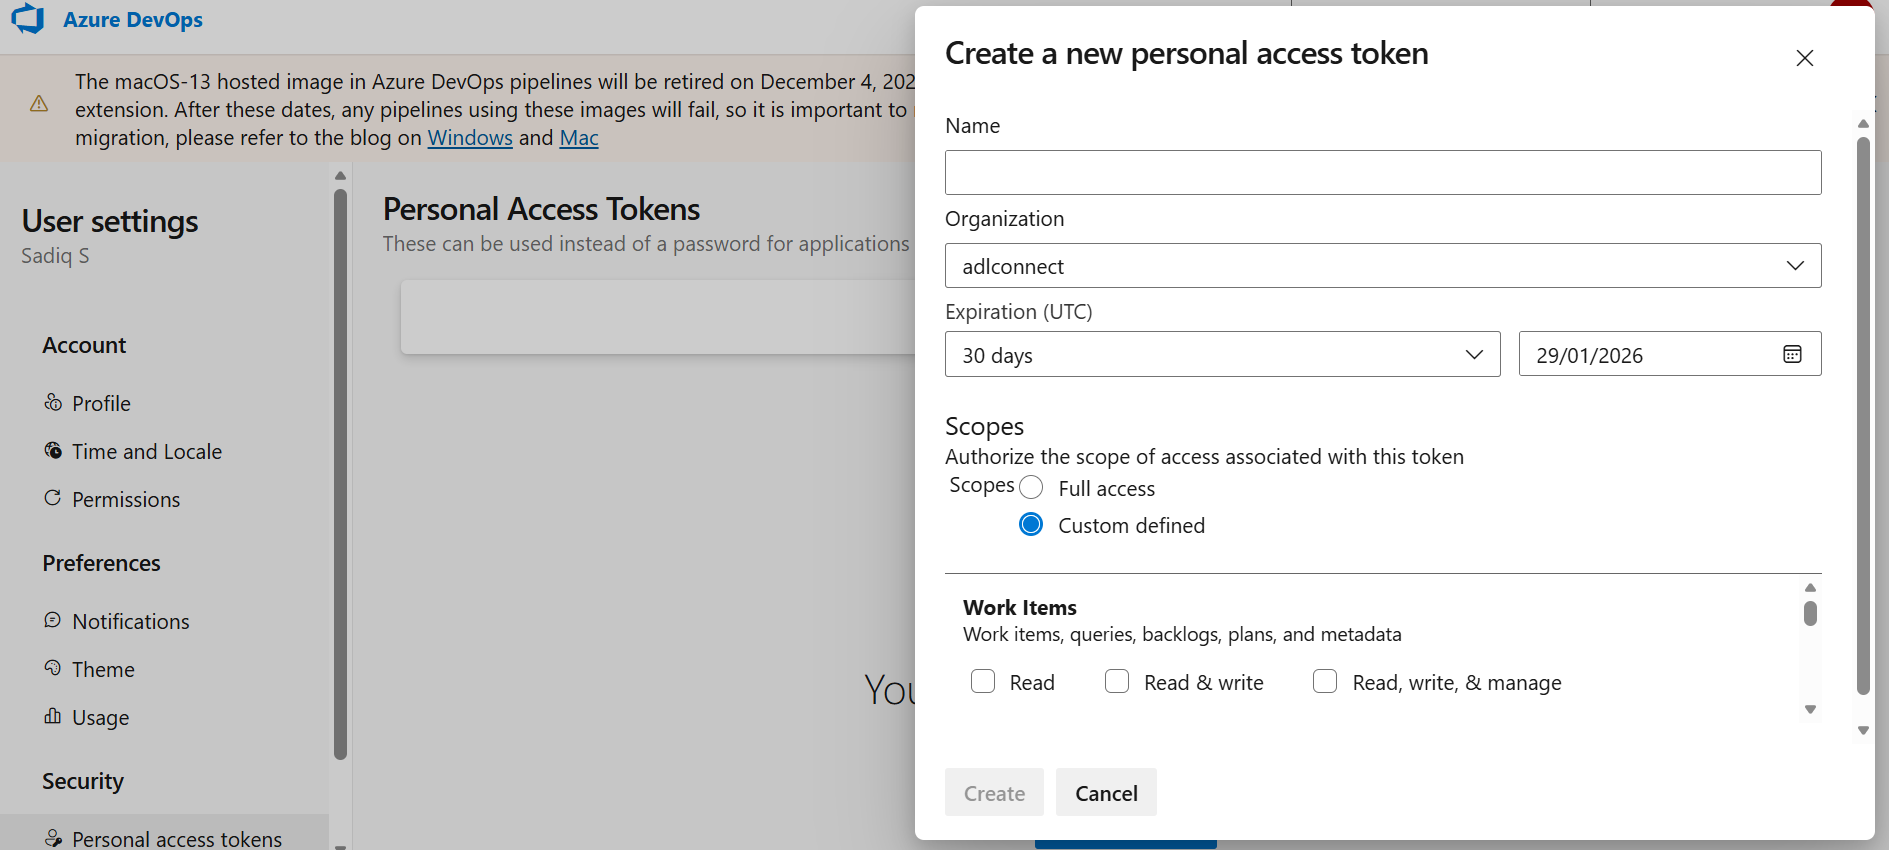
Click Create API Token. In the token creation dialog:
- Enter a descriptive name for the token
- Set the access scope to full access (recommended for ADL Connect)
- Set the expiration date (recommended: one year)
- Click Create to generate the token.
Setting a Custom Scope (Alternative)
If your organization's security policies restrict the use of "full access" tokens, you can restrict the token's permissions by selecting Custom defined under the access scope settings.
To configure this, click Show all scopes at the bottom of the list and check the following permissions:
- Identity: Read
- Member Entitlement Management: Read
- Project and Team: Read & write
- Work Items: Read, write, & manage
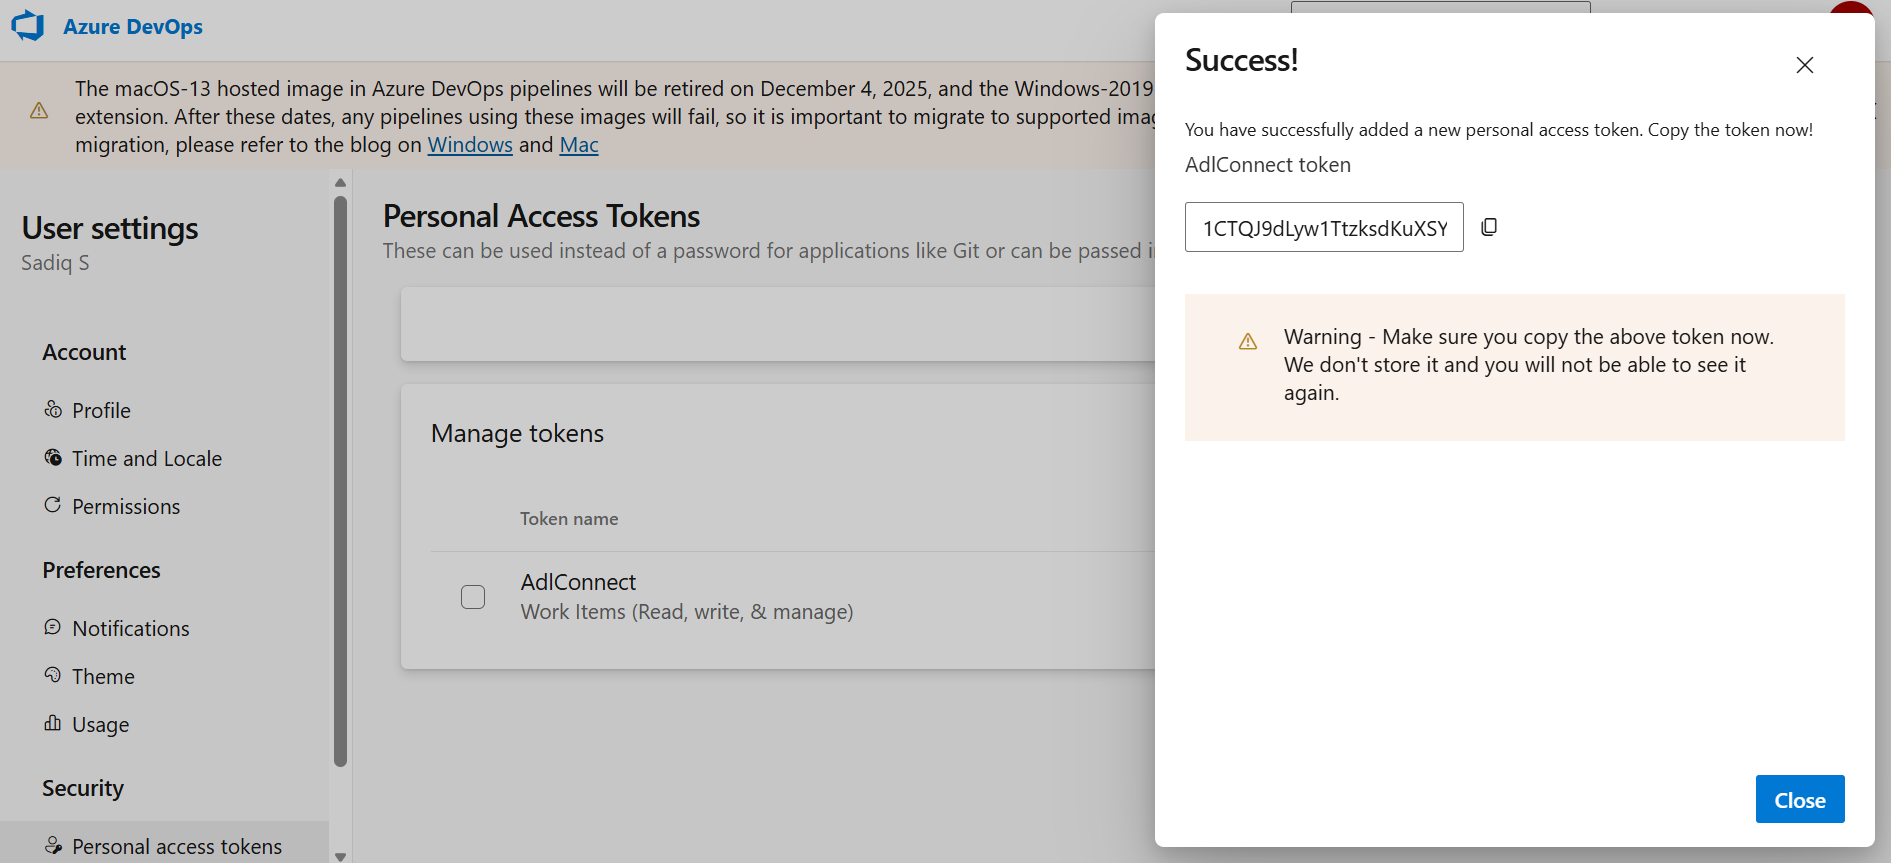
Step 4: Copy and Store the Token Securely
- Once the token is generated, click Copy to Clipboard.
- Store the token temporarily in a secure location. (For security reasons, Microsoft will not display the token again after the dialog is closed)
- Keep the token available for the Salesforce configuration step.
Step 5: Connect Salesforce to Azure DevOps Using the API Token
Before synchronization can begin, a secure connection must be configured in ADL Connect.
To complete the connection:
- Open the ADL Connect authentication settings in Salesforce.
- Enter your Azure DevOps email address or username.
- Paste the generated API token into the API token field.
- Save the credentials.
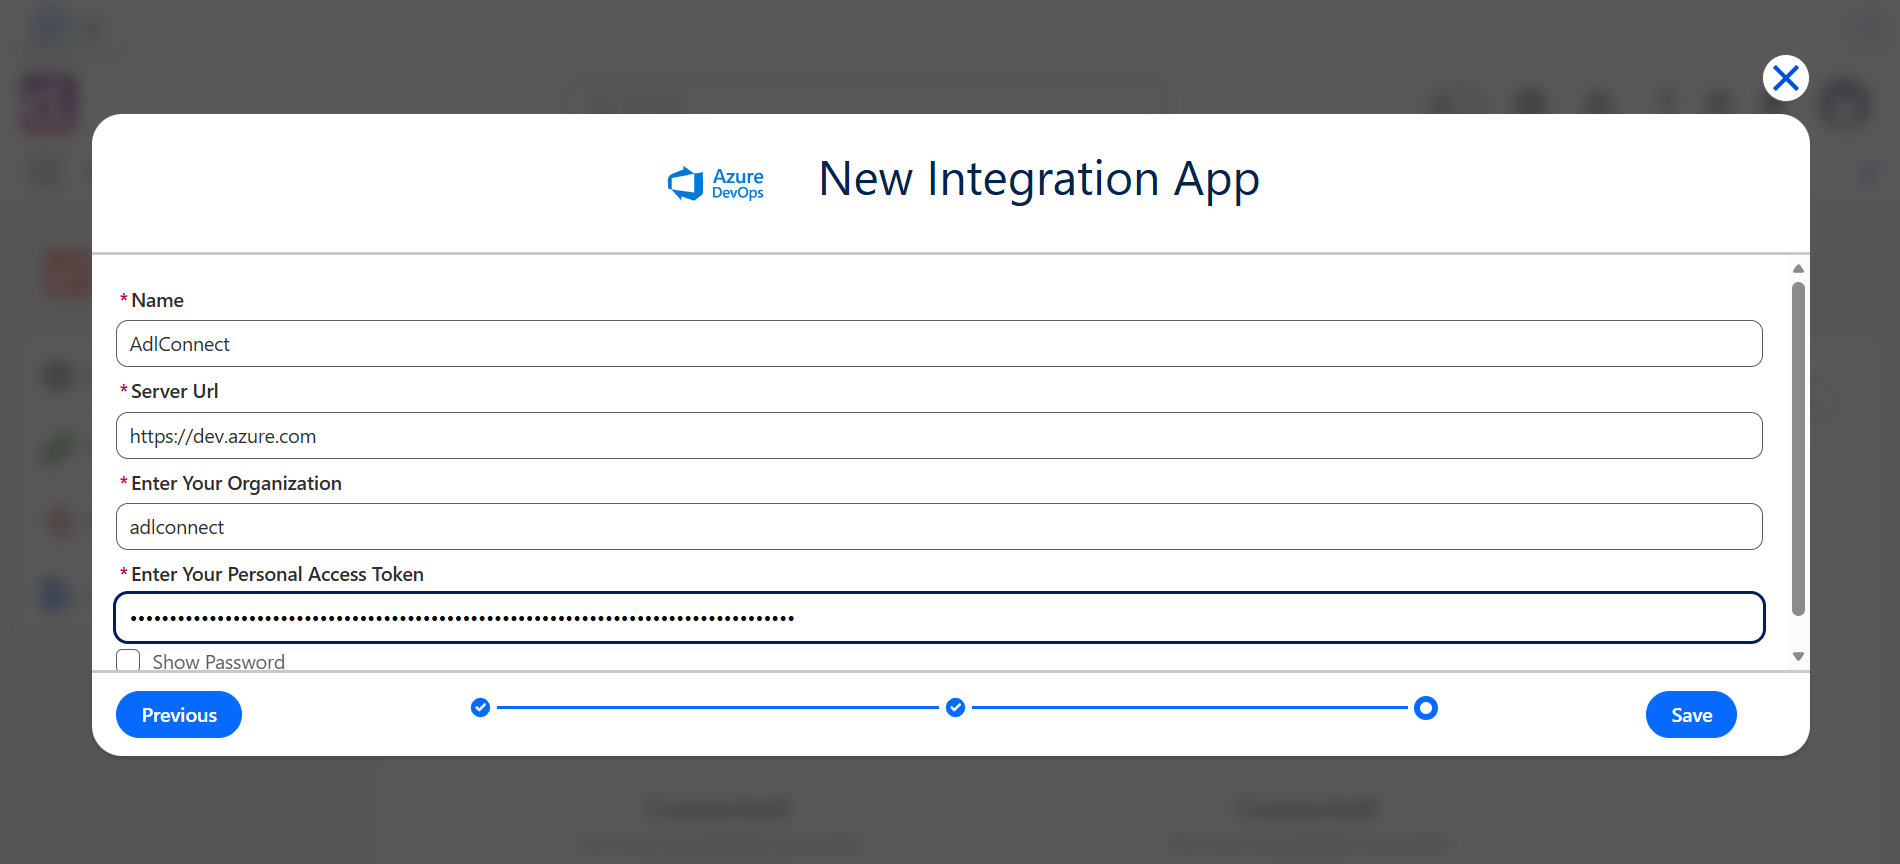
Once saved, ADL Connect can securely access Azure DevOps based on the permissions granted to the token.
Security Best Practices
- API tokens act as credentials and must be handled with care.
- Do not share tokens publicly or store them in unsecured locations.
- If a token is compromised, revoke it immediately from the Personal Access Tokens page.
- Always use the token together with your Microsoft email address when configuring ADL Connect.
Setup OAuth 2.0
This section is password protected
Enter the password to view “Setup OAuth 2.0”.
Incorrect password. Please try again.
Don’t know the password? Contact us and we’ll help you out.
Configure Project Mapping
Project Mapping Between Salesforce and Azure DevOps
Project mapping establishes the relationship between Salesforce and Azure DevOps by defining which Salesforce object corresponds to a specific Azure DevOps project and work item type.
As part of this configuration, a custom Azure DevOps field is required to store the Salesforce Record ID, enabling reliable cross-system linkage and bidirectional synchronization.
Follow the steps below to configure a project mapping.
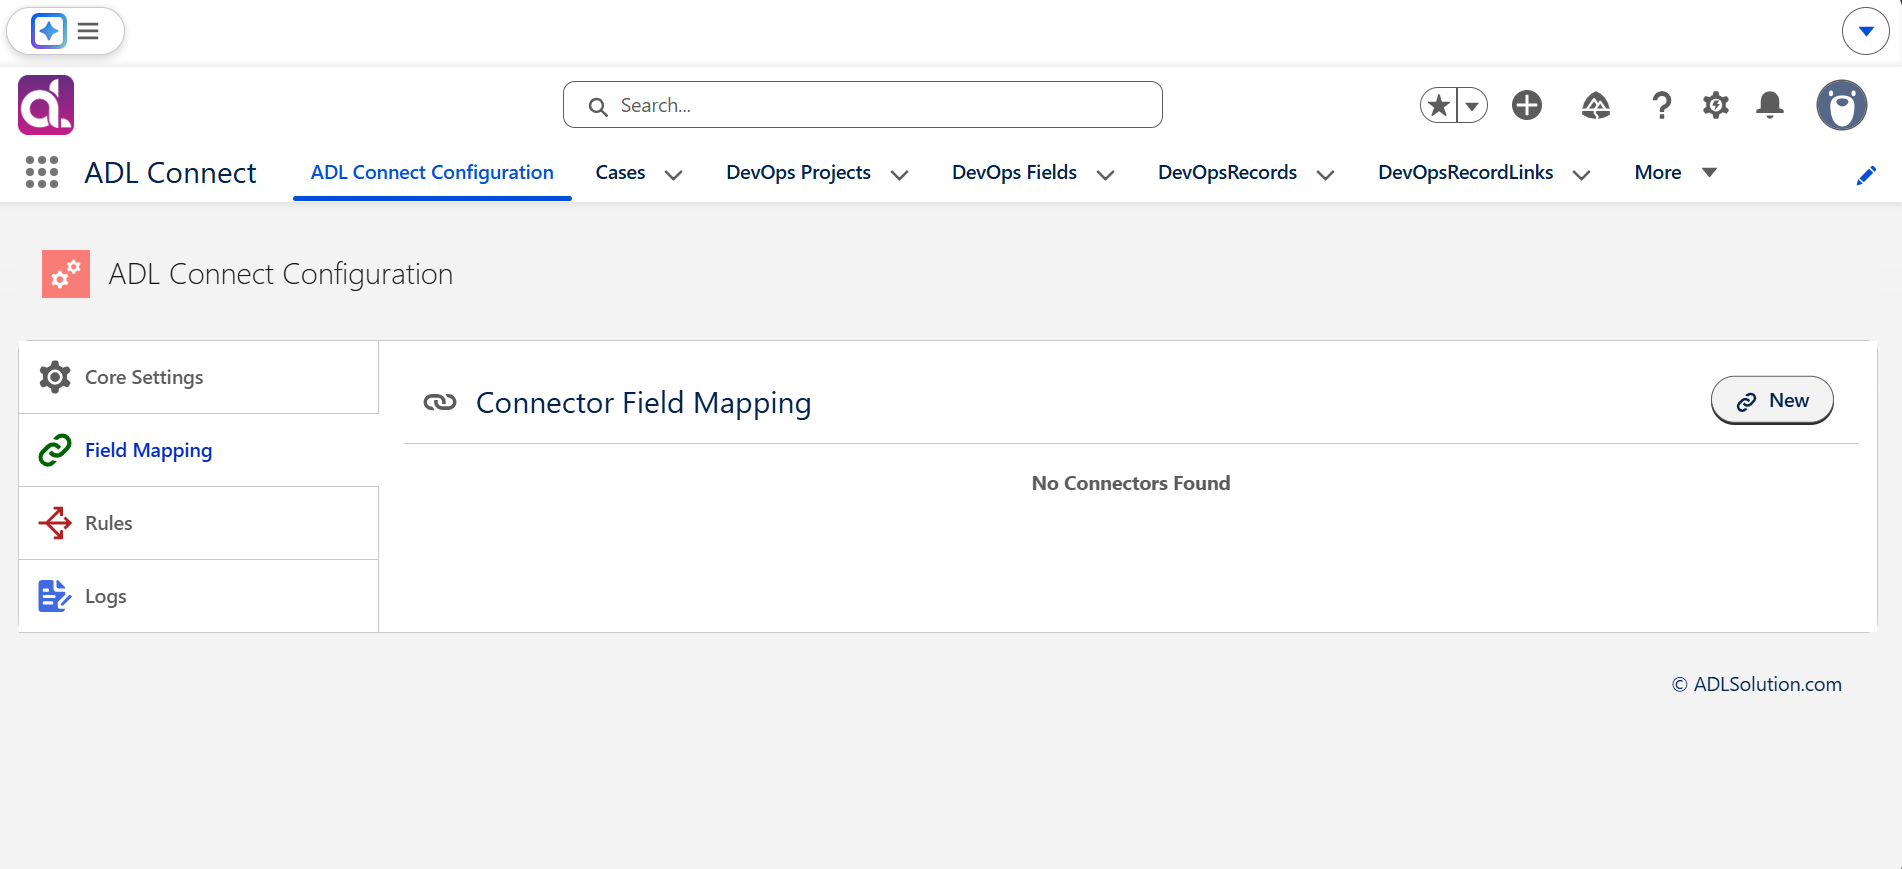
Step 1: Create a New Project Mapping
- In ADL Connect, navigate to the Field Mappings section.
- Click New Project Mapping or New Mapping.
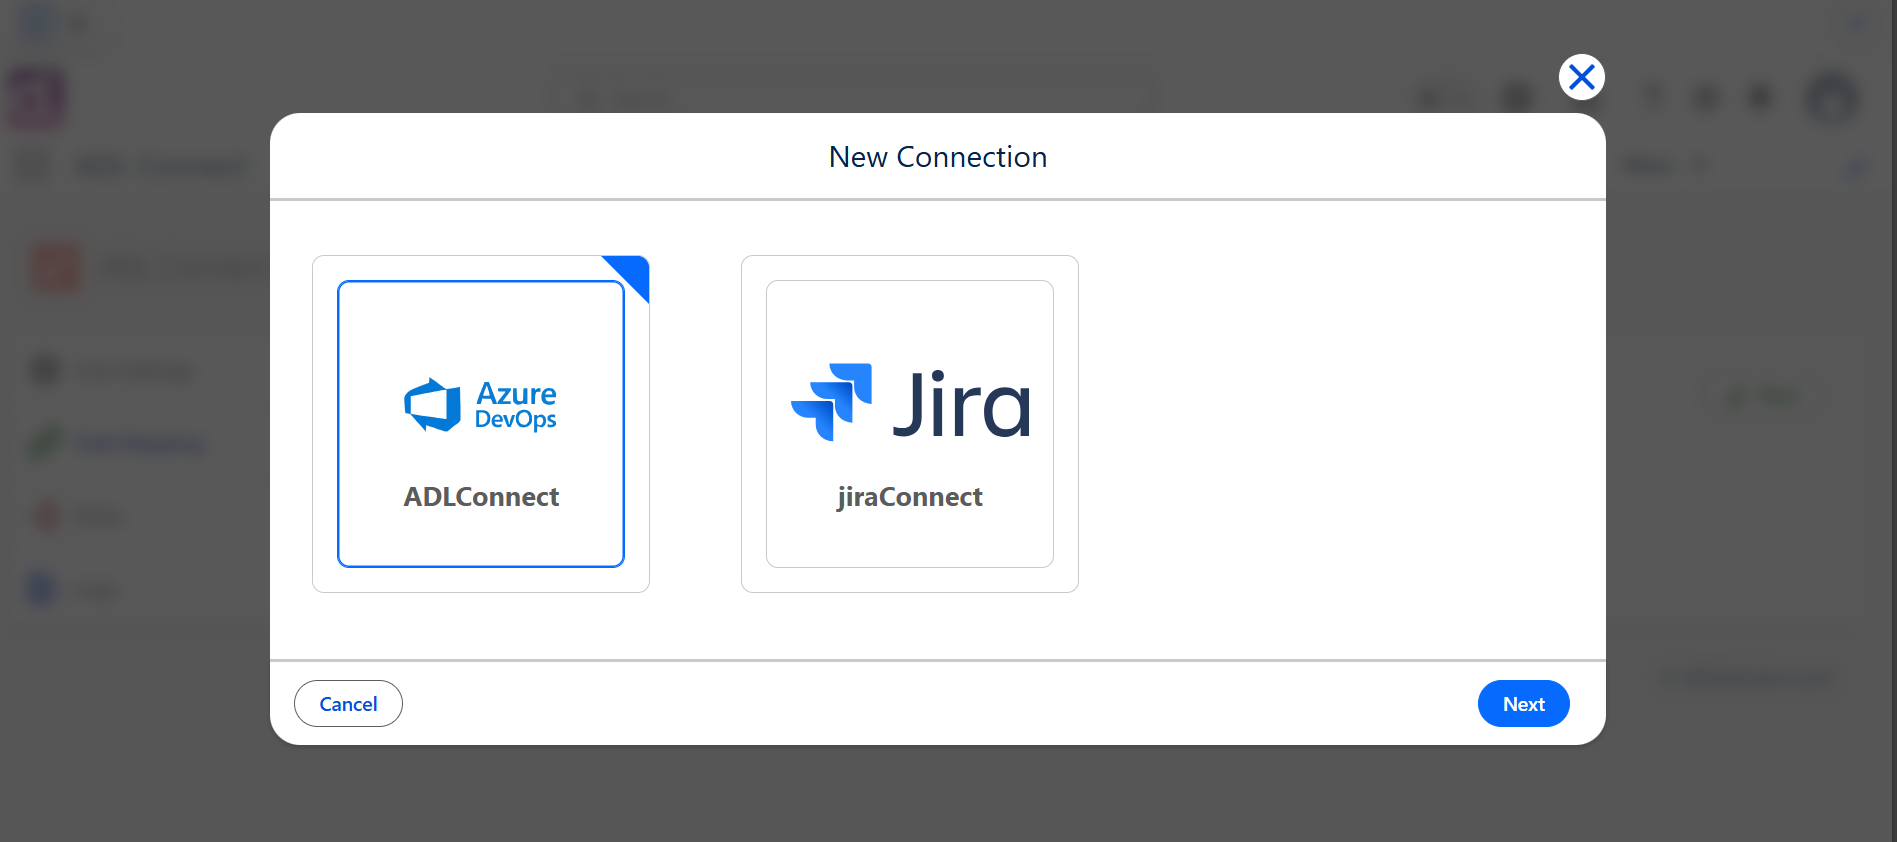
- Select the appropriate Integration App from the dropdown.
This identifies the Azure DevOps environment to which the mapping belongs.
Step 2: Select the Azure DevOps Project
- In the Azure DevOps Project field, select the project you want to integrate with Salesforce.
- Enter a Project Mapping Name to label the connection.
Examples:
- Support Cases → Azure DevOps Bugs
- Opportunities → Azure DevOps Stories
This name serves as the reference point for all synchronization rules related to this project.
Step 3: Choose the Salesforce Object
- From the Salesforce Object dropdown, select the object whose records you want to synchronize.
- Standard objects (e.g., Case, Opportunity)
- Custom objects
- This determines:
- Where Azure DevOps work items are created from
- Which Salesforce records can be linked to Azure DevOps
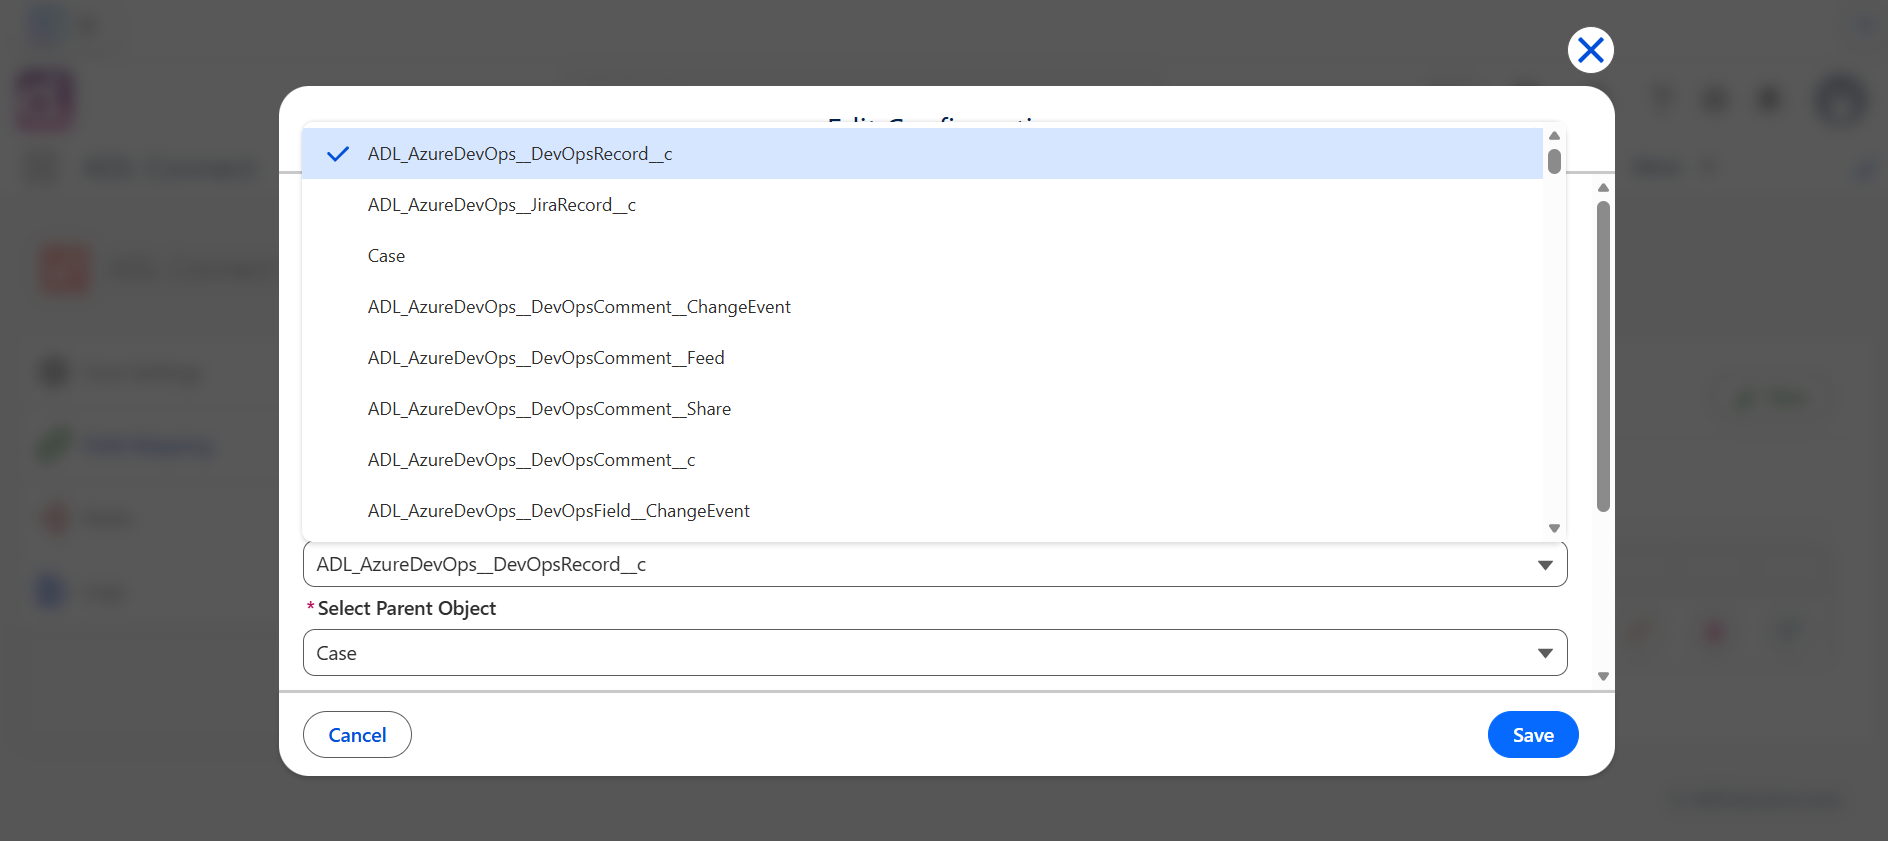
Step 4: Select the Azure DevOps Work Item Type
- In the Azure DevOps Work Item Type dropdown, choose the type to be created.
Examples include:
- Task
- Story
- Epic
- Custom work item types
This ensures the correct Azure DevOps structure is used when issues are created from Salesforce.
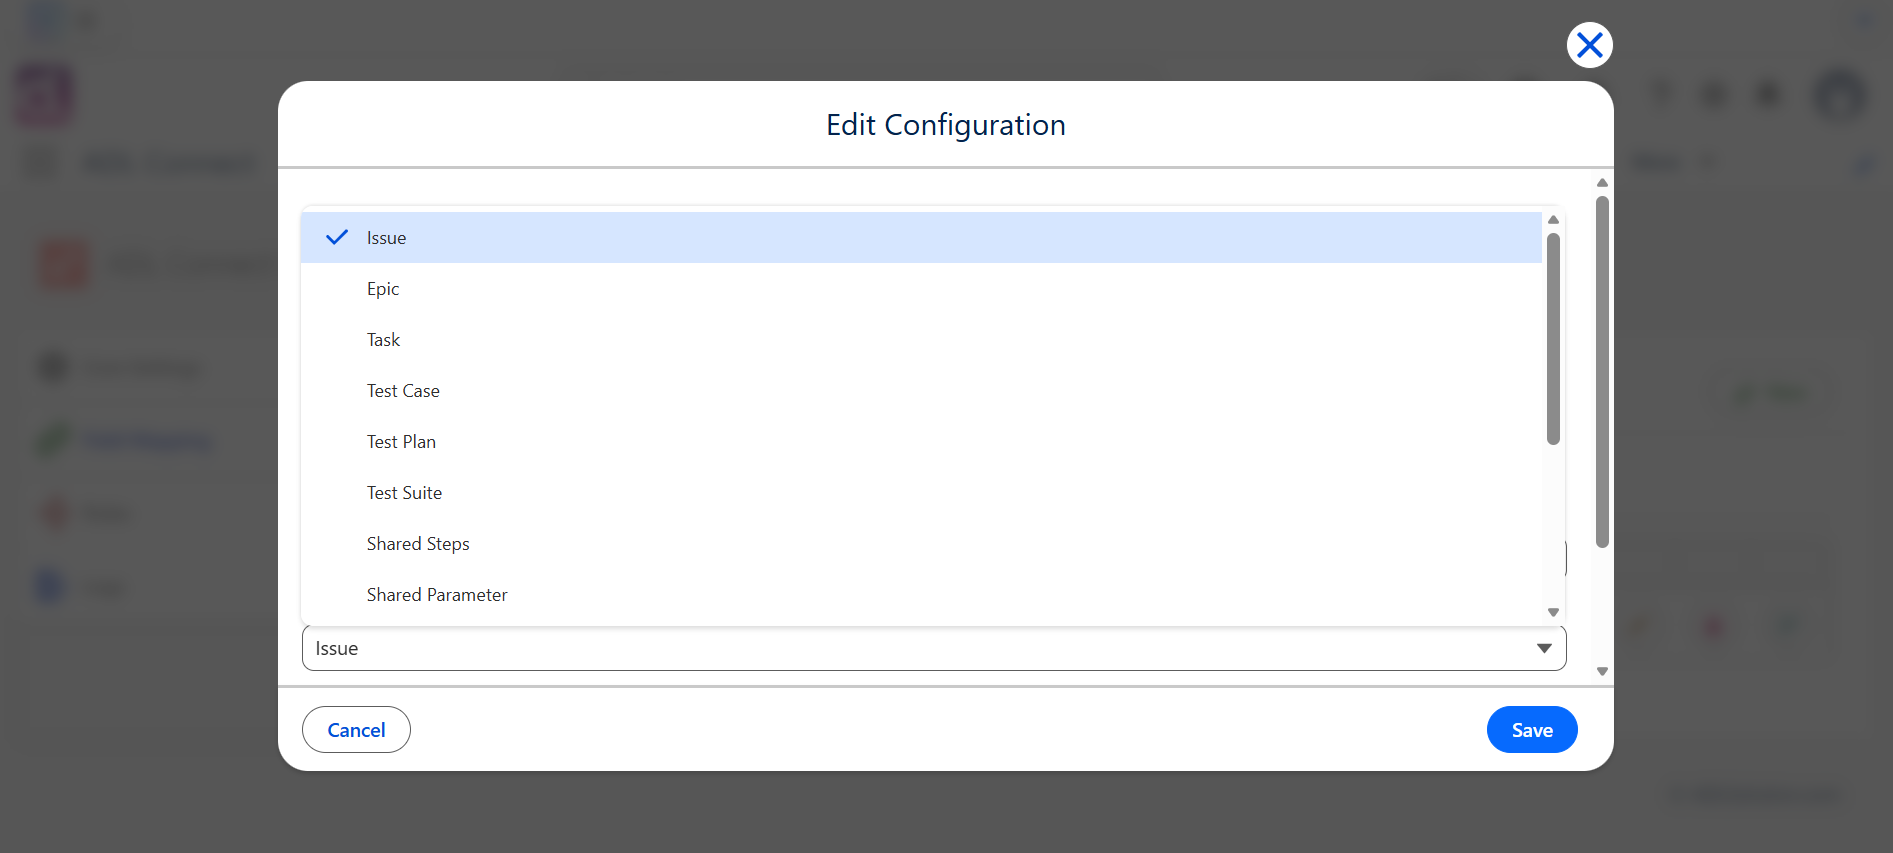
Step 5: Select or Create the Azure DevOps Field to Store Salesforce Record ID
To maintain a persistent link between Salesforce records and Azure DevOps work items, Azure DevOps must store the Salesforce Record ID in a dedicated field.
Option A: Select an Existing Custom Field
- Open the Salesforce Record ID Mapping Field dropdown.
- If a suitable Azure DevOps custom field already exists, select it.
Option B: Create a New Azure DevOps Custom Field (Recommended)
If no appropriate field exists, create one using the steps below.
Step 6: Create the Required Azure DevOps Custom Field (Text Field)
- Navigate to the Azure DevOps Work Item page you want to map.
- Click the Action Dots (⋮) on the page.
- Select Customize.
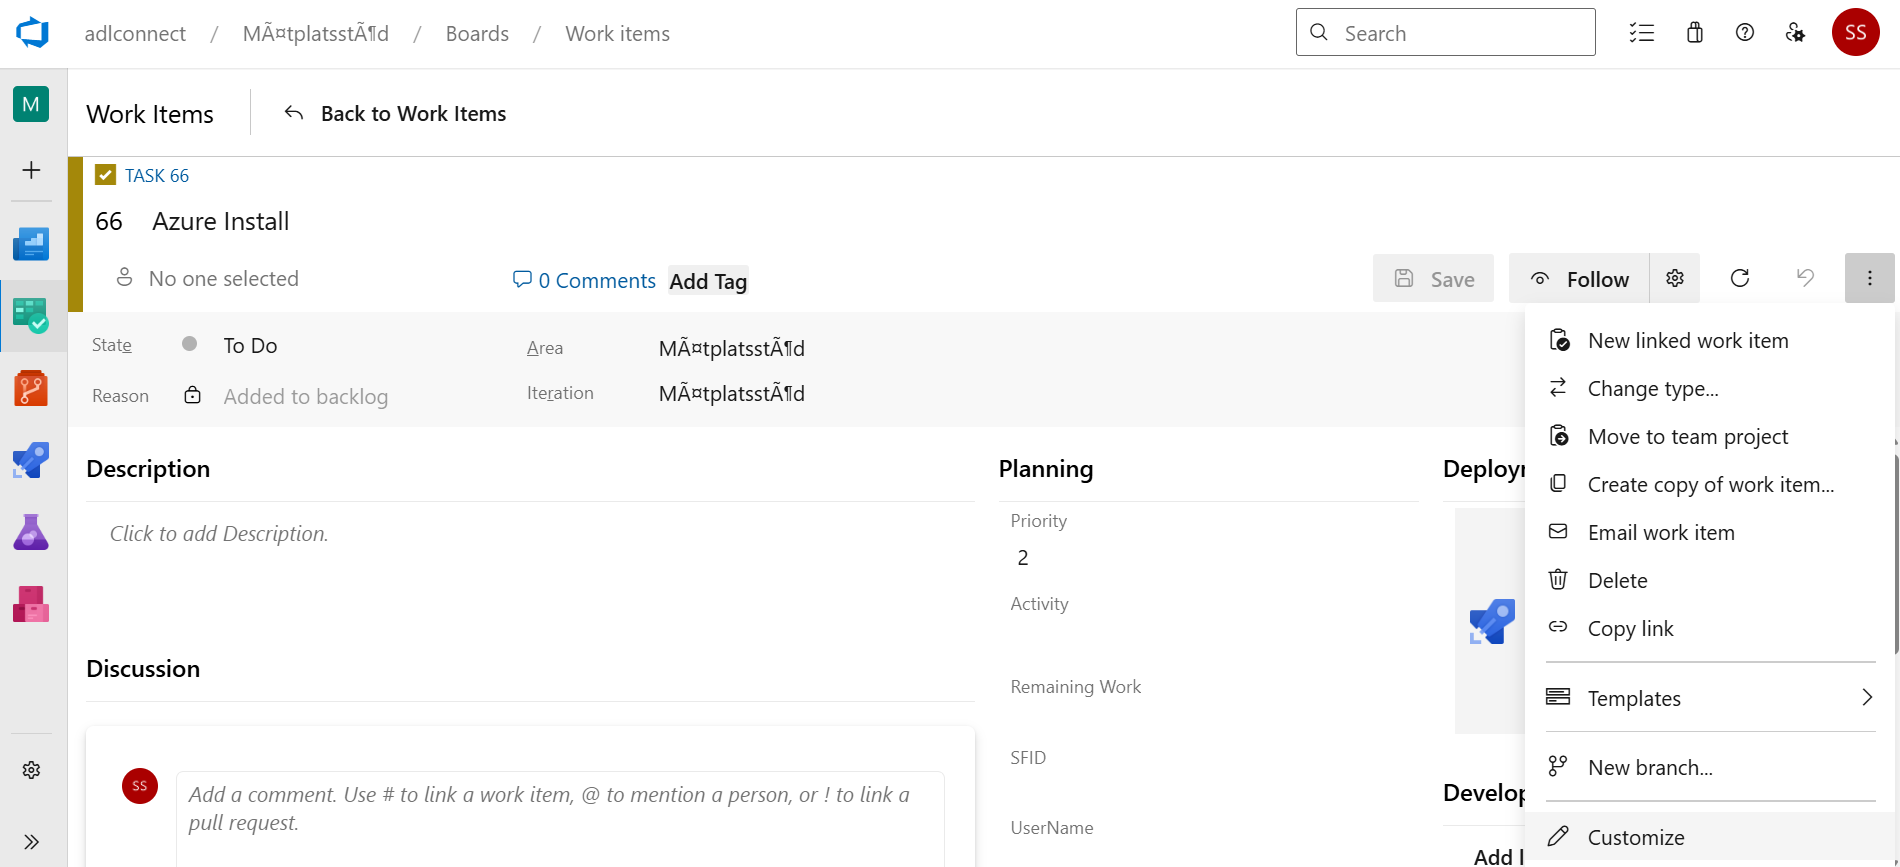
In the customization panel:
- Click New Field.
- Set Field Name to
SFID. - Choose Field Type as Text.
- Enter the Description as shown in the reference configuration.
- Review the field details.
- Click Add Field to save and create the field.
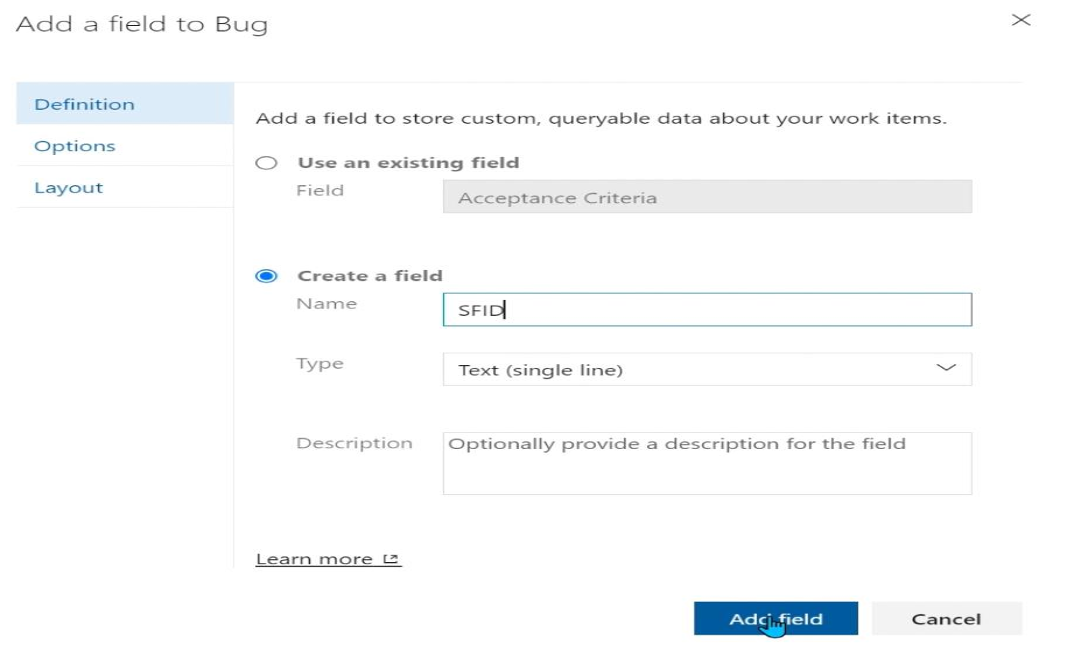
Step 7: Return to Salesforce and Complete the Mapping
- Go back to Salesforce and refresh the ADL Connect configuration page.
- In the Salesforce Record ID Field dropdown, select the newly created Azure DevOps field.
- Verify all other mapping details:
- Salesforce Object
- Azure DevOps Project
- Work Item Type
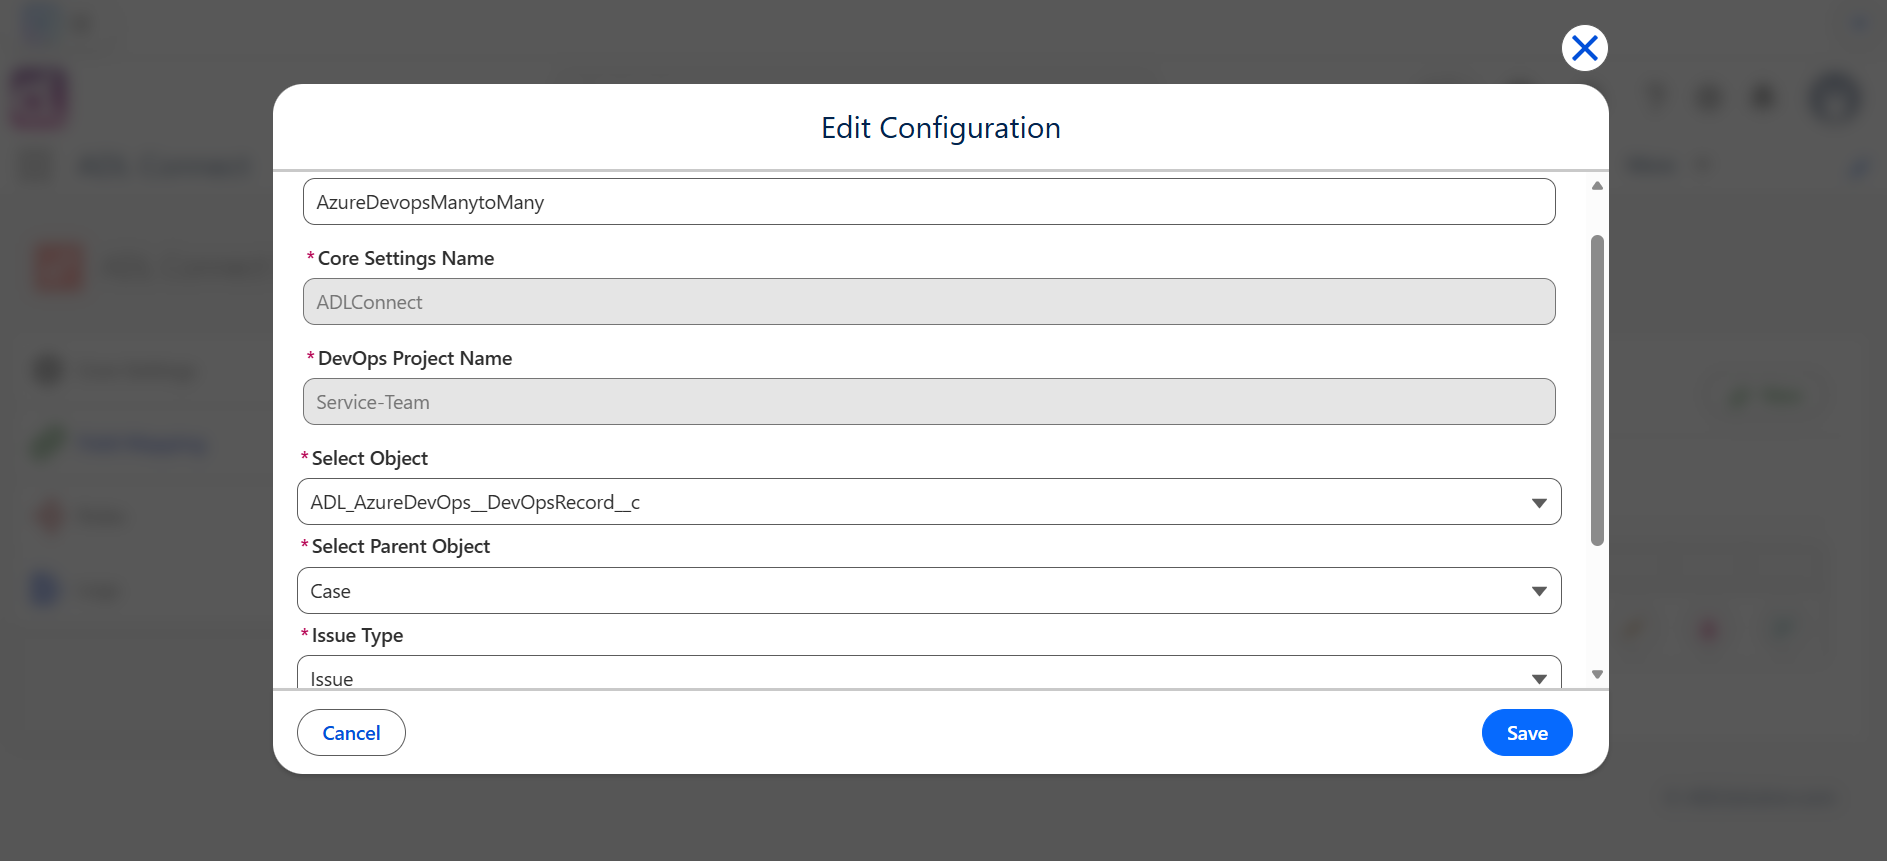
Step 8: Save the Project Mapping
- Click Save to complete the setup.
- The project mapping is now active and ready for use.
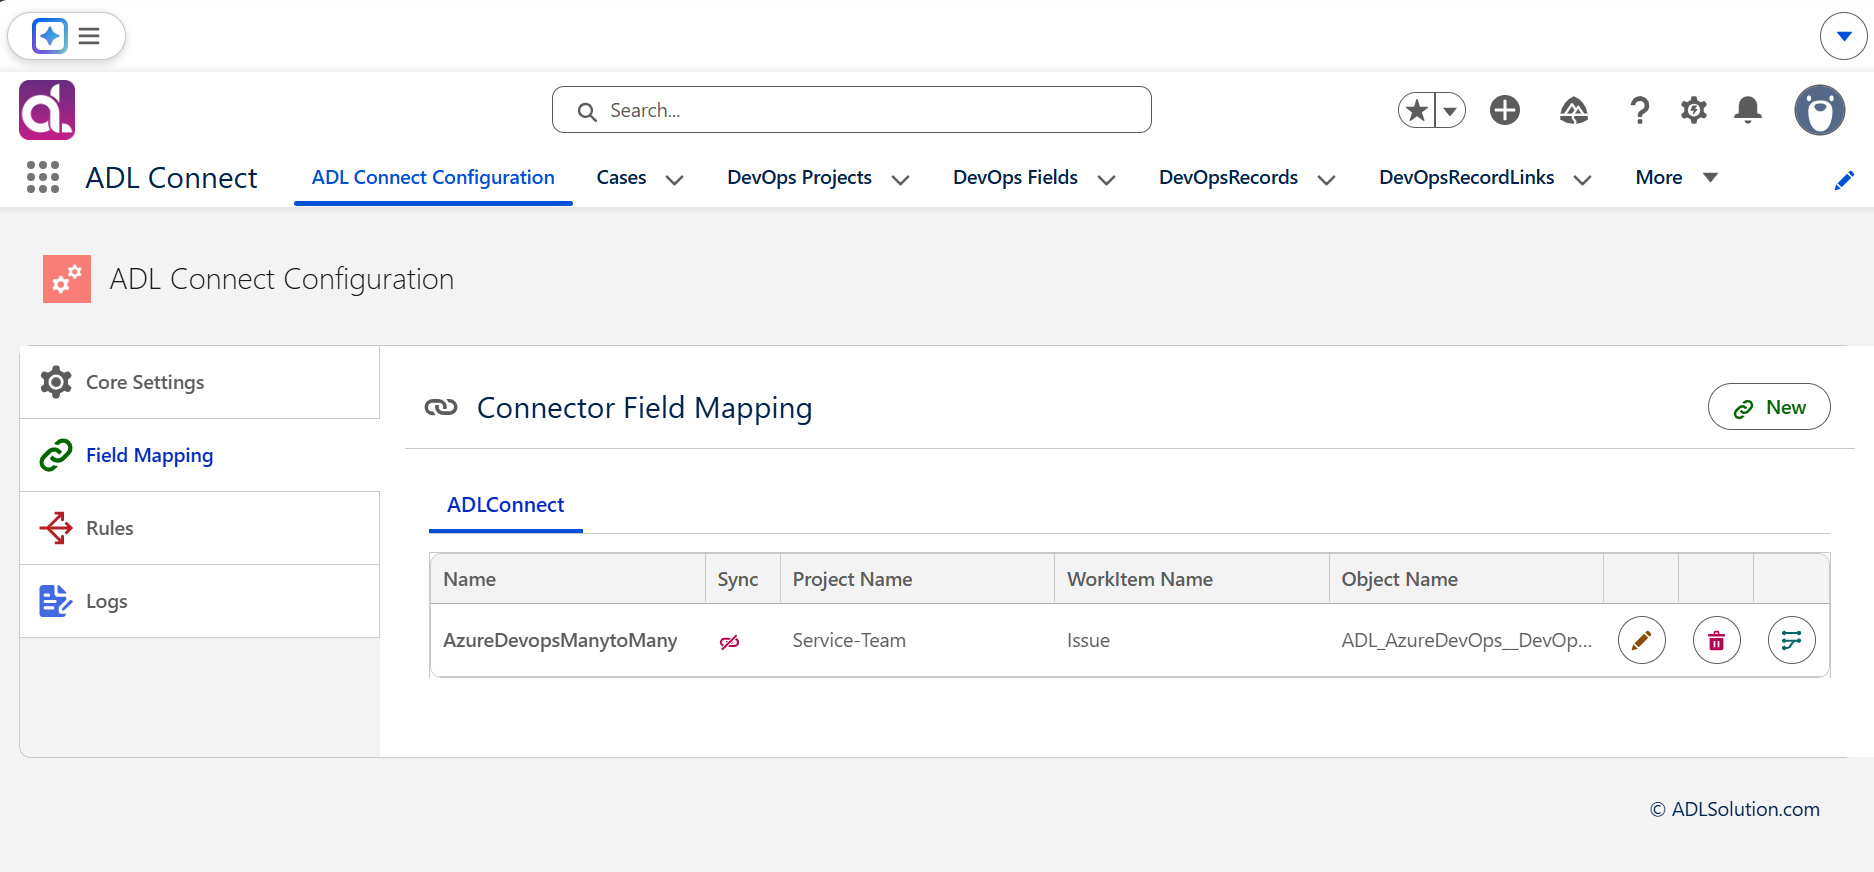
Result
The project mapping is successfully established.
This configuration links a Salesforce object to an Azure DevOps project and work item type, ensuring that every Azure DevOps item created through ADL Connect maintains a reference to its originating Salesforce record.
This mapping serves as the foundation for:
- Field mappings
- Synchronization rules
- Issue creation and update workflows
Configuring Field Level Mappings
Field Mapping Configuration
Once the project mapping has been established, the next step is to configure field-level mappings.
Field mappings define how individual Salesforce fields correspond to Azure DevOps fields and determine the direction of data synchronization.
These mappings ensure that updates made in either system flow correctly and consistently based on business requirements.
Follow the steps below to configure field mappings for the selected project connection.
Step 1: Open the Field Mapping Section
- Navigate to the Project Connection created earlier.
- Locate and click the Field Mapping action button.
This opens the configuration panel where you define how data moves between Salesforce and Azure DevOps.
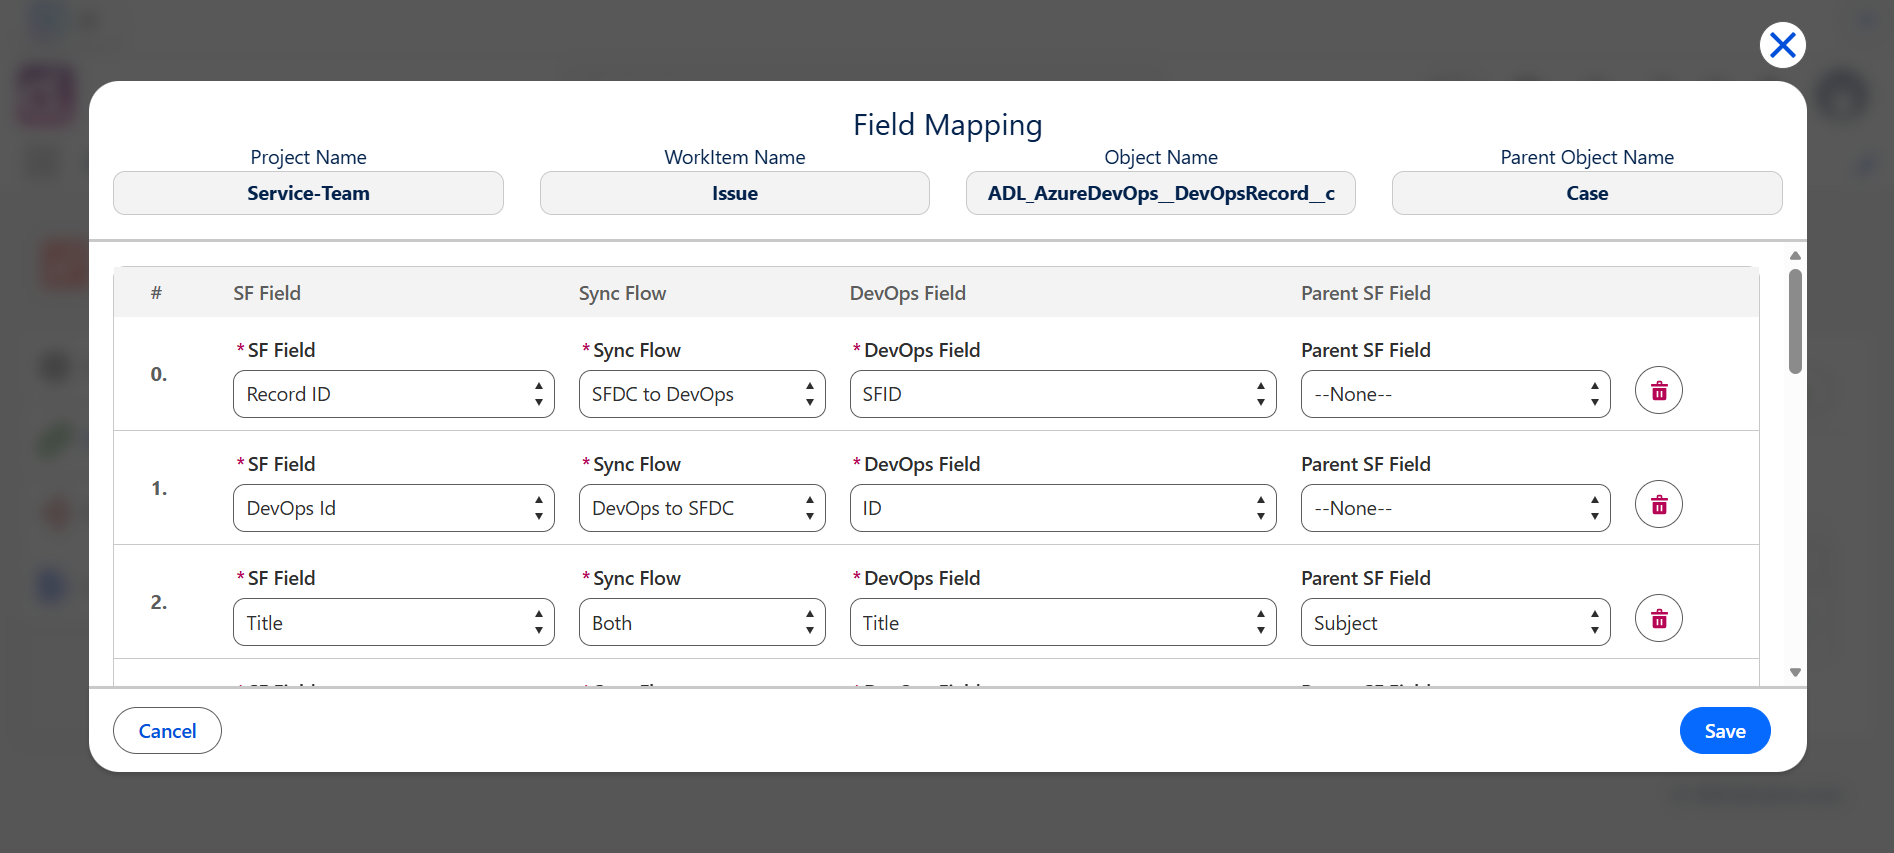
Step 2: Select the Salesforce Field
- In the Salesforce Field dropdown, select the field you want to synchronize.
- The system automatically displays all available fields from the Salesforce object associated with the project connection.
- Choose the appropriate field based on your integration requirements.
Examples include:
- Title
- Description
- Assignee
- Any custom field created for integration purposes
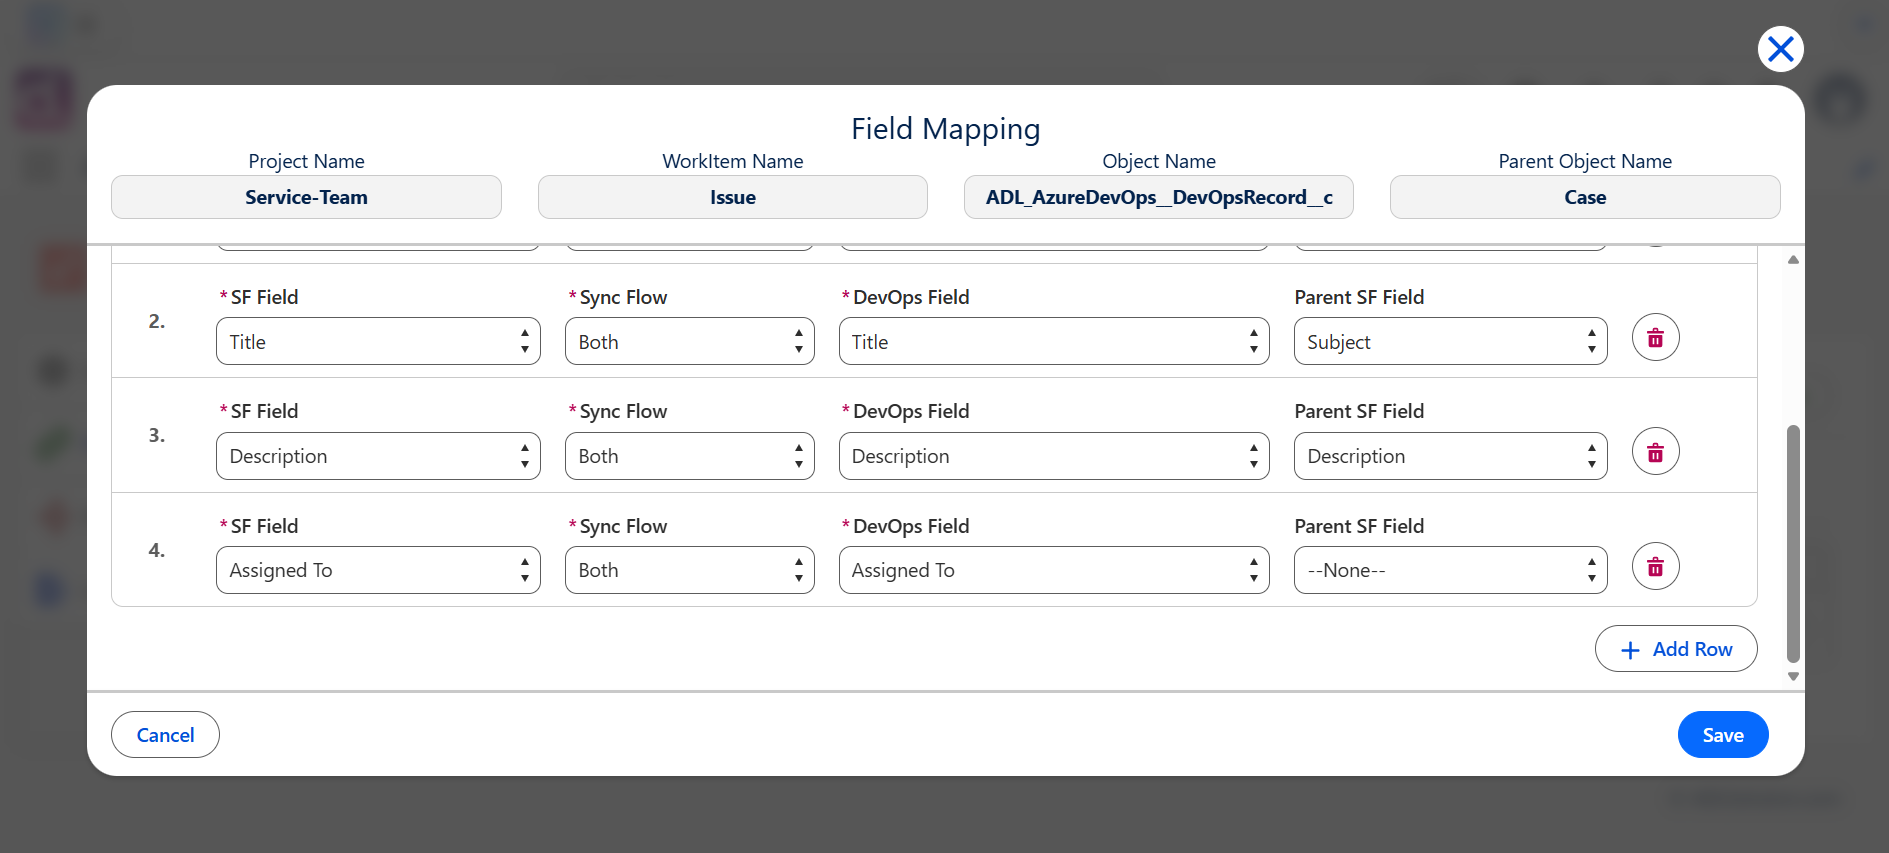
This selection determines which Salesforce data will participate in the synchronization process.
Setting Up Inbound Rules
Inbound rules allow Azure DevOps to send updates back into Salesforce through ADL Connect. These updates can include:
- Field value changes
- Status transitions
- Comments
- Assignments
To enable inbound synchronization, you must:
- Create an Inbound Rule in ADL Connect
- Configure a Salesforce Site to receive Azure DevOps webhook requests
Follow the steps below to complete the configuration.
Prerequisites
Before proceeding, ensure that:
- A Project Mapping has already been created in ADL Connect
- The Azure DevOps integration instance is configured and authenticated
- You have Salesforce System Administrator access to configure Salesforce Sites
Step 1: Open the Inbound Rule Configuration
- Navigate to the Project Mapping you previously created.
- Locate the Inbound Rule section for that project mapping.
- Click New Inbound Rule.
This opens the inbound rule configuration interface where you define how incoming updates are processed.
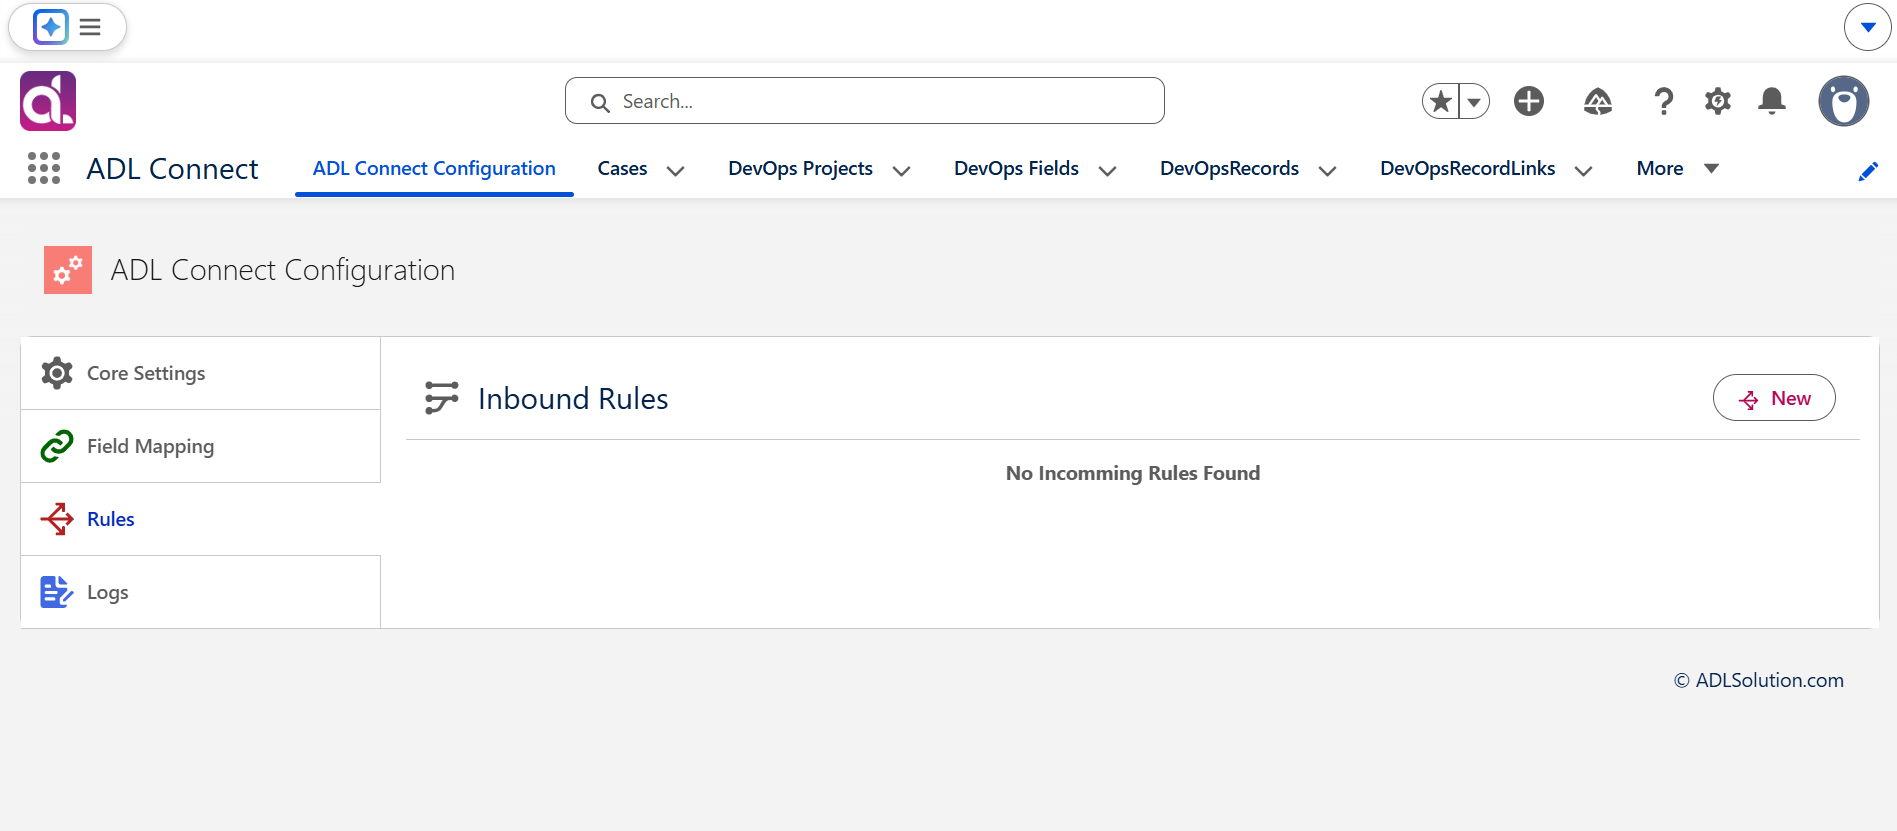
Step 2: Select the Integration App
- In the Integration App dropdown, select the Azure DevOps integration instance.
- This ensures the inbound rule is connected to the correct Azure DevOps environment and authentication setup.
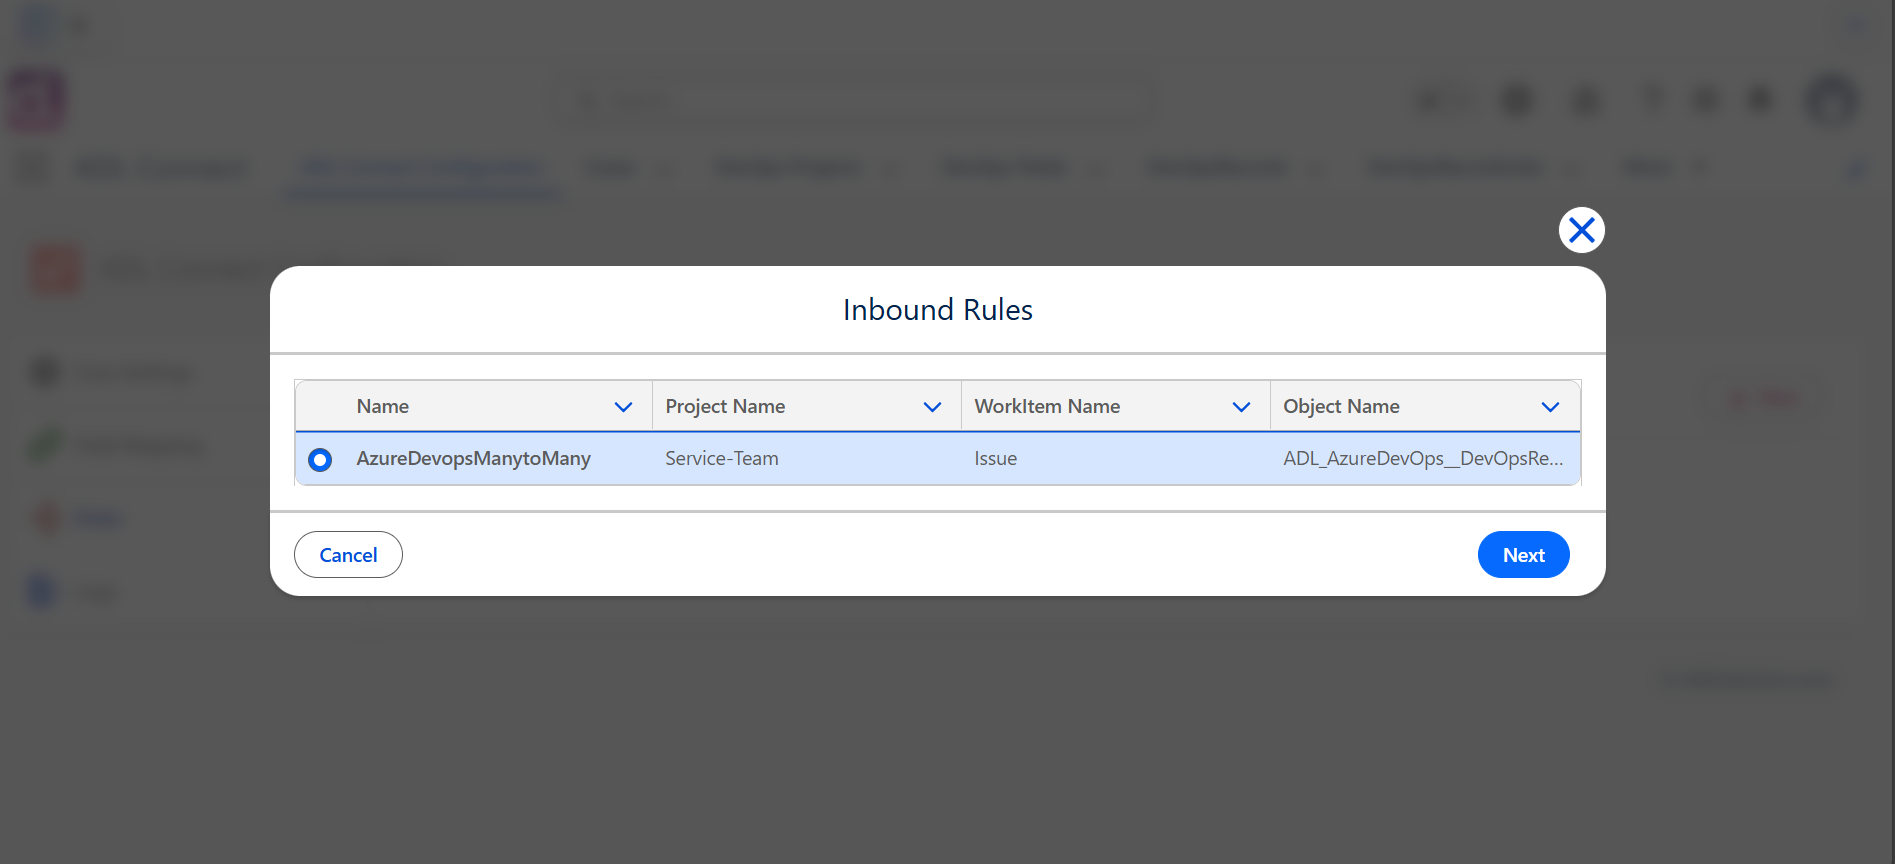
Step 3: Choose the Project Mapping
- In the Project Mapping field, select the mapping created earlier.
- Verify that the selected mapping corresponds to:
- The correct Salesforce object
- The intended Azure DevOps project and work item type
This ensures inbound data is applied to the correct records.
Configuring the Salesforce Site for Inbound Access
To allow Azure DevOps to call back into Salesforce, a Salesforce Site must be created. This Site provides the public endpoint URL used by Azure DevOps webhooks.
Step 4: Copy the Site Subdomain Prefix ID
- In the inbound rule configuration panel, locate the Site Subdomain Prefix ID.
- Copy this value — it will be used while creating the Salesforce Site.
- Click Add in the Site configuration section.
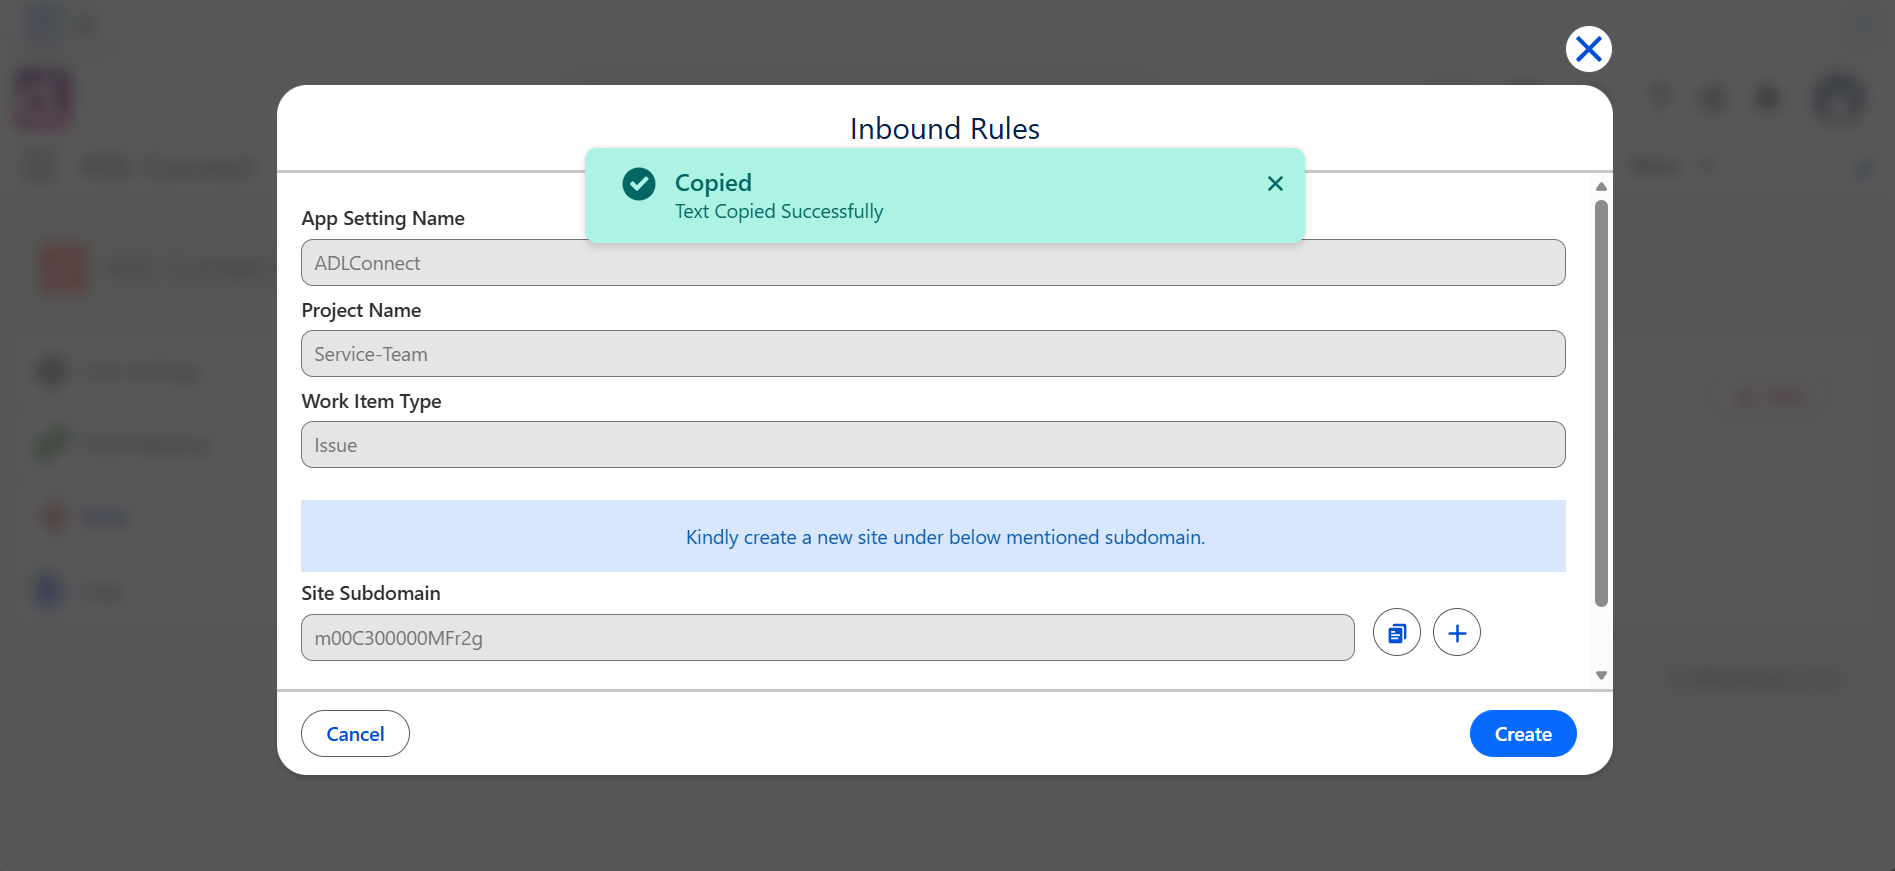
You will be redirected to the Salesforce Sites setup page.
Step 5: Register a Salesforce Site Domain (If Not Already Enabled)
If Salesforce Sites have not been enabled previously:
- You will be prompted to register a Site Domain.
- Enter a unique domain name and click Save.
- Once registered, you can proceed to create a new Site.
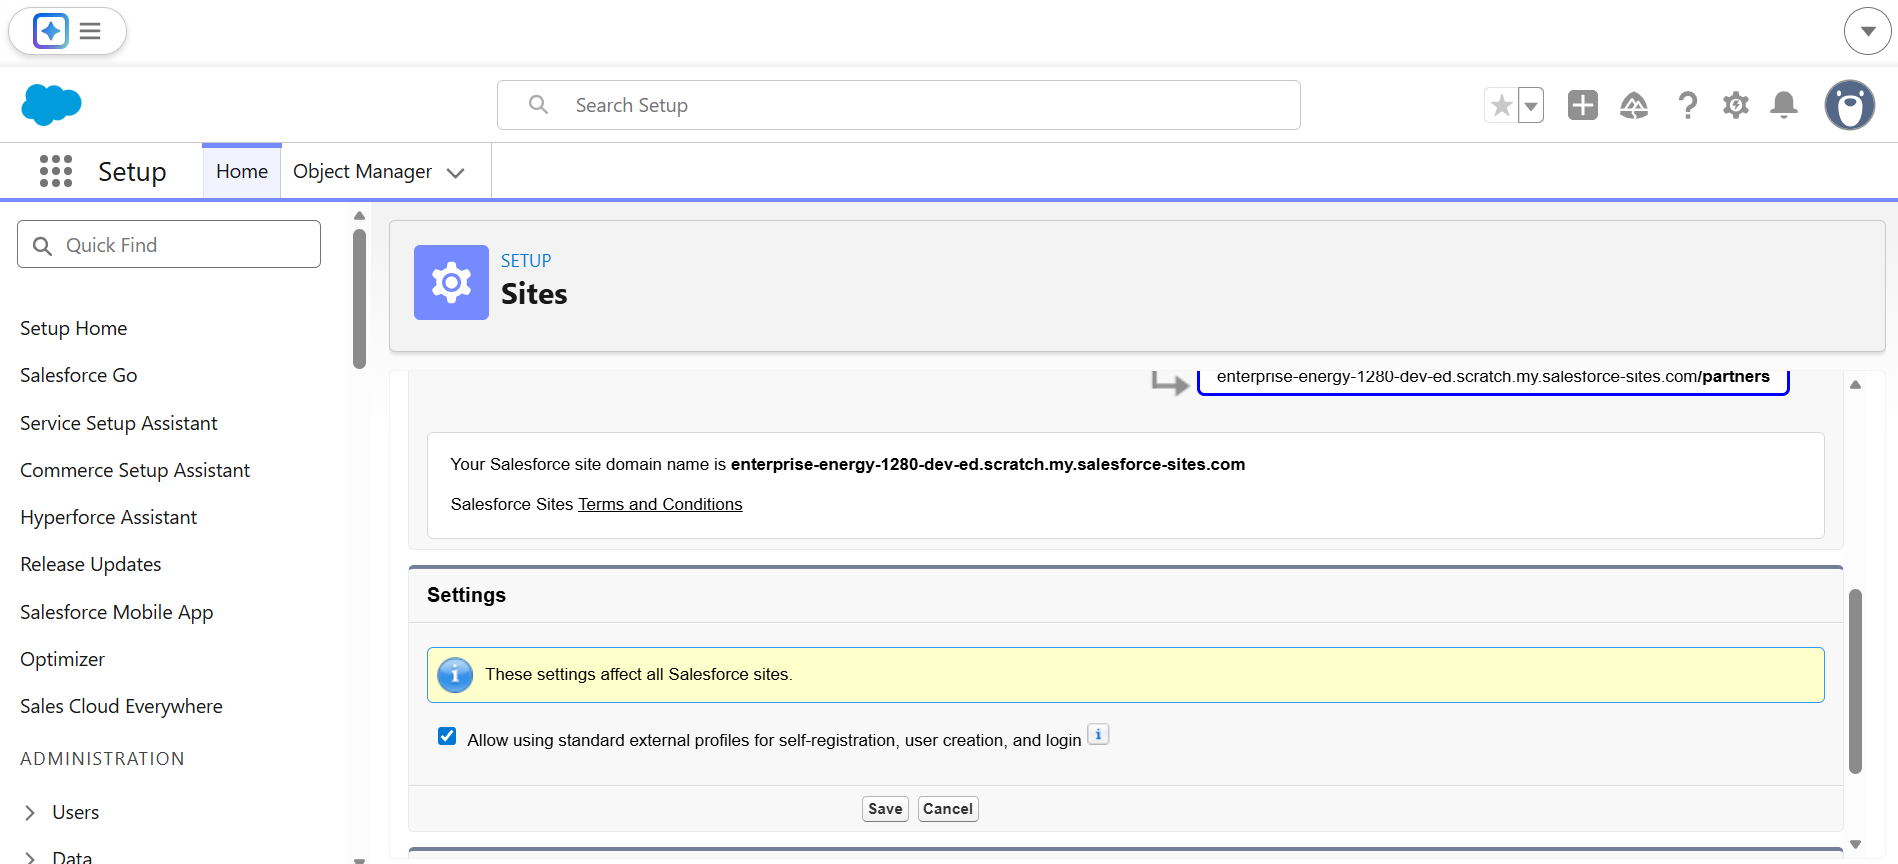
This is a one-time setup per Salesforce org.
Step 6: Create a New Salesforce Site
- On the Sites page, click New.
- Enter a Site Label, for example:
ADL Connect Inbound SiteAzure Inbound
- In the Site Name / Subdomain Prefix field, paste the Site Subdomain Prefix ID copied earlier.
- This ensures the Site URL matches what ADL Connect expects.
- Complete the required fields:
- Active: ✔ Enabled
- Site Contact
- Default Web Address
- Set Active Site Home Page to:
ADL_Connect_inbound- Click Save to create the Site.
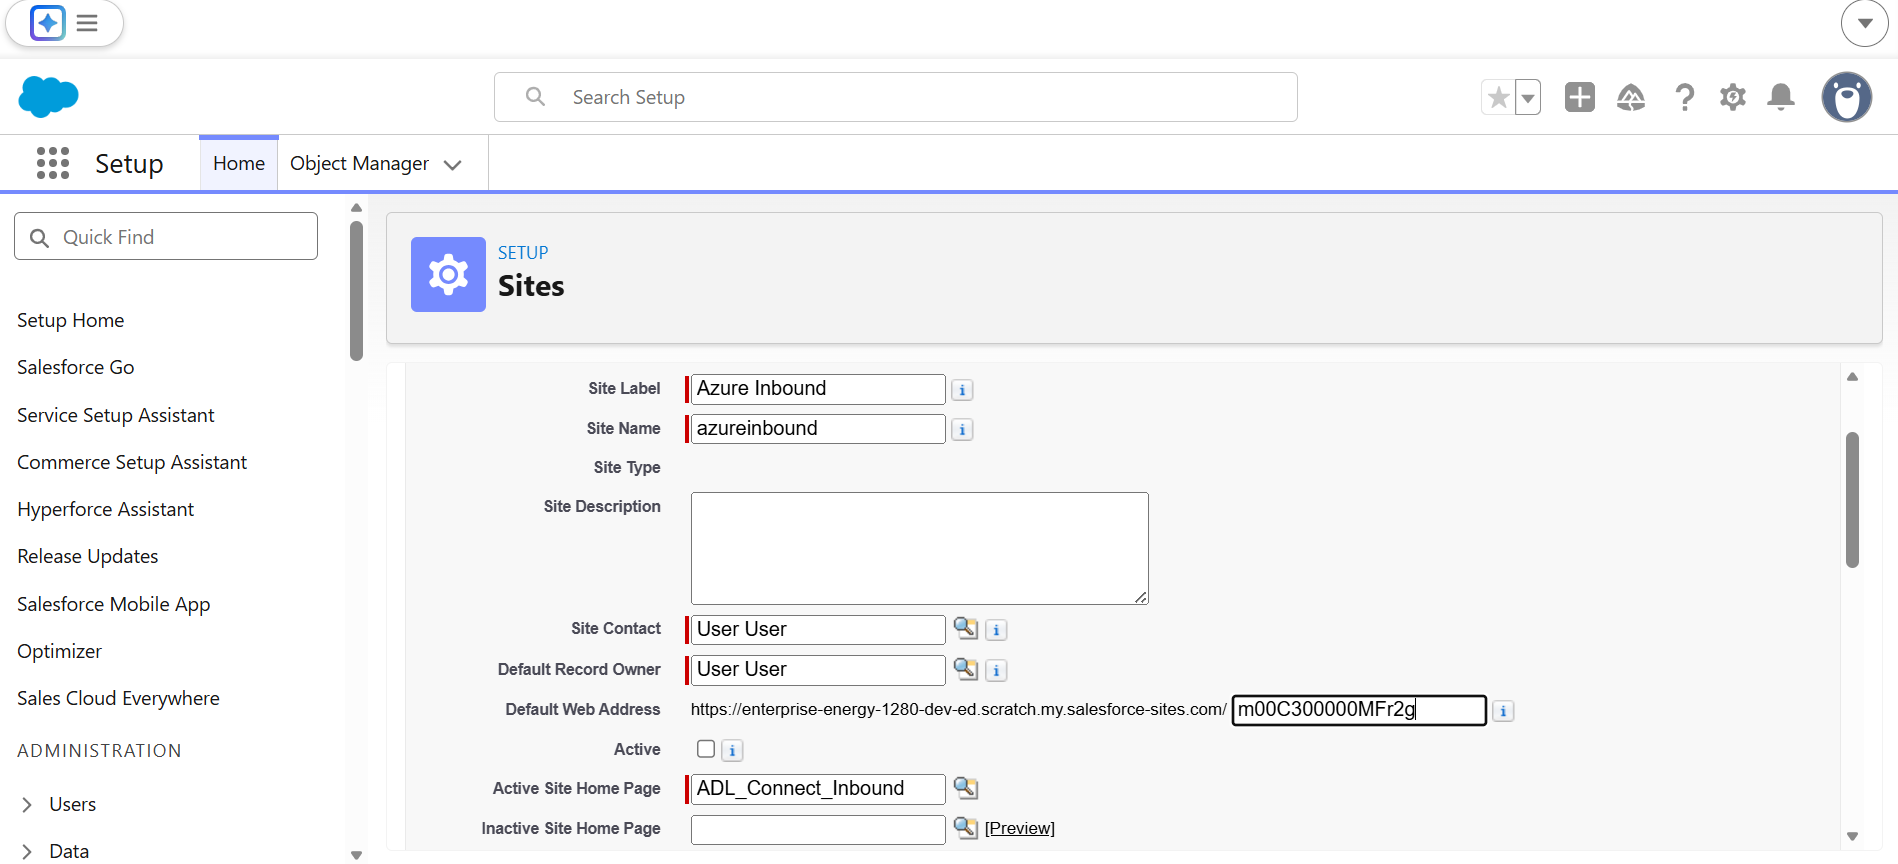
The Site will now generate a public-facing URL that Azure DevOps uses for inbound updates.
Step 7: Finalize the Inbound Rule in ADL Connect
- Return to ADL Connect.
- Confirm that the newly created Salesforce Site is selected in the inbound rule configuration.
- Click Save.
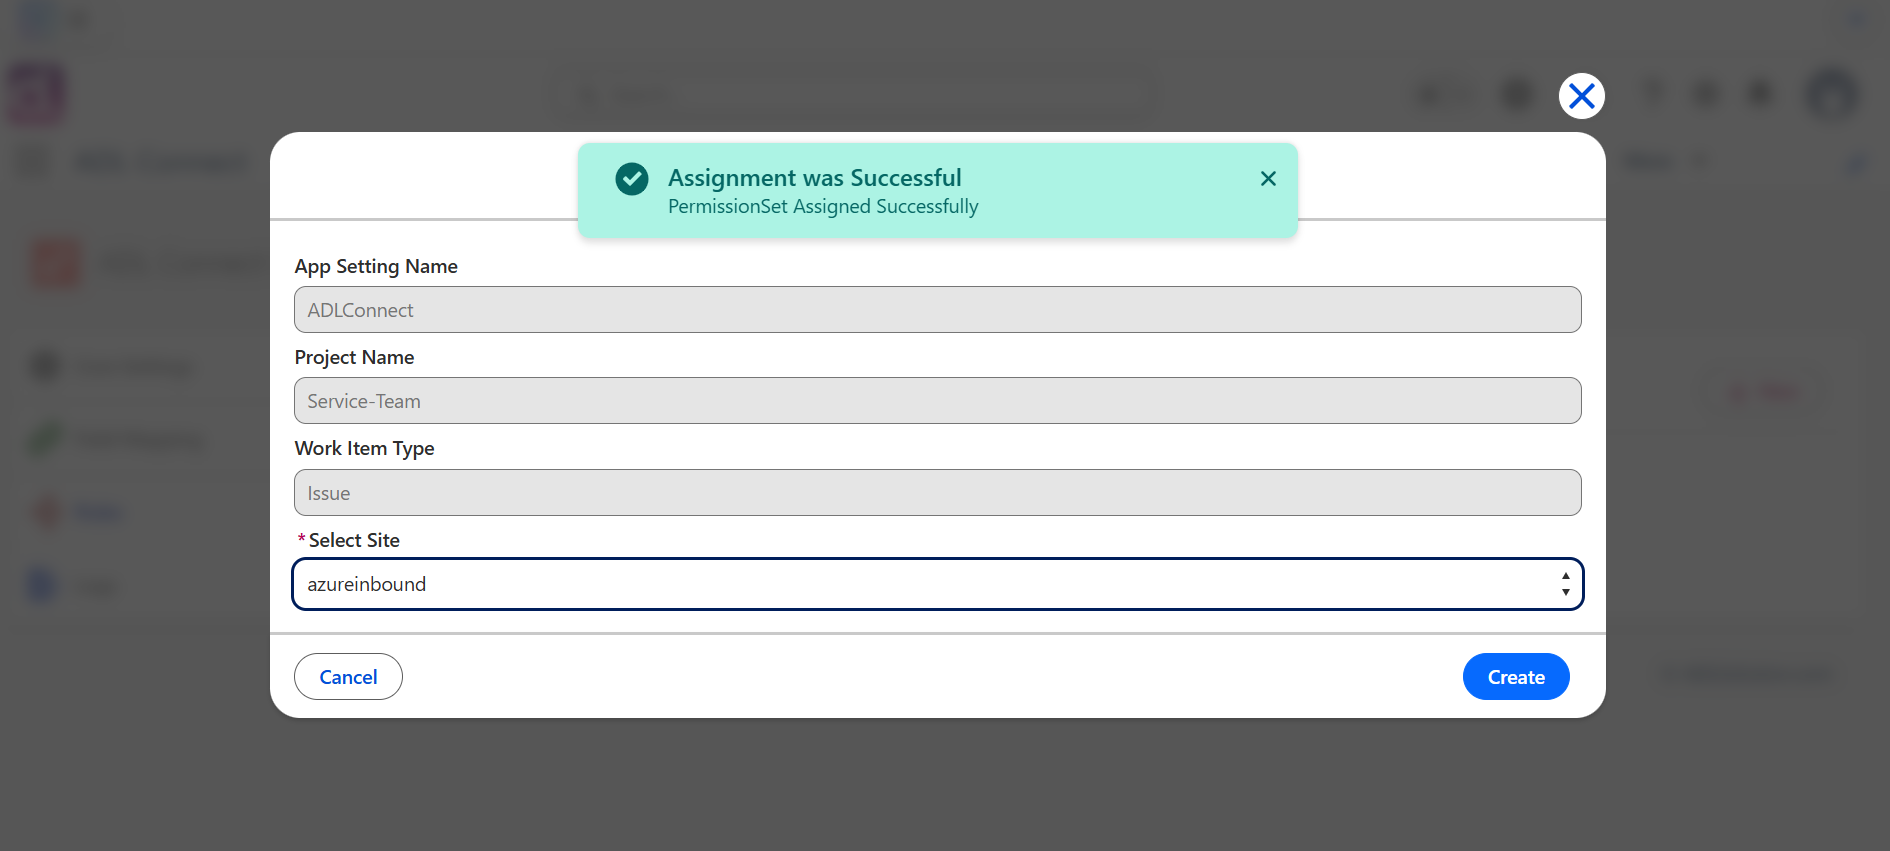
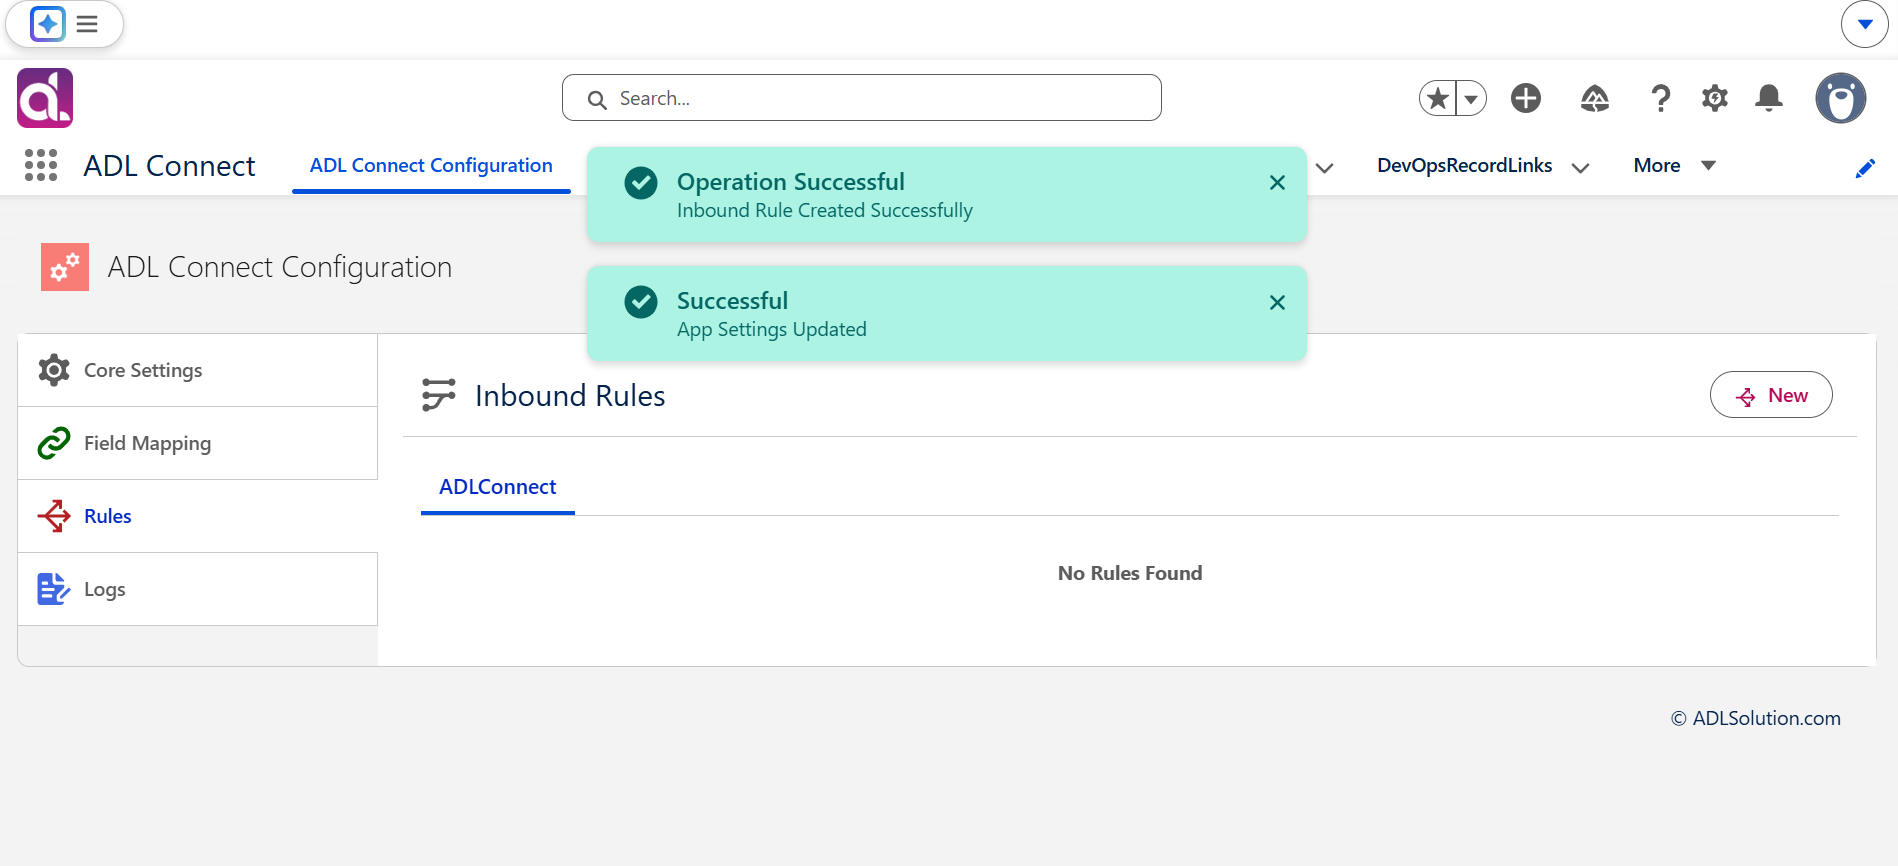
Inbound processing is now enabled for the selected project mapping.
Result
After completing this configuration:
- Azure DevOps can push real-time updates into Salesforce
- The Salesforce Site acts as the secure inbound endpoint
- ADL Connect processes inbound field updates, status changes, comments, and assignments
Configuring Case Page Layout
ADL Connect allows users to create, view, and manage Azure DevOps Work Items directly from Salesforce Case records. This is achieved by adding ADL Connect components to the Case Lightning Record Page and leveraging the configured project mappings and synchronization rules.
This article explains:
- How to configure the Case page layout
- How users create and manage Azure DevOps Work Items from Salesforce
- How outbound and inbound synchronization works
- How to manage Azure DevOps comments from Salesforce
Prerequisites
Before proceeding, ensure that:
- ADL Connect is installed and configured
- Azure DevOps integration and Project Mapping are already set up
- You have permission to edit Lightning Record Pages
- Inbound and outbound sync rules are configured (if bi-directional sync is required)
Step 1: Open and Edit the Case Record Page
- Open any existing Case record in Salesforce.
- Click Edit Page to open the Lightning App Builder.
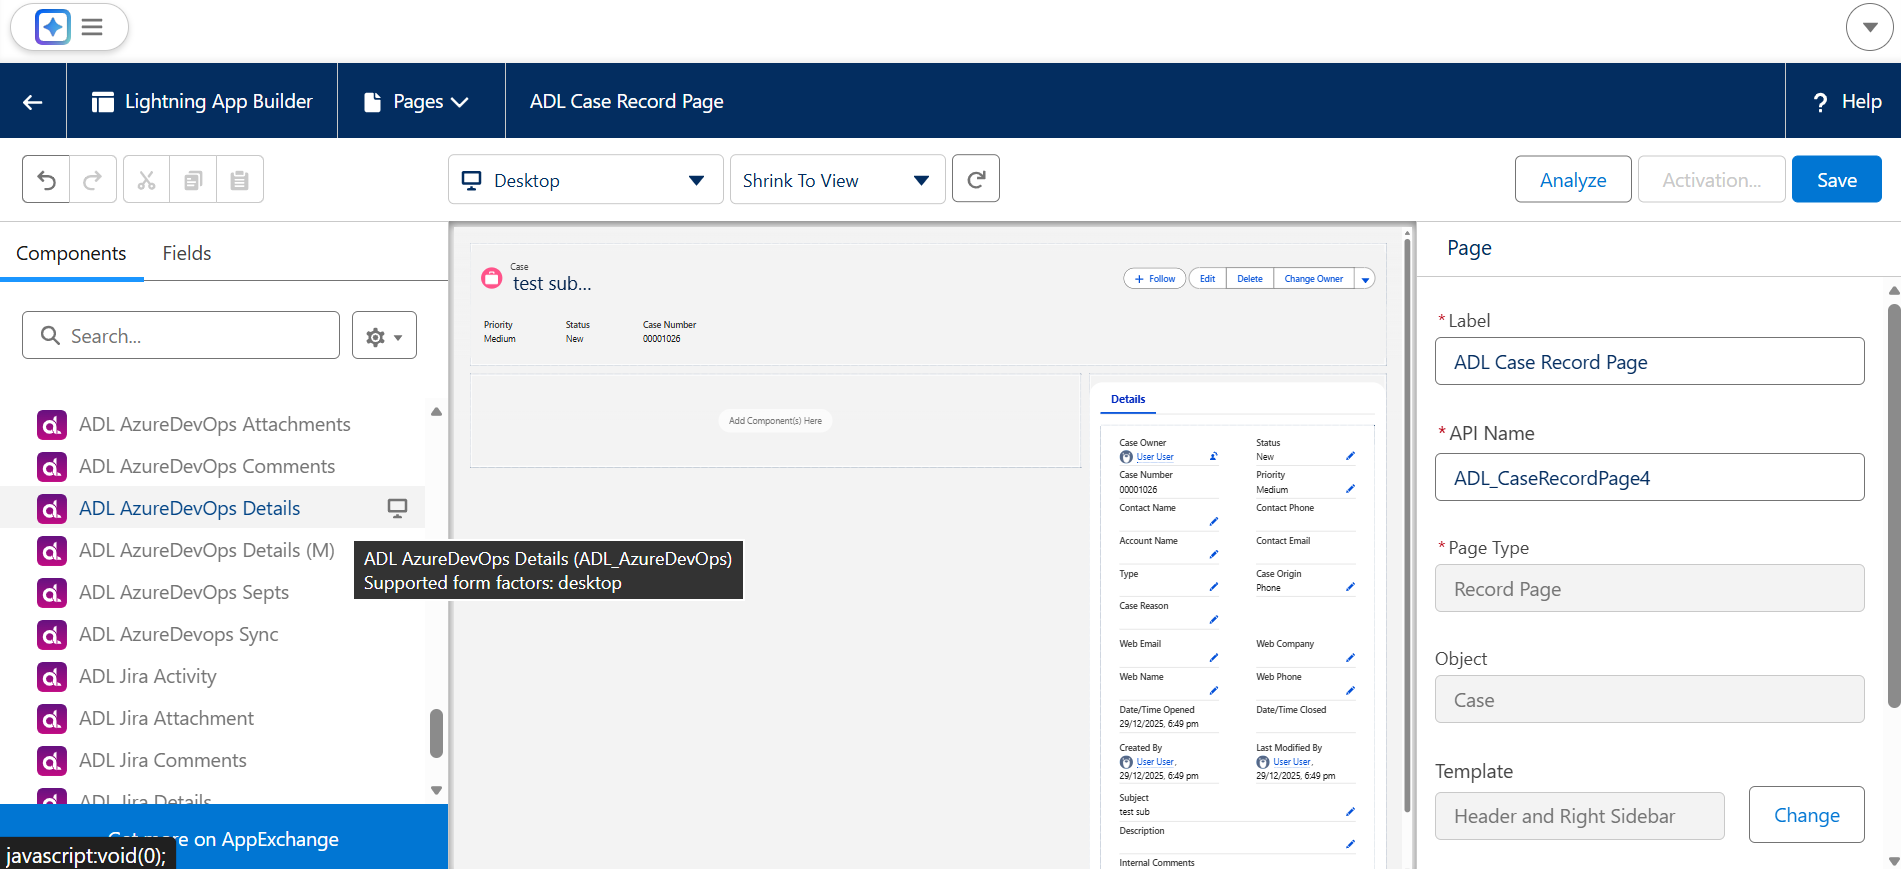
This opens the Case record layout where managed components can be added.
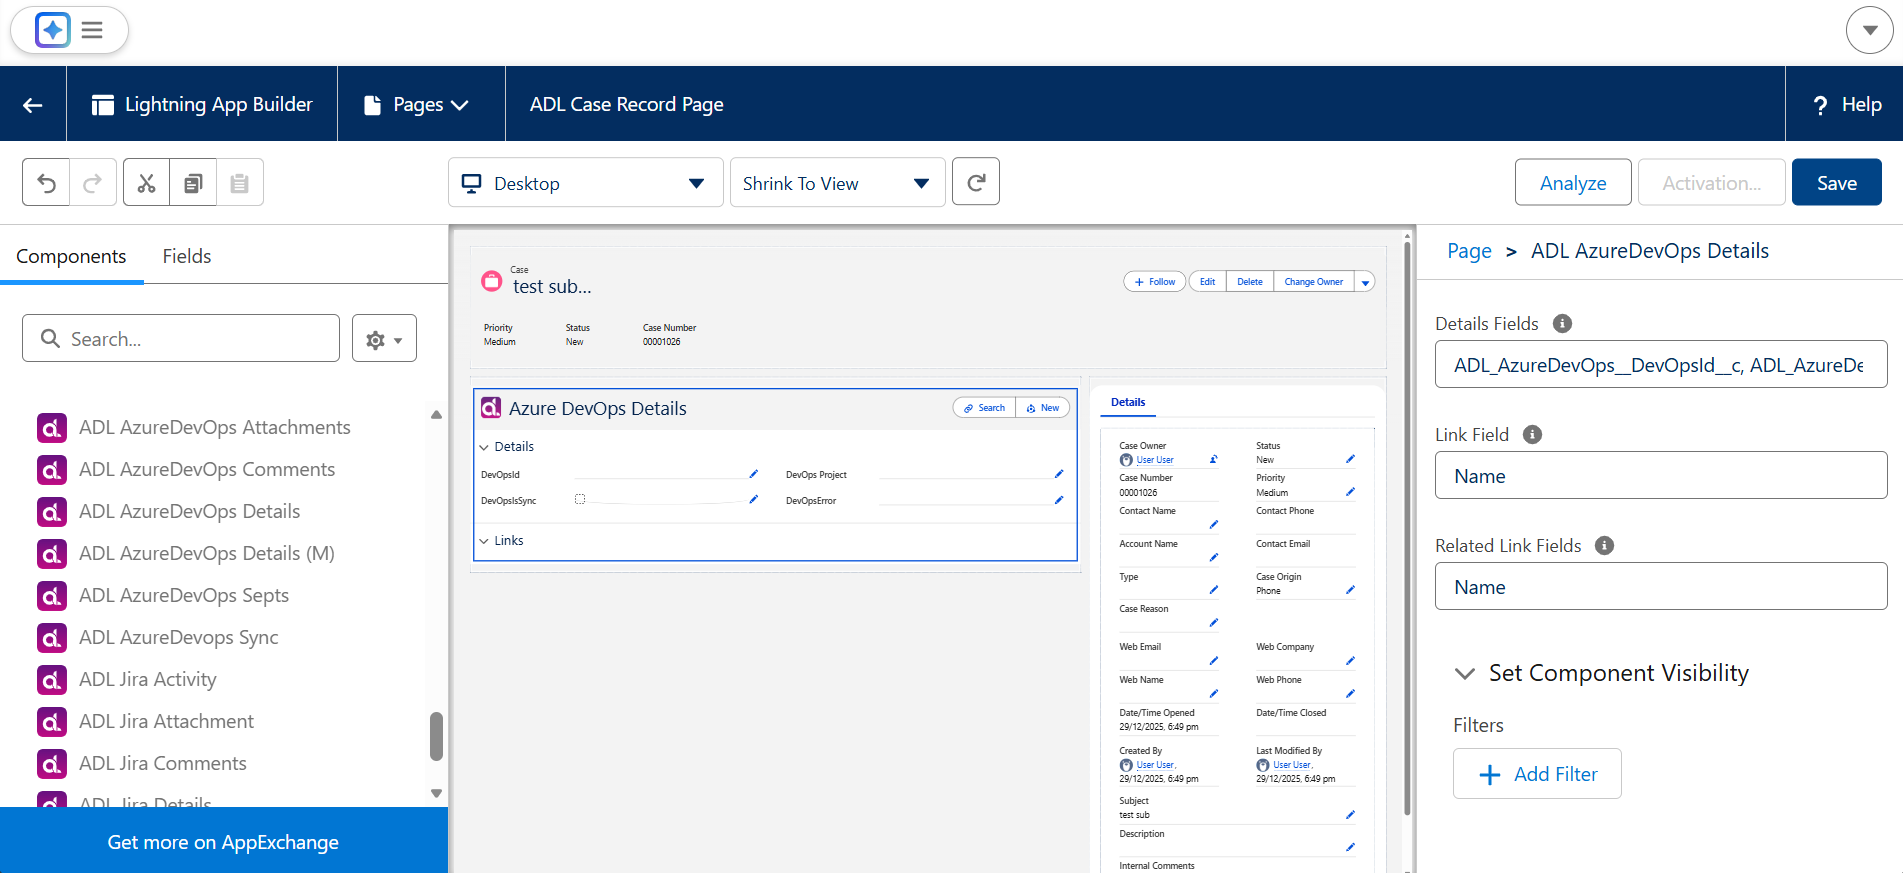
Step 2: Add the ADL Azure DevOps Details Component
- In the Lightning App Builder, scroll to Custom – Managed Components.
- Locate ADL AzureDevOps Details.
- Drag and drop the component into the desired region of the Case page.
Purpose of this component:
- Displays linked Azure DevOps Work Item details
- Allows users to create new Azure DevOps Work Items from Salesforce
- Click Save.
- Activate the page for the required apps and profiles if prompted.
Once added, every Case record will support Azure DevOps Work Item management.
Step 3: Start Creating a New Work Item
- Open a Case record.
- Locate the ADL AzureDevOps Details component.
- Click New.
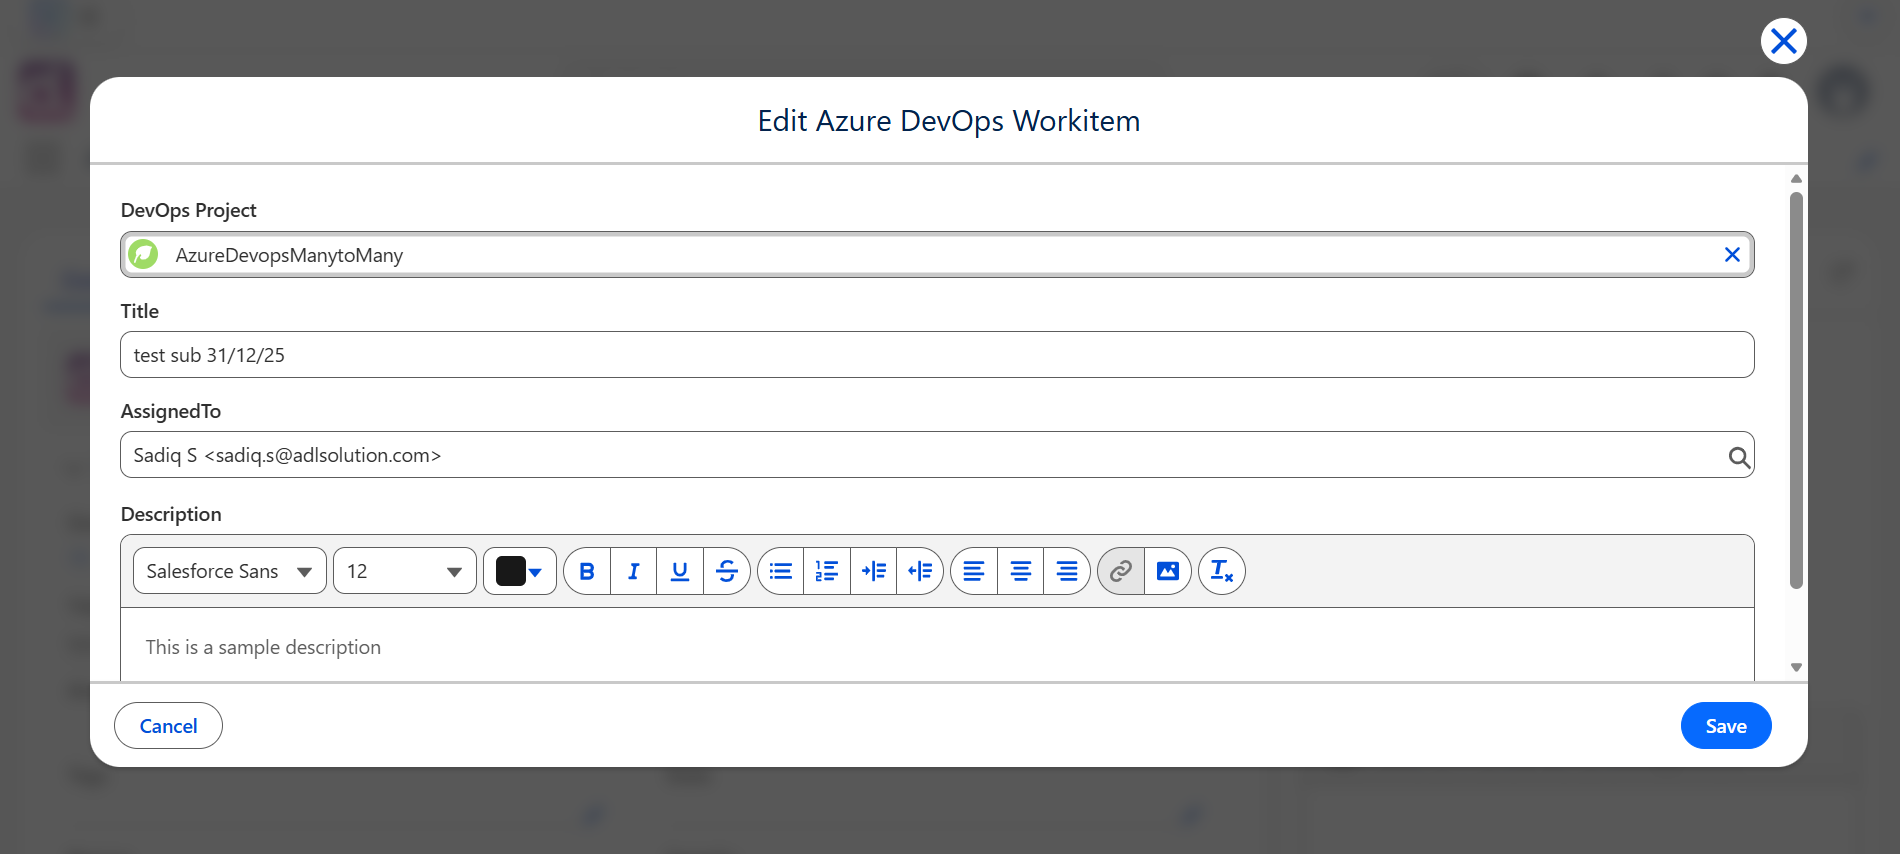
This opens the Azure DevOps Work Item creation panel inside Salesforce.
Step 4: Select the Mapped Azure DevOps Project
- In the project search field, enter the name of the Azure DevOps project configured in Project Mapping.
- Select the correct project from the list.
ADL Connect automatically:
- Loads the mapping configuration
- Prepares the Work Item form based on mapped fields
This ensures consistency between Salesforce and Azure DevOps.
Step 5: Review Pre-Populated Field Values
Based on your field mappings, ADL Connect automatically pre-fills values such as:
- Summary
- Description
- Assigned To
- Custom synchronized fields
This minimizes manual entry and ensures data consistency across systems.
Step 6: Assign the Azure DevOps Work Item
- Use the Assignee field to select an Azure DevOps user.
- You can choose any user who has access to the selected project.
The assignment is applied immediately in Azure DevOps.
Step 7: Save the Azure Dev Ops Work Item
- Click Save.
- The generated Azure DevOps Work Item ID is displayed within Salesforce.
This confirms:
- Successful Work Item creation
- A live link between the Salesforce Case and Azure DevOps
Step 8: Open the Linked Azure DevOps Work Item
- Click the Azure DevOps Work Item ID shown in Salesforce.
- The corresponding Work Item opens in Azure DevOps.
Verify that:
- The Work Item is assigned to the correct user
- The Salesforce Case ID appears in the custom Azure DevOps field created for integration
This confirms proper mapping and linkage.
Step 9: Update Work Item Fields from Salesforce
- In Salesforce, update Azure DevOps–related fields such as:
- Work Item State
- Summary Prefix
- Any custom mapped fields
- Click Save.
ADL Connect pushes these updates to Azure DevOps using outbound field mappings.
Step 10: Confirm Updates in Azure DevOps
- Open the same Work Item in Azure DevOps.
- Verify that:
- The Summary reflects Salesforce changes
- The State is updated (for example, Pending)
This confirms outbound synchronization is working correctly.
Step 11: Update Azure DevOps and Observe Changes in Salesforce
- In Azure DevOps, update the Work Item (for example, change the State to Done).
- ADL Connect synchronizes this update back to Salesforce.
- Refresh the Salesforce Case and verify:
- Azure DevOps State is updated
- All inbound-mapped fields reflect the latest values
This validates inbound synchronization.
Step 12: Add the ADL Azure DevOps Comments Component
- Click Edit Page on the Case record again.
- Navigate to Custom – Managed Components.
- Drag and drop ADL AzureDevOps Comments onto the page.
- Click Save.
This component enables comment collaboration directly from Salesforce.
Step 13: Post and Sync Comments
- In the ADL AzureDevOps Comments component, enter a comment.
- Click Send to post the comment to Azure DevOps.
- Edit comments if required.
- Open Azure DevOps and confirm the comment appears on the Work Item.
This ensures seamless, bi-directional collaboration between Salesforce and Azure DevOps teams.
Result
After completing these steps:
- Salesforce users can fully manage Azure DevOps Work Items from Cases
- Field updates sync in both directions
- Comments are shared across platforms
- Teams collaborate without switching systems
This completes the configuration and usage flow for Azure DevOps Work Item integration with Salesforce Cases using ADL Connect.
Creating Work item from Salesforce
ADL Connect enables Salesforce users to create Azure DevOps Work Items directly from Salesforce records such as Cases. This capability improves collaboration between support, sales, and development teams by allowing issue creation, assignment, and updates without leaving the Salesforce interface.
This article explains how to:
- Create Azure DevOps Work Items from Salesforce
- Verify synchronization between Salesforce and Azure DevOps
- Update Work Items bidirectionally
Prerequisites
Before creating Azure DevOps Work Items from Salesforce, ensure that:
- A Project Mapping is configured between Salesforce and Azure DevOps
- The ADL AzureDevOps Details component is added to the Salesforce record page
- Users have the required Salesforce and Azure DevOps permissions
Step 1: Access the Work Item Creation Interface
- Open the Salesforce record (typically a Case) from which you want to create an Azure DevOps Work Item.
- Locate the ADL AzureDevOps Details component on the record page.
- Click New.
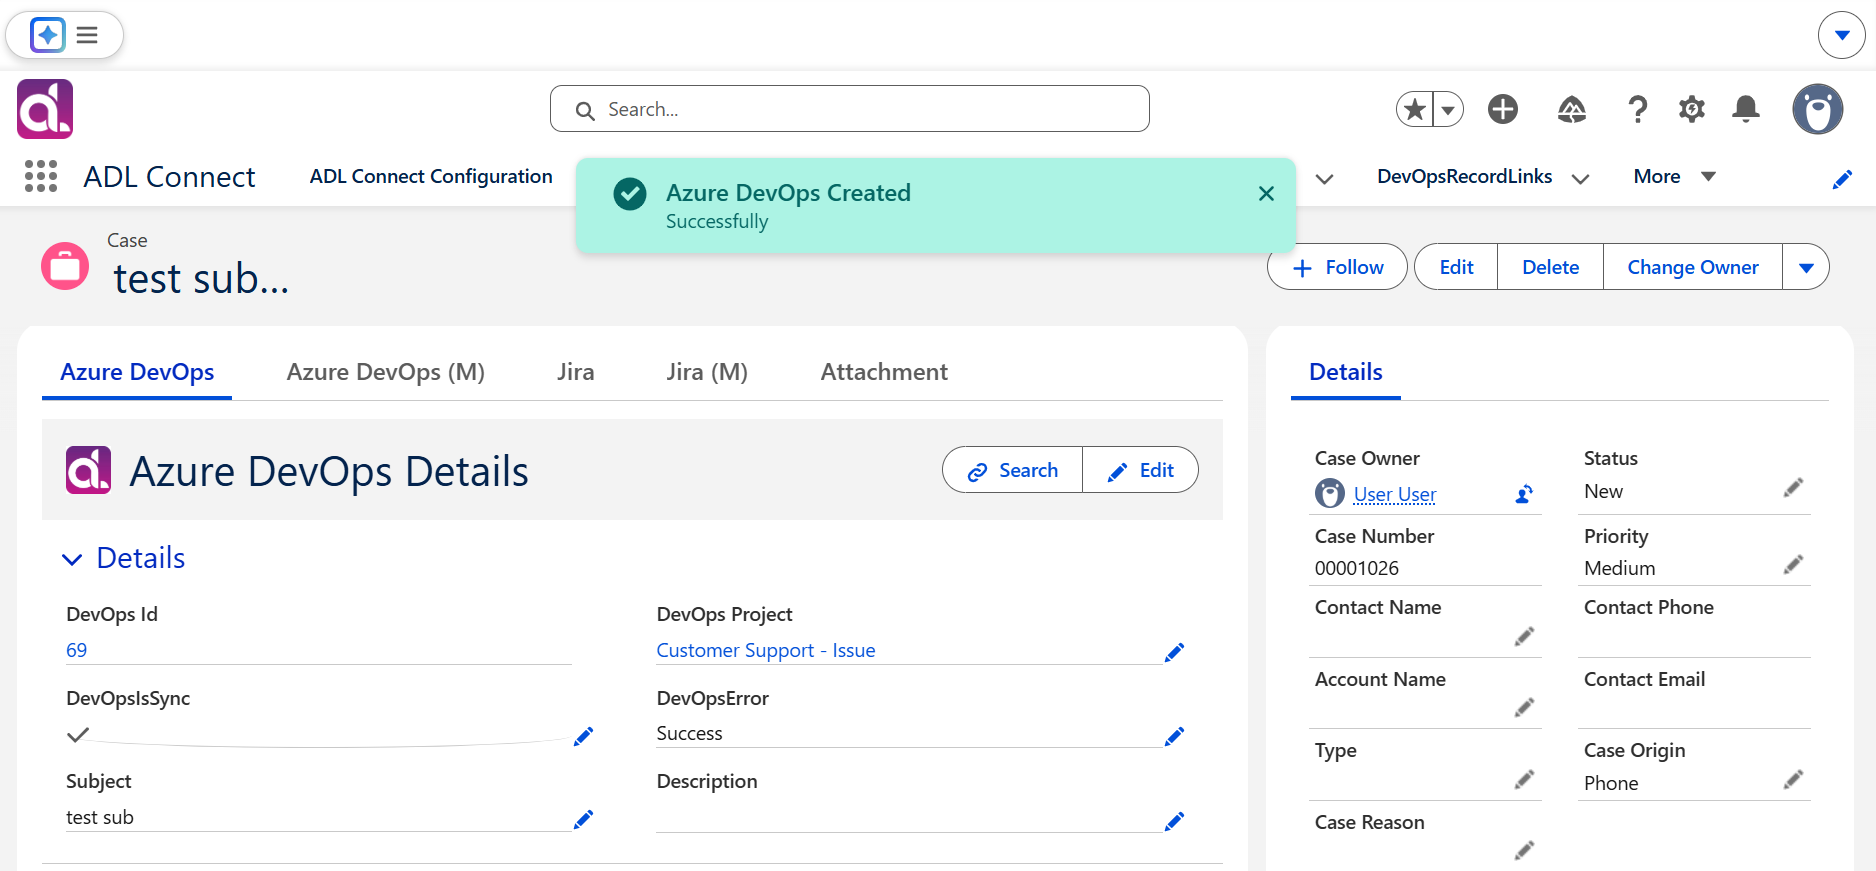
This opens the Azure DevOps Work Item creation panel embedded within Salesforce.
Step 2: Select the Mapped Azure DevOps Project
- In the project selection field, begin typing the name of the Azure DevOps project.
- Select the project that was configured in Project Mapping.
ADL Connect automatically loads:
- Associated Work Item types
- Field mappings
- Default values defined during configuration
This ensures consistent issue creation.
Step 3: Review Pre-Populated Field Values
Based on your mapping configuration, ADL Connect automatically populates fields such as:
- Salesforce field values mapped to Azure DevOps fields
- Summary prefixes or templates
- Priority or classification fields
- Custom integration fields
This reduces manual effort and enforces data consistency.
Step 4: Assign the Azure DevOps Work Item
- Use the Assignee dropdown to select the Azure DevOps user responsible for the Work Item.
- Assigning ownership during creation ensures immediate visibility for the development team.
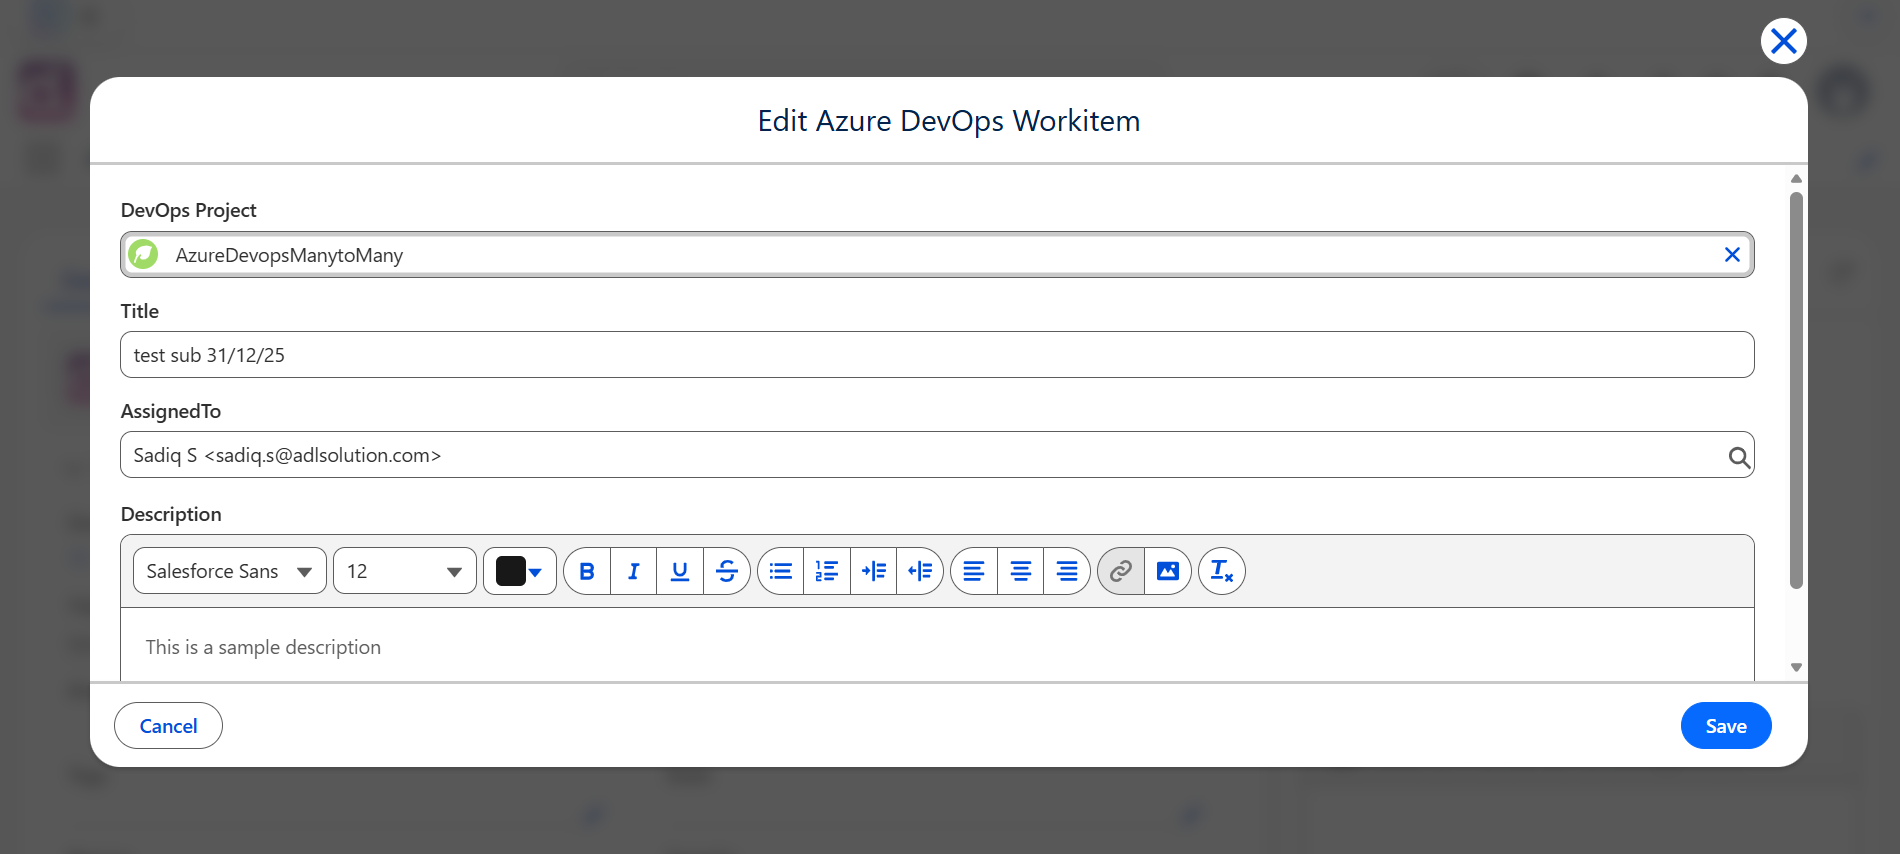
Step 5: Save the Azure DevOps Work Item
- After completing the required fields, click Save.
- ADL Connect creates the Azure DevOps Work Item in real time.
- The generated Azure DevOps Work Item ID is displayed directly in Salesforce.
The Work Item ID becomes the permanent reference for synchronization between Salesforce and Azure DevOps.
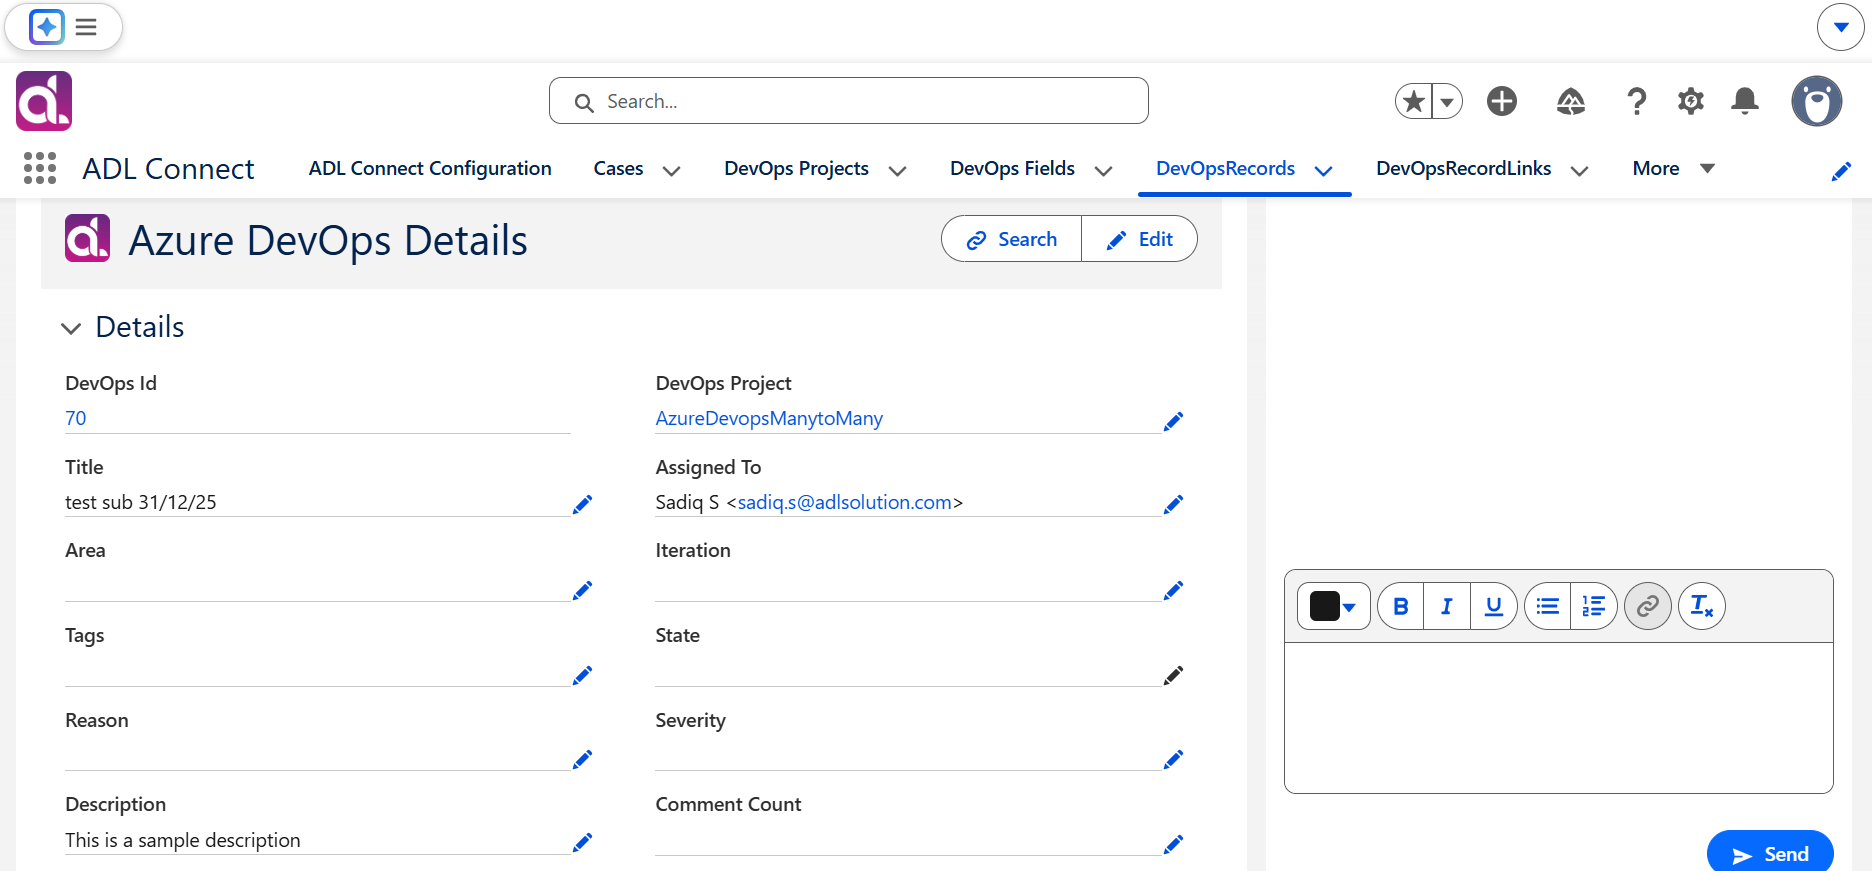
Verifying the Azure DevOps Work Item
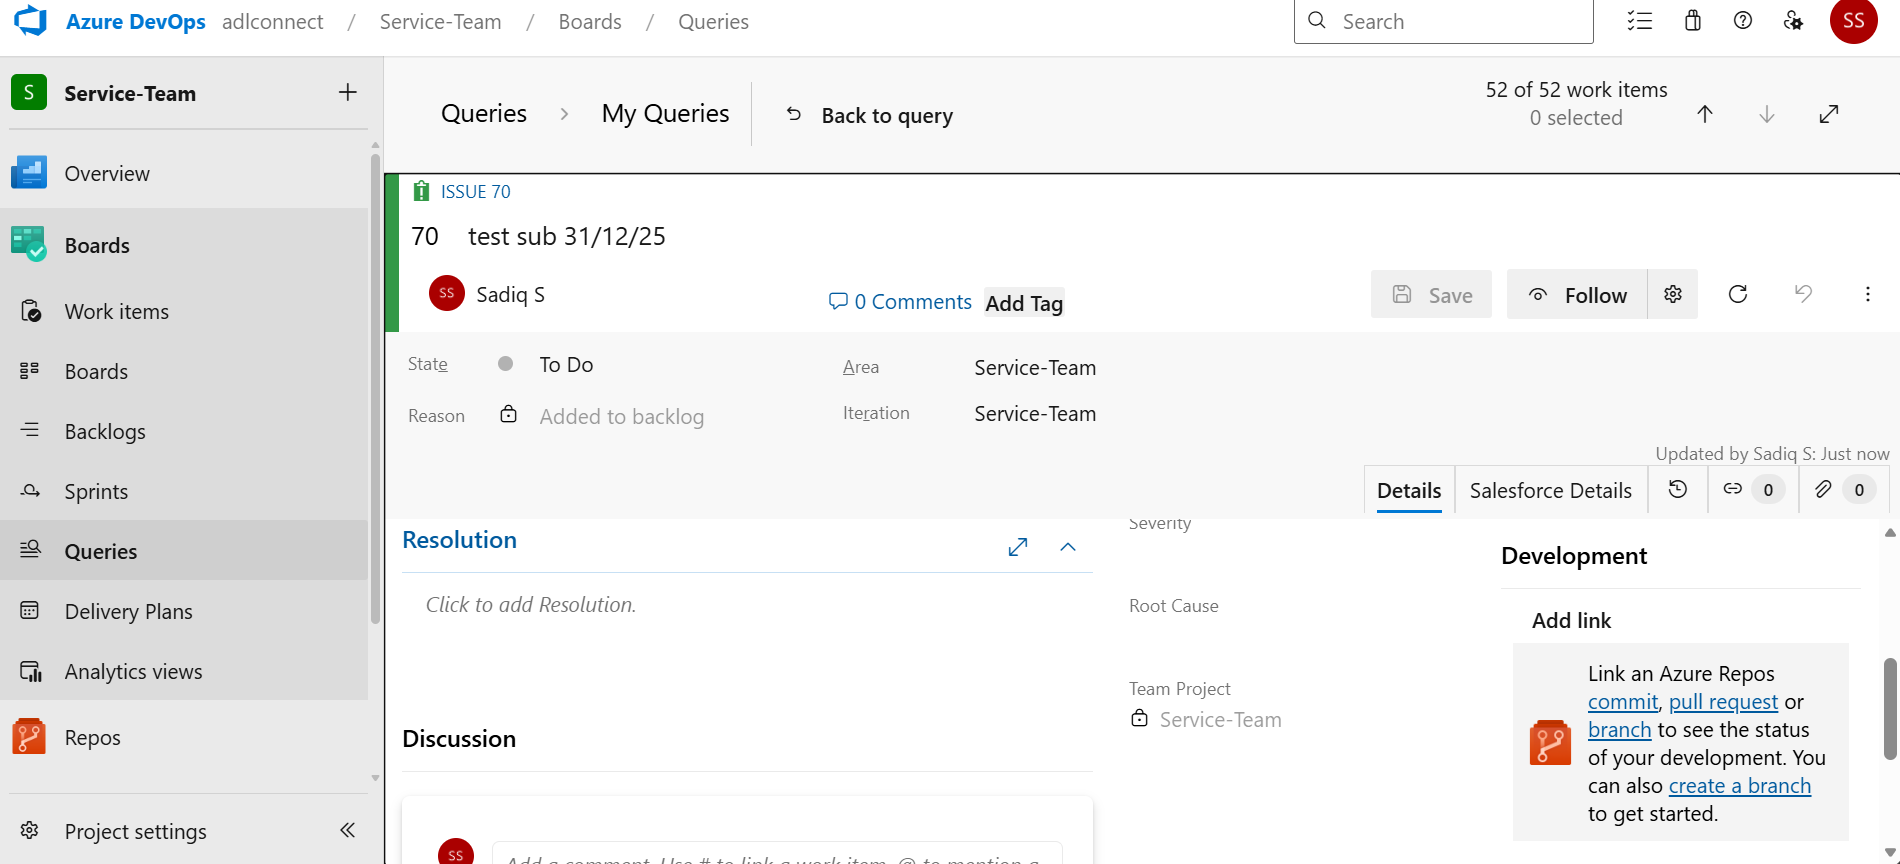
Step 6: Open and Review the Created Work Item
- Click the Azure DevOps Work Item ID displayed in Salesforce.
- The Work Item opens in a new browser tab in Azure DevOps.
Verify that:
- The Work Item is assigned to the correct Azure DevOps user
- The Salesforce record ID appears in the Azure DevOps custom integration field
- All mapped fields are populated correctly
This confirms outbound synchronization is functioning properly.
Step 7: Modify Azure DevOps Fields in Salesforce
- In the ADL AzureDevOps Details component, update fields such as:
- Work Item State
- Summary
- Description
- Other mapped fields
- Click Save.
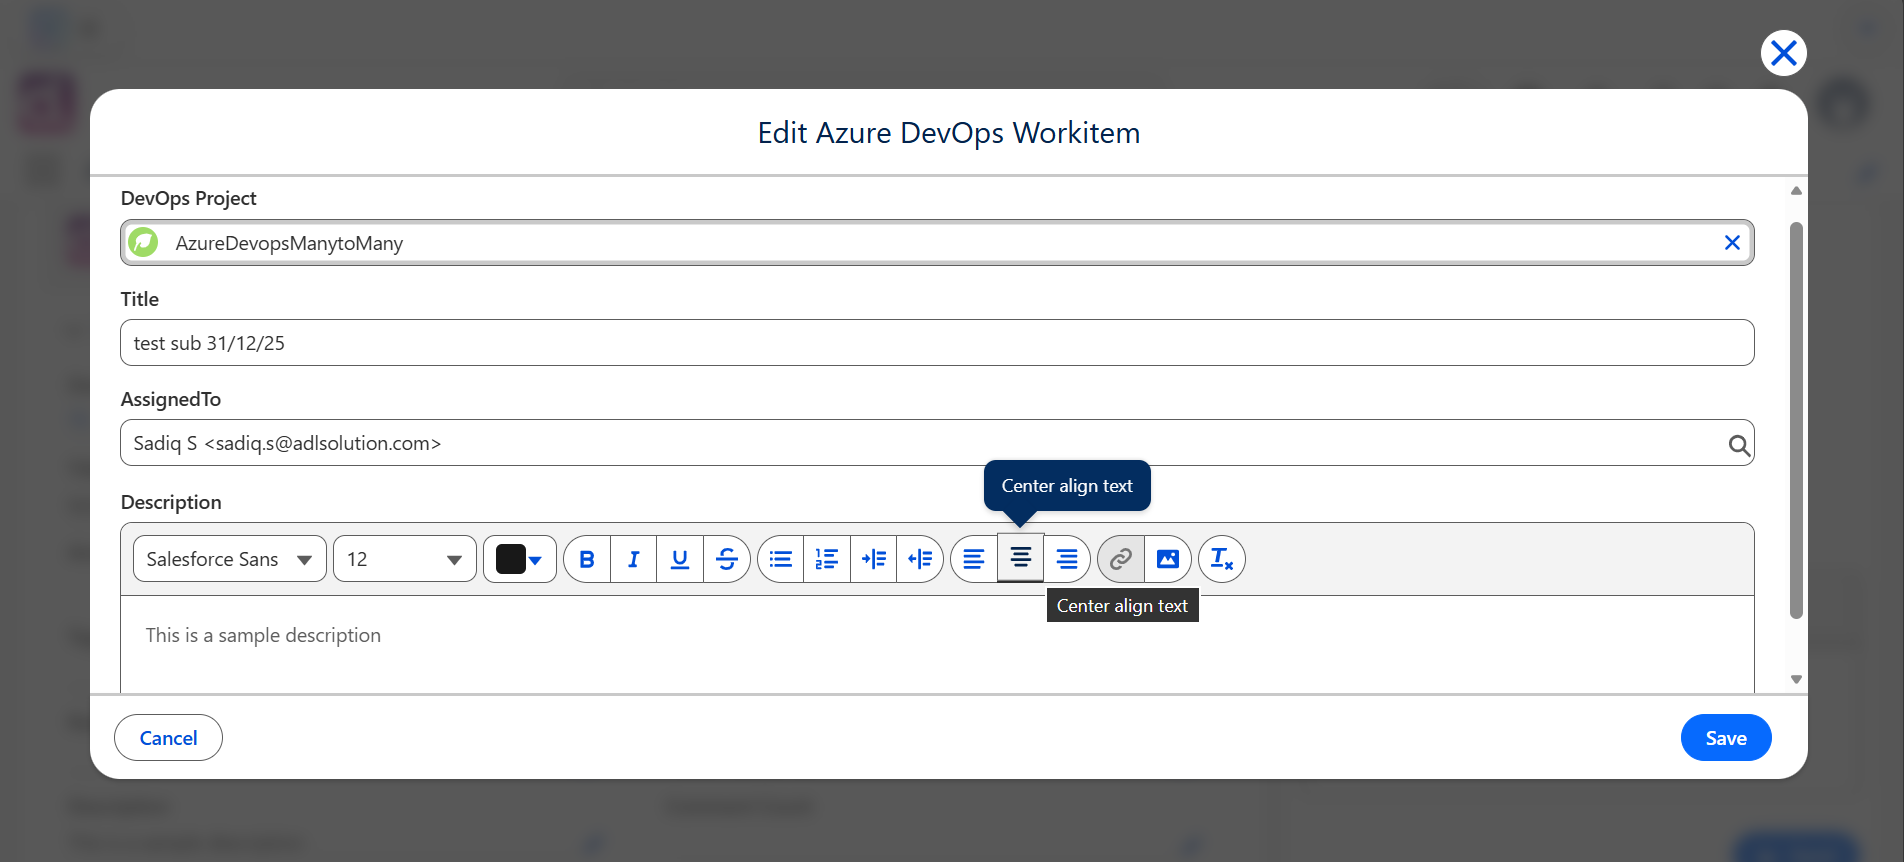
ADL Connect immediately pushes these updates to Azure DevOps based on configured sync rules.
Step 8: Validate Changes in Azure DevOps
- Open the same Work Item in Azure DevOps.
- Confirm that updates (for example, state or summary changes) are reflected correctly.
This confirms outbound synchronization is working as expected.
Step 9: Confirm Inbound Synchronization
- In Azure DevOps, update the Work Item (for example, change the State).
- Return to Salesforce and refresh the record.
- Confirm that updated values appear in the ADL AzureDevOps Details component.
This verifies that inbound synchronization is enabled and functioning.
Summary
Using the ADL AzureDevOps Details component, Salesforce users can:
- Create Azure DevOps Work Items directly from Salesforce Cases
- Assign Work Items to Azure DevOps team members
- Update issue details bidirectionally
- Maintain real-time visibility into Azure DevOps progress
- Eliminate duplicate data entry across systems
This integration significantly streamlines collaboration between Salesforce teams and Azure DevOps development teams.
Managing Comments from Salesforce
ADL Connect allows Salesforce users to view, add, and edit Azure DevOps comments directly from Salesforce. This capability enables customer-facing teams to collaborate with development teams without leaving the Salesforce interface.
Comments added in either system are synchronized automatically, ensuring consistent and up-to-date communication across both Salesforce and Azure DevOps.
Prerequisites
Before working with Azure DevOps comments from Salesforce, ensure that:
- Azure DevOps integration is configured in ADL Connect
- The Salesforce record (typically a Case) is already linked to an Azure DevOps Work Item
- Users have the required Salesforce and Azure DevOps permissions
Step 1: Add the ADL AzureDevOps Comments Component
- Open any Salesforce record (typically a Case).
- Click Edit Page to open the Lightning App Builder.
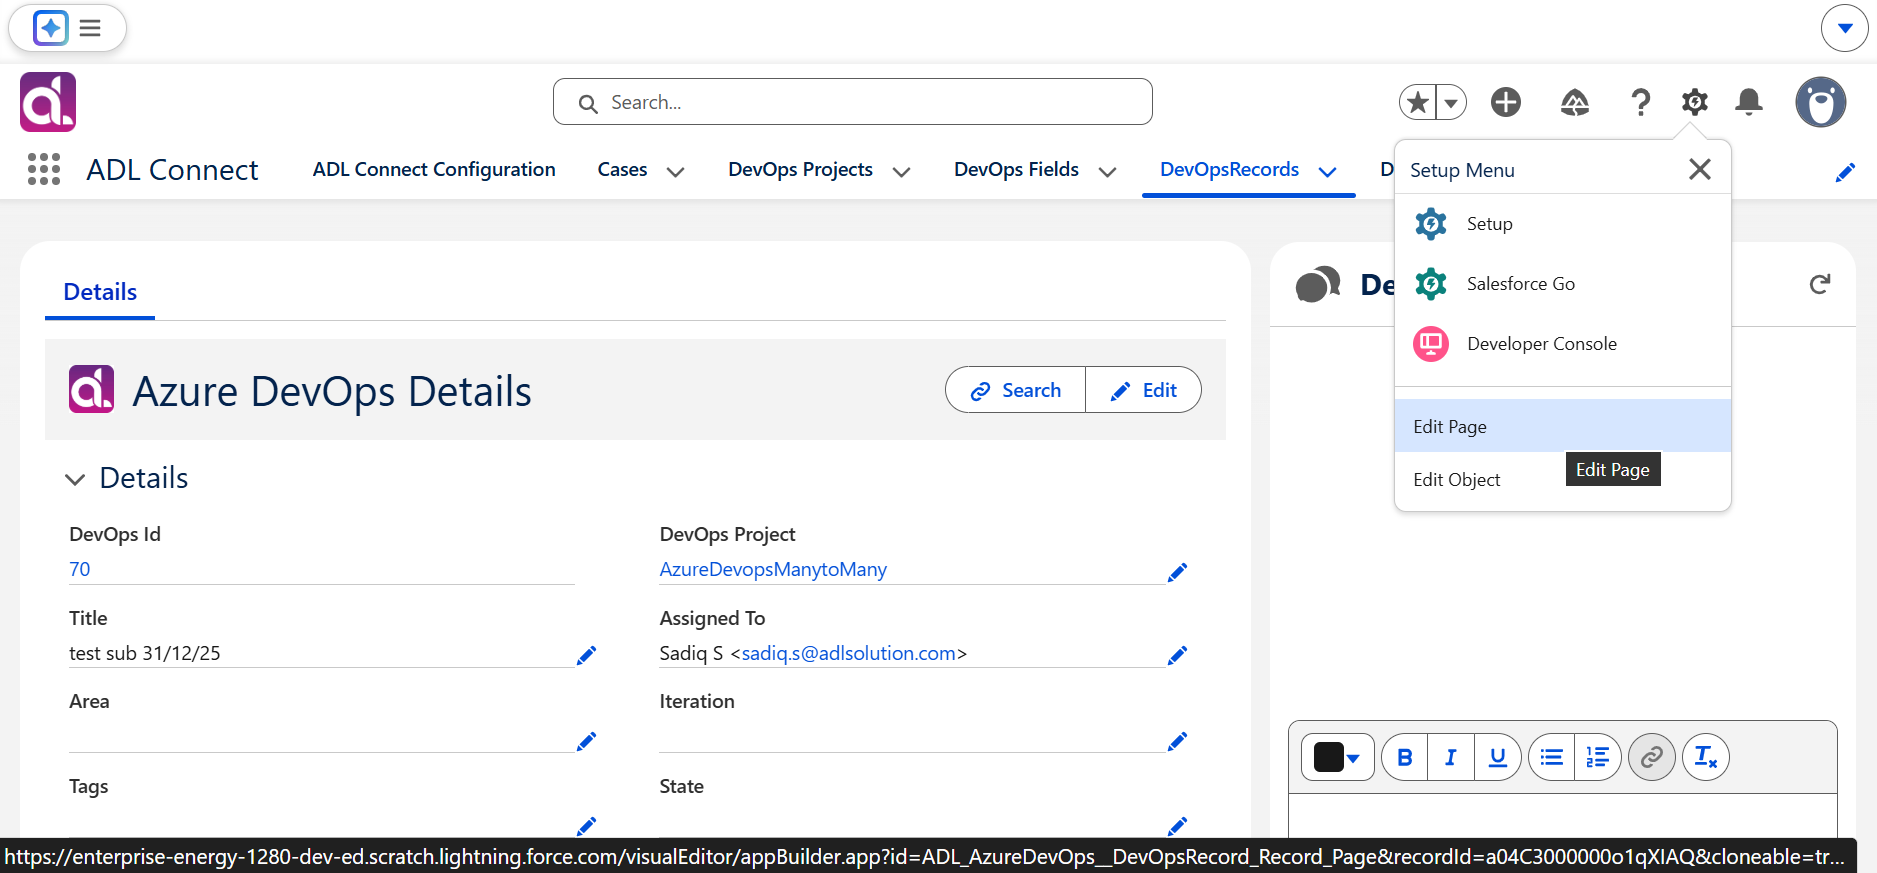
- Scroll to Custom – Managed Components.
- Locate the ADL AzureDevOps Comments component.
- Drag and drop the component onto the desired location on the page layout.
- Click Save and activate the page for the required apps or profiles.
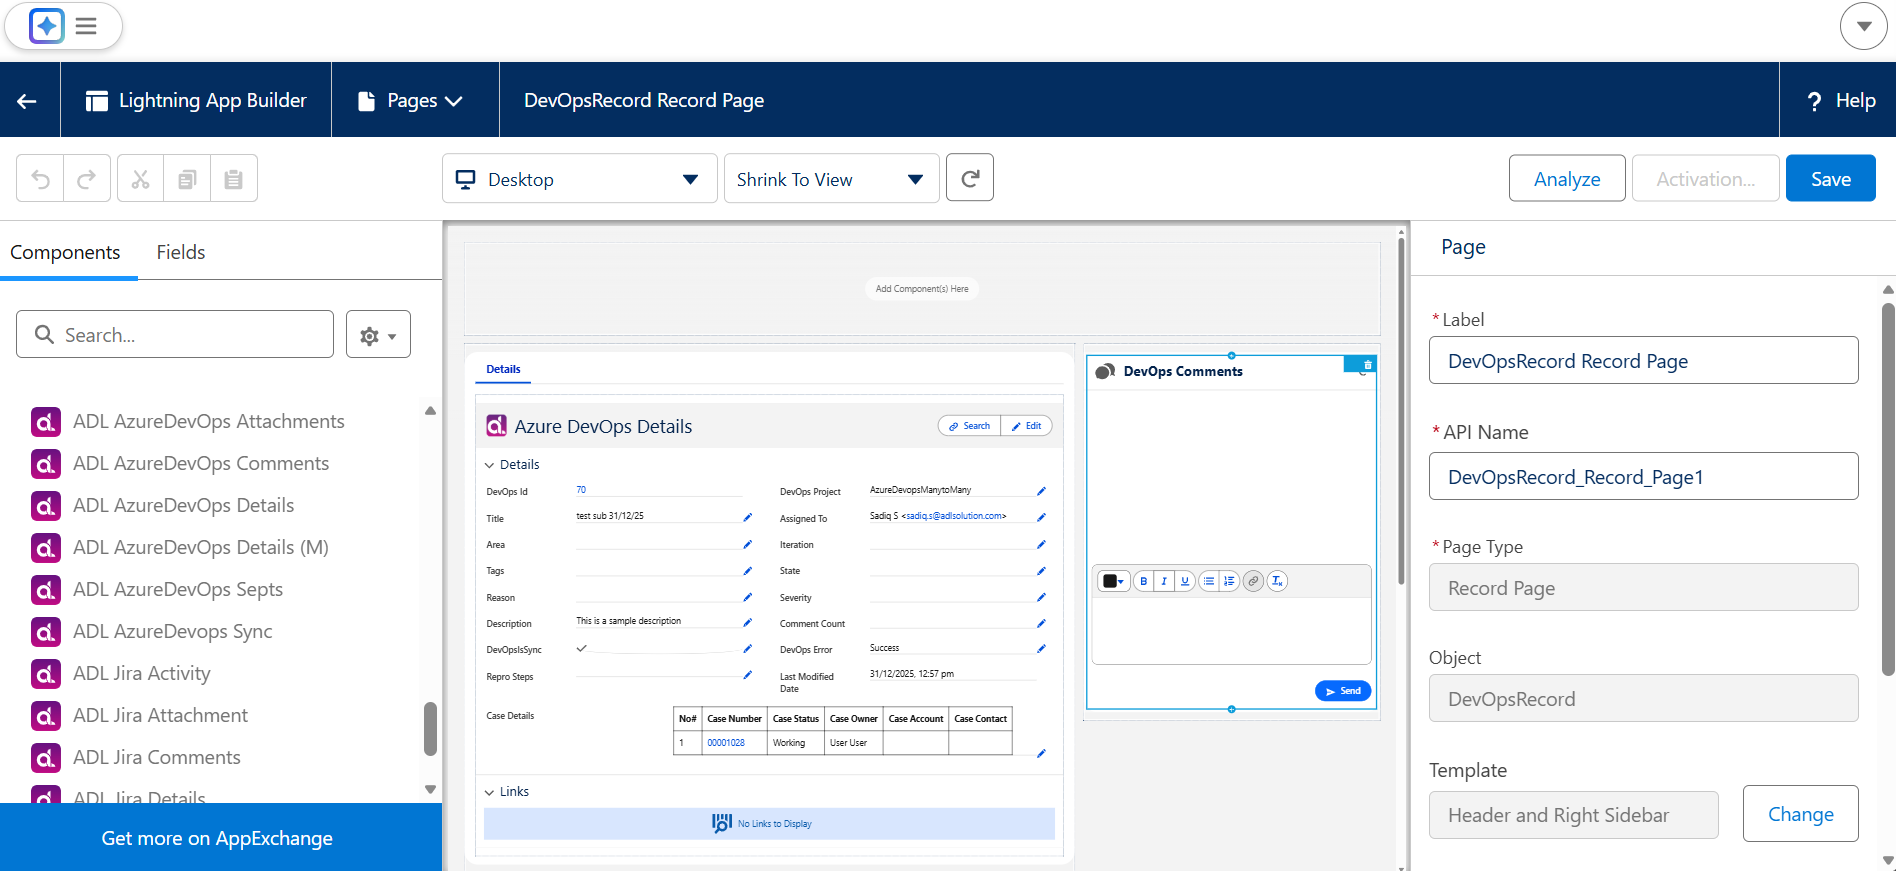
The Salesforce page is now ready to display and manage Azure DevOps comments.
Step 2: Post a Comment to an Azure DevOps Work Item
- Open the Salesforce record where the ADL AzureDevOps Comments component is available.
- In the comment input area, type your message.
- Click Send.
Once submitted:
- The comment is added to the linked Azure DevOps Work Item
- It becomes immediately visible to Azure DevOps users
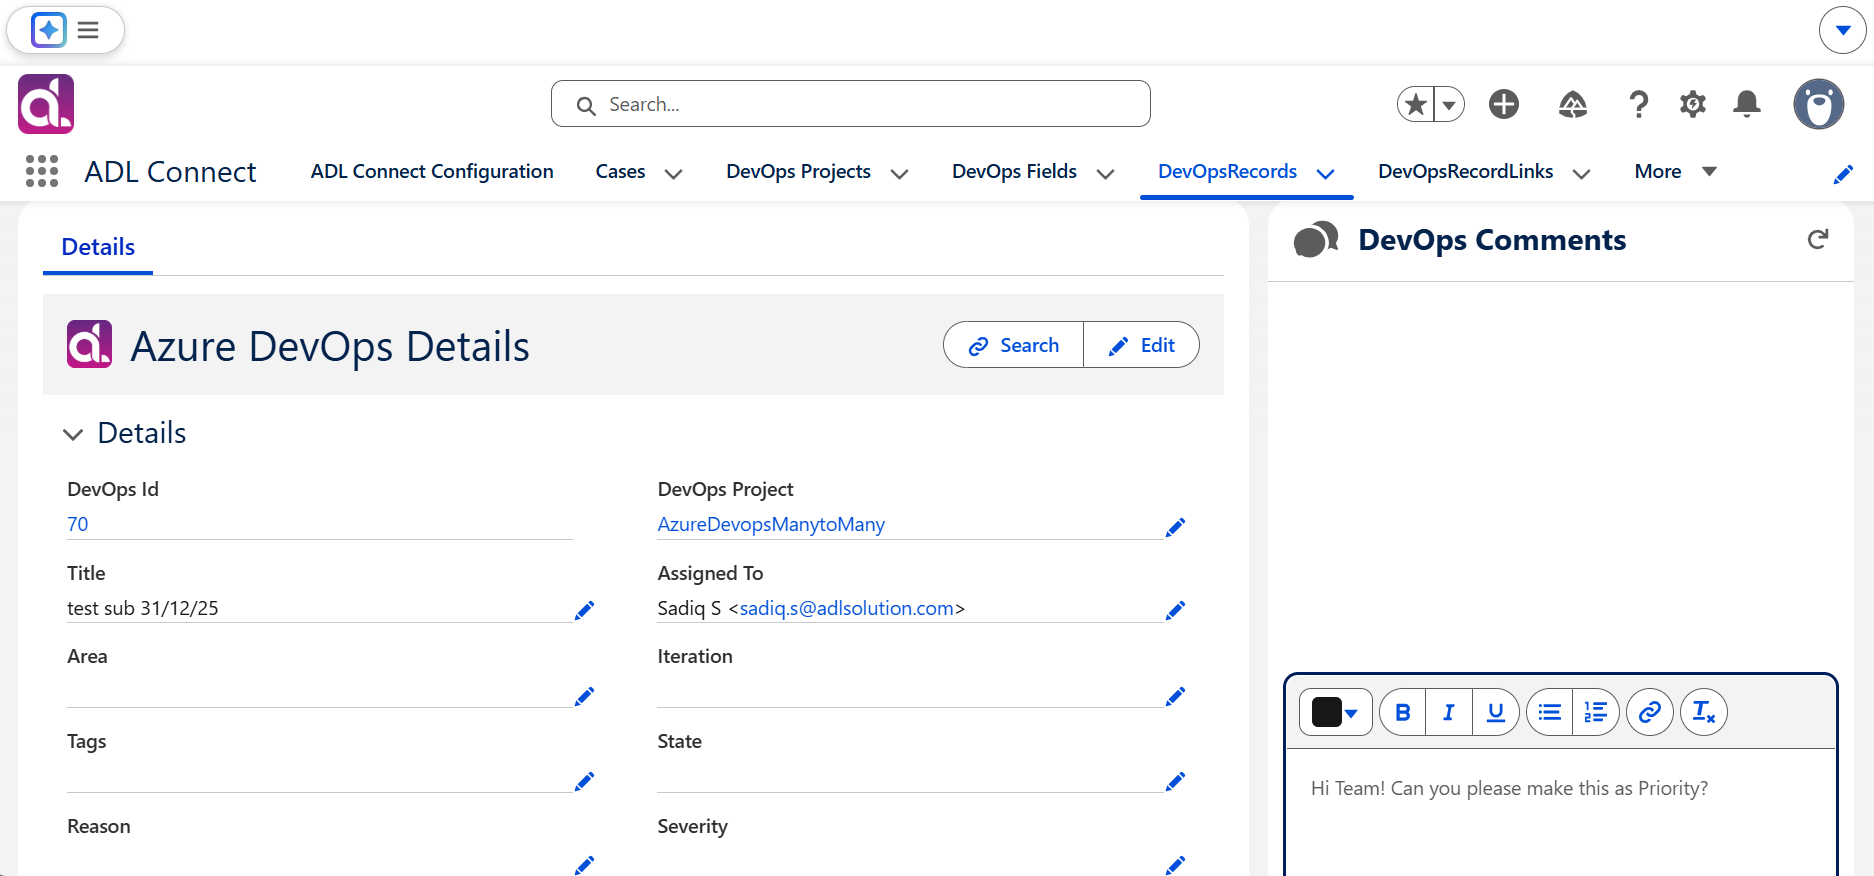
Step 3: Edit Existing Comments (If Required)
- Locate the comment you want to update within the Salesforce component.
- Click the Edit option.
- Modify the comment content.
- Click Save.
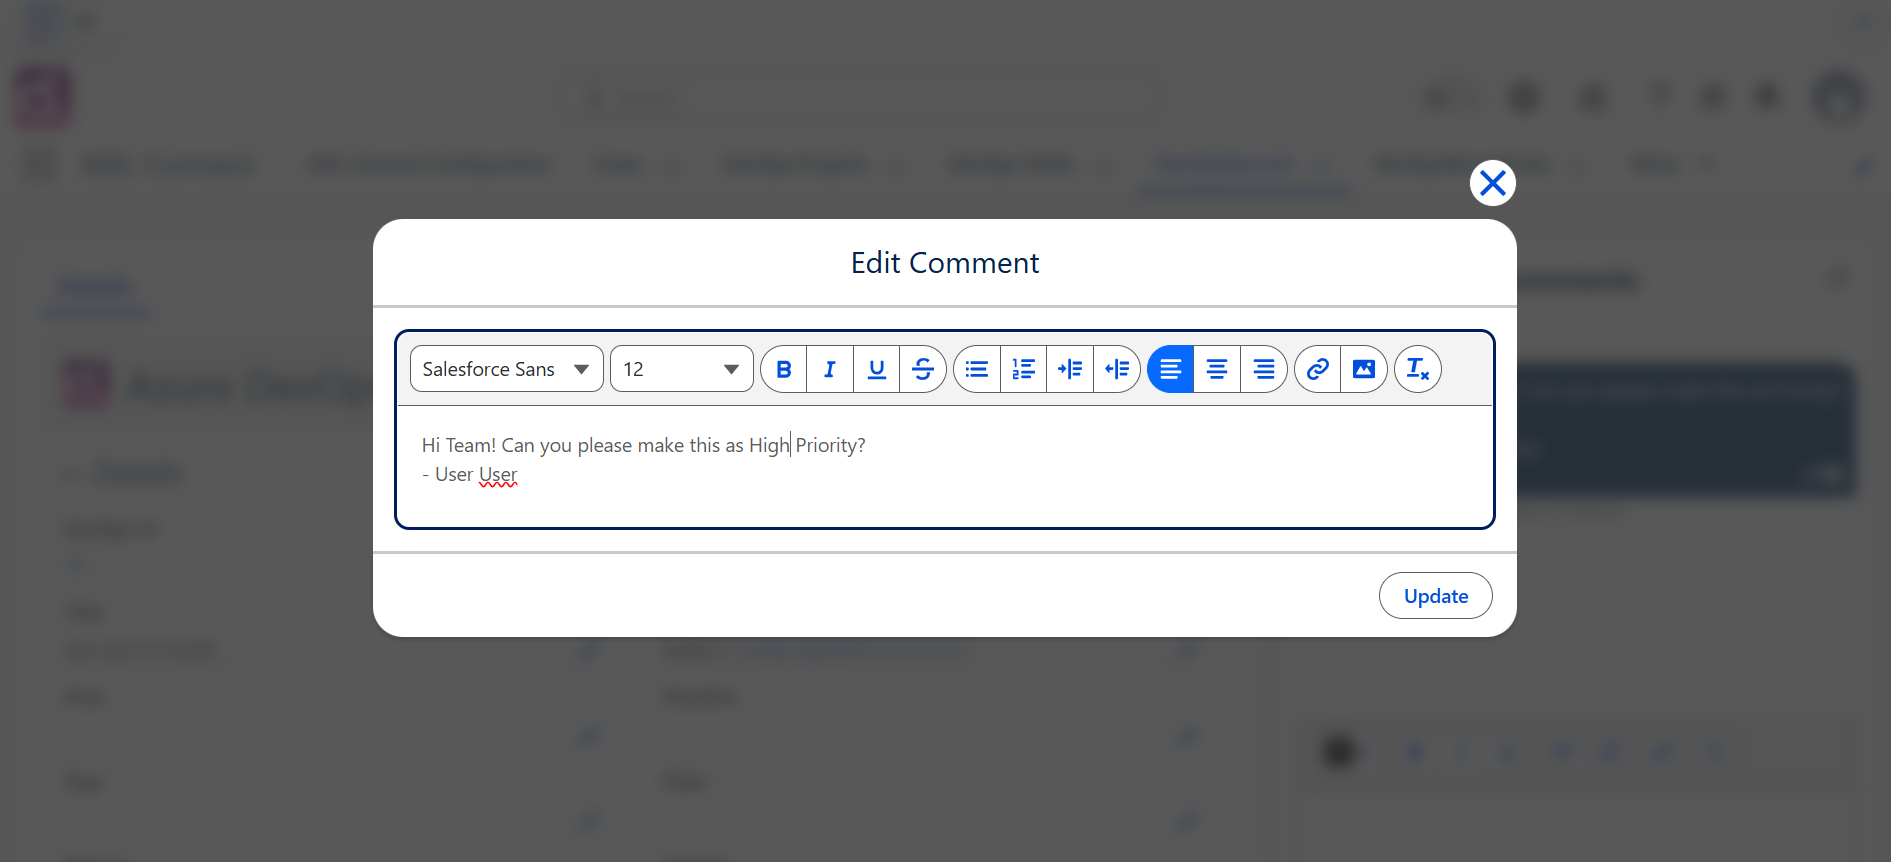
The updated comment is synchronized back to Azure DevOps, ensuring both systems display the latest version.
Step 4: Confirm Salesforce → Azure DevOps Comment Sync
- Open the corresponding Azure DevOps Work Item.
- Navigate to the Comments section.
- Verify that the newly added or edited comment from Salesforce is visible.
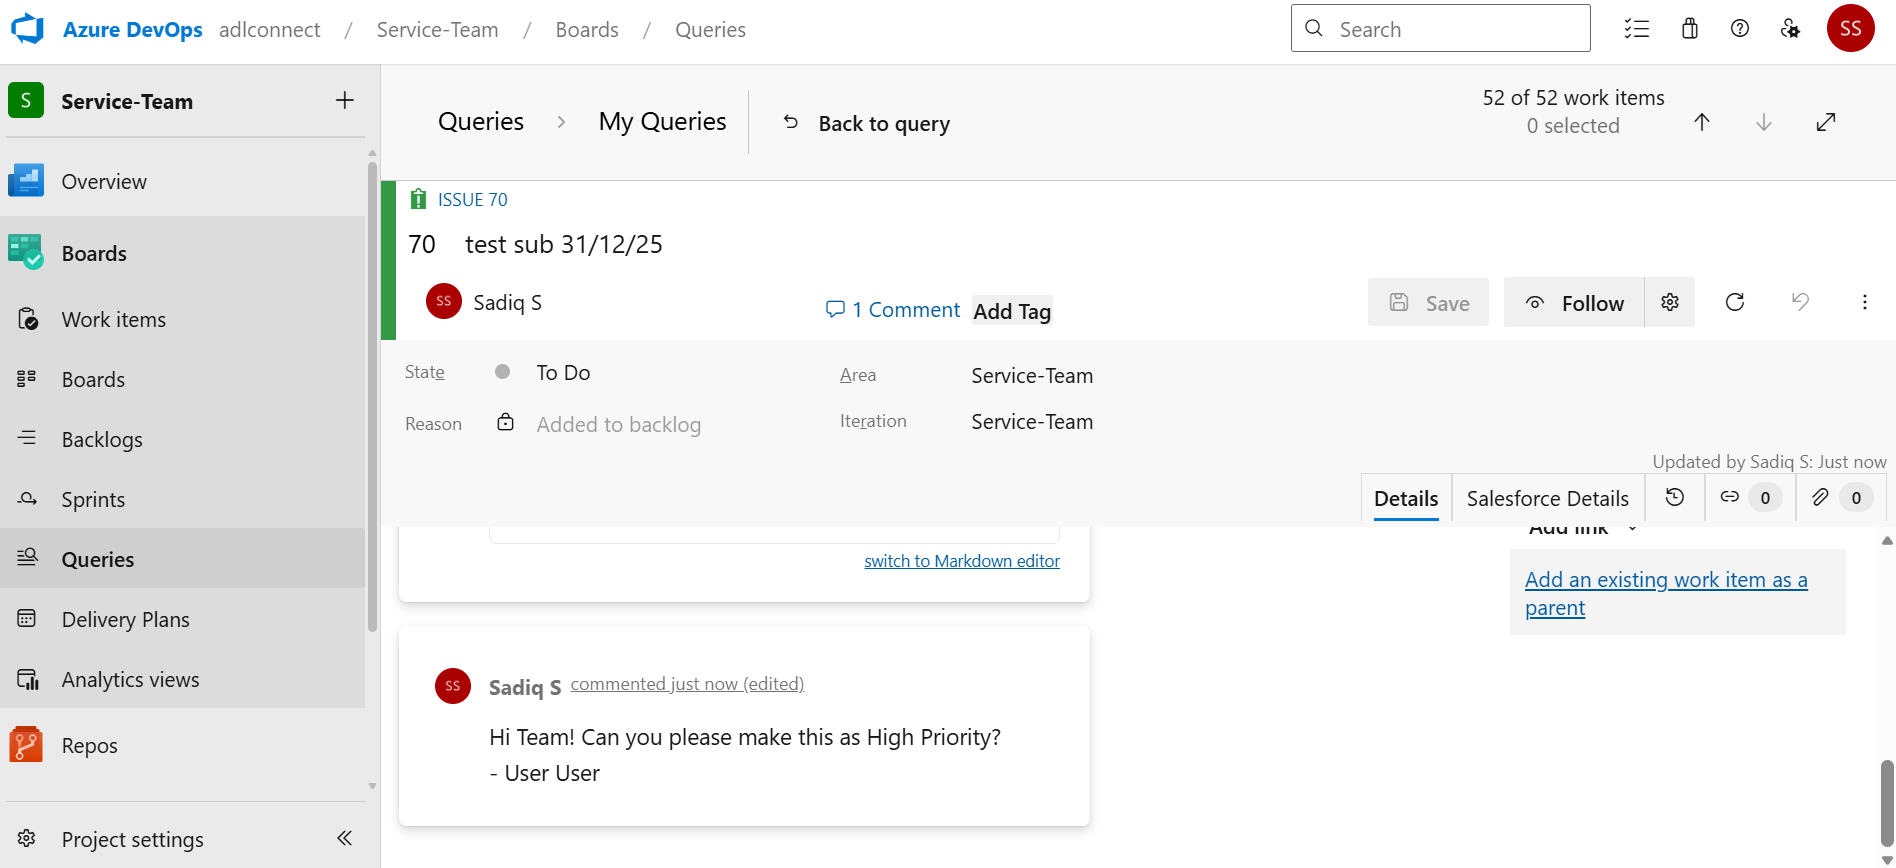
This confirms that outbound comment synchronization is working correctly.
Step 5: Add a Comment in Azure DevOps
- Open the Azure DevOps Work Item linked to the Salesforce record.
- Add a new comment in the Azure DevOps comments section.
- Save the comment.
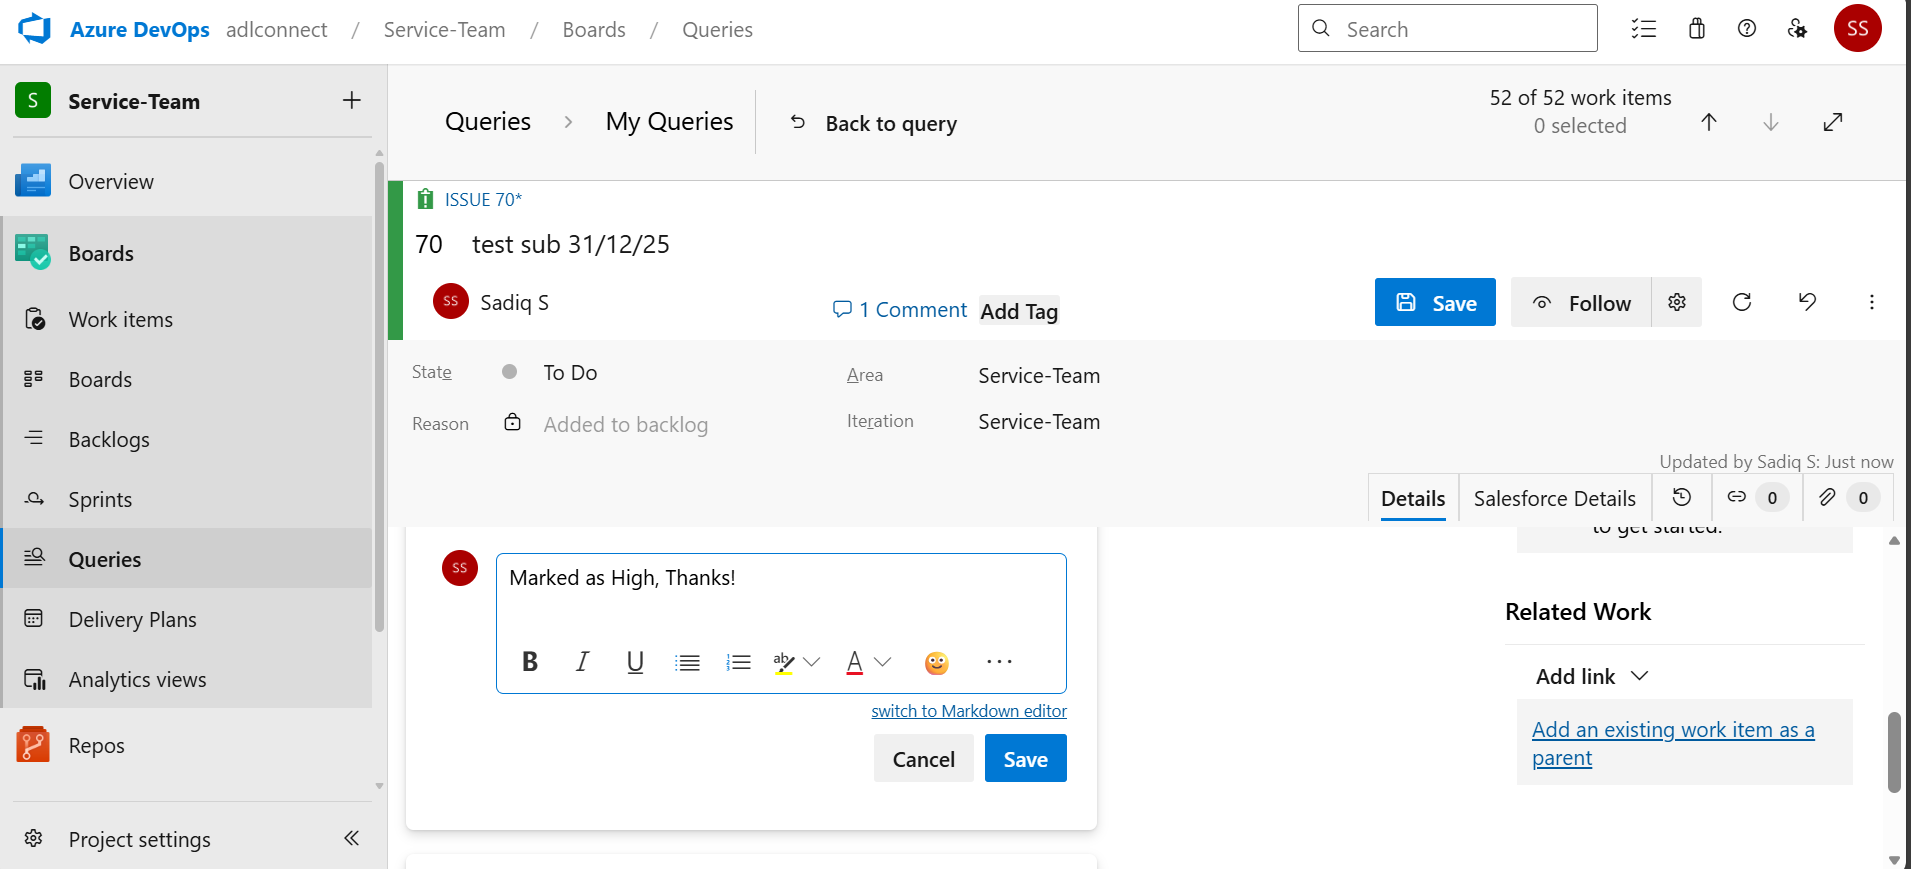
Step 6: Refresh Salesforce to View Azure DevOps Comments
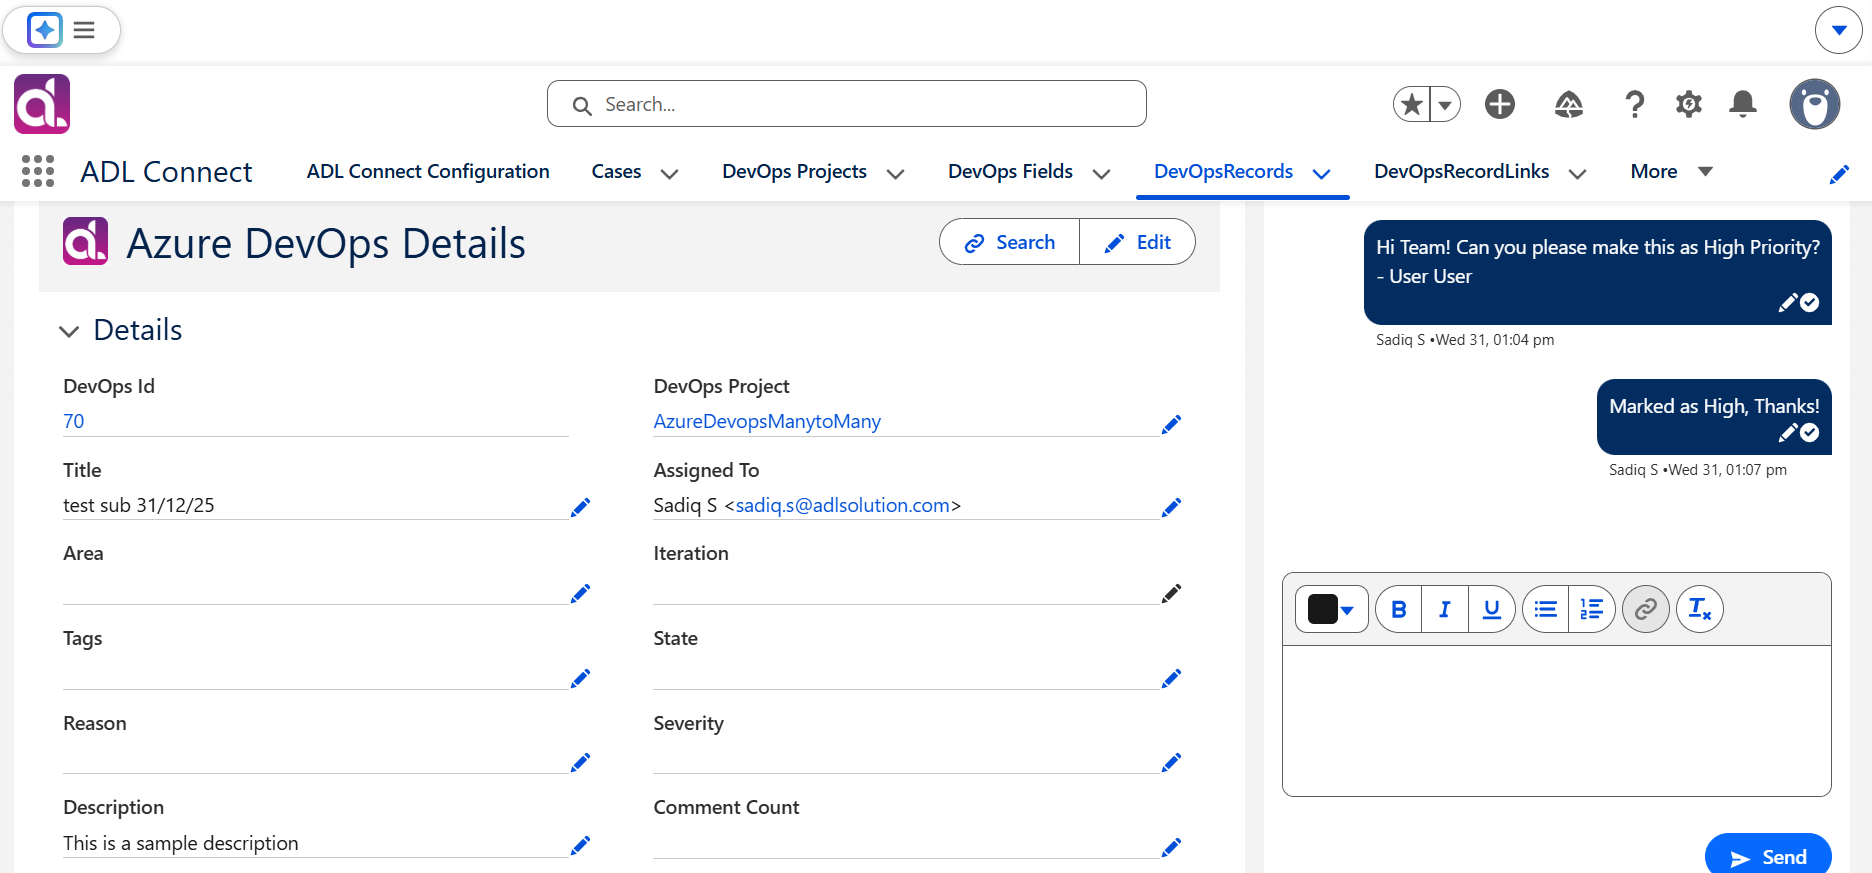
- Return to the Salesforce record.
- Refresh the page.
- Verify that the new comment appears in the ADL AzureDevOps Comments component.
This confirms inbound comment synchronization from Azure DevOps to Salesforce.
Summary
By using the ADL AzureDevOps Comments component, Salesforce users can:
- View Azure DevOps comments directly within Salesforce
- Add and edit comments without switching systems
- Maintain synchronized communication between Salesforce and Azure DevOps
- Improve collaboration between customer-facing and development teams
This functionality ensures transparent, real-time communication across platforms and eliminates context switching for users.
Managing Attachments from Salesforce
ADL Connect enables Salesforce users to view, preview, and upload Azure DevOps attachments directly from Salesforce records. This functionality provides customer-facing teams with full visibility into Azure DevOps Work Item context and allows them to contribute files without switching systems.
Attachments added in Salesforce synchronize instantly to Azure DevOps, and existing Azure DevOps attachments are displayed within the Salesforce interface.
Prerequisites
Before working with Azure DevOps attachments from Salesforce, ensure that:
- Azure DevOps integration is configured in ADL Connect
- The Salesforce record (such as a Case) is linked to an Azure DevOps Work Item
- Users have the required Salesforce and Azure DevOps permissions
Configuring the Salesforce Page Layout for Azure DevOps Attachments
Before viewing or uploading attachments, the ADL AzureDevOps Attachments component must be added to the Salesforce record page.
Step 1: Add the ADL AzureDevOps Attachments Component
- Open the Salesforce record linked to the Azure DevOps Work Item (for example, a Case).
- Click Edit Page to open the Lightning App Builder.
- Scroll to Custom – Managed Components.
- Locate the ADL AzureDevOps Attachments component.
- Drag and drop the component into the desired area of the page layout.
- Click Save and activate the page if required.
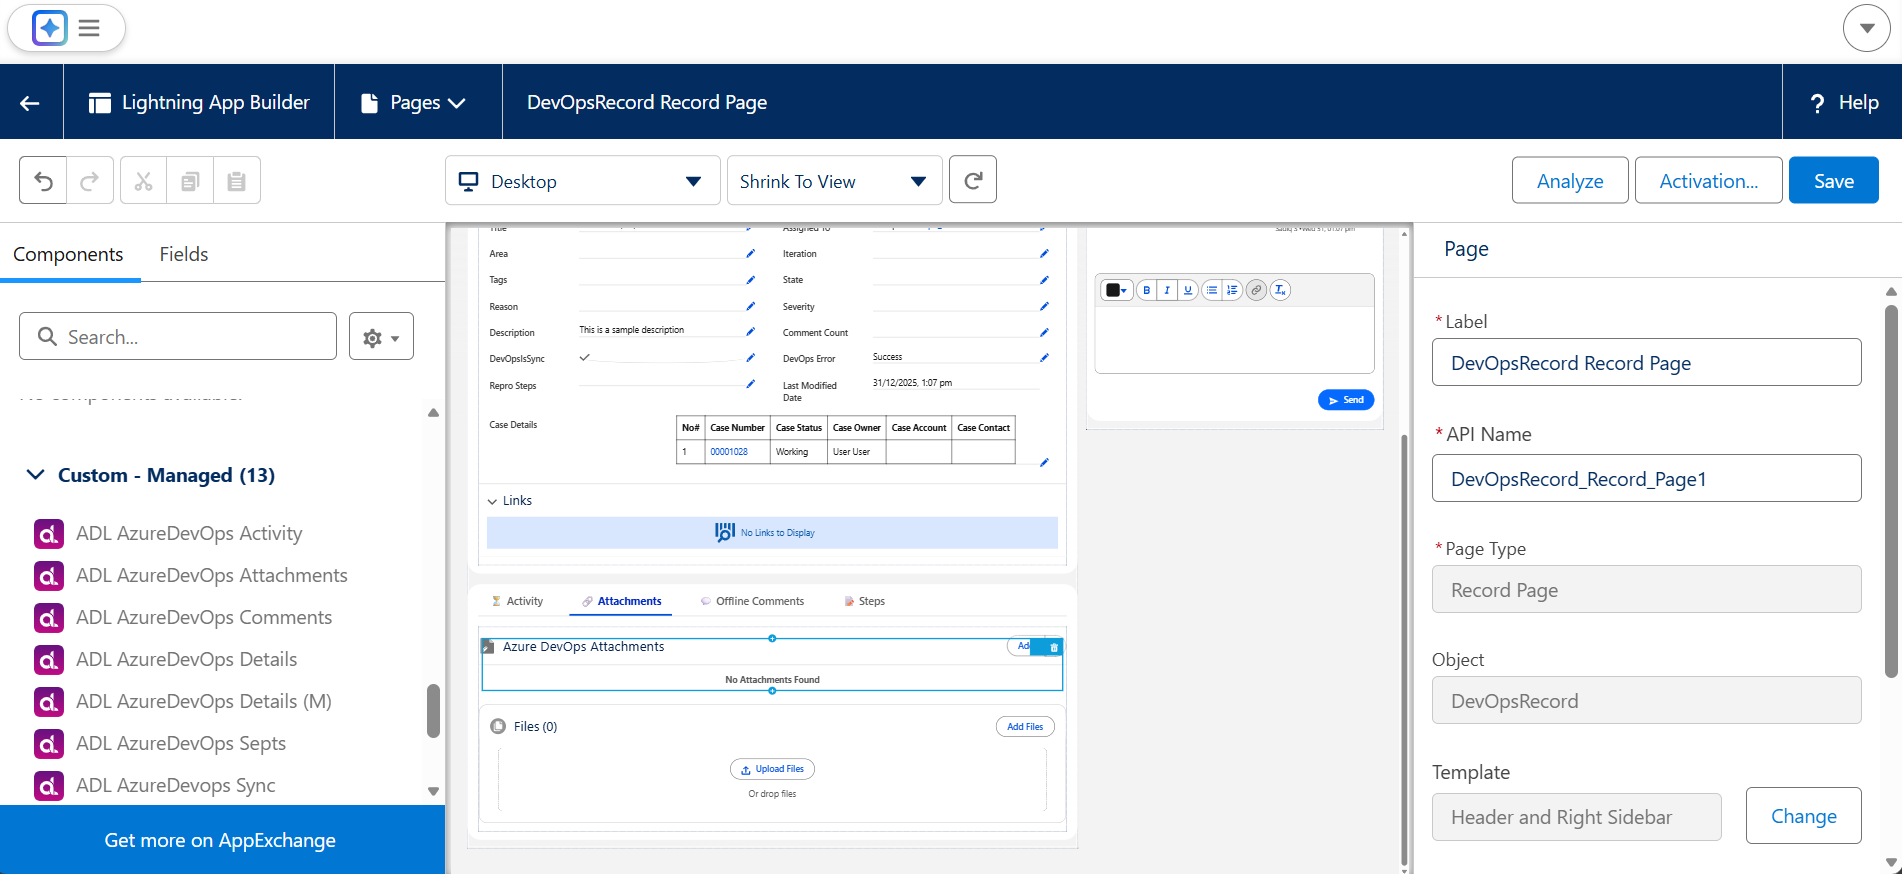
Once added, the component displays all attachments associated with the linked Azure DevOps Work Item.
Viewing Azure DevOps Attachments in Salesforce
Step 2: View or Preview Existing Attachments
- Navigate to the updated Salesforce record.
- In the ADL AzureDevOps Attachments component, review the list of attachments already stored in Azure DevOps.
- Optionally, switch the display to Tile View.
- Tile View allows image previews without downloading files.
- Click any attachment to preview it or download it directly from Salesforce.
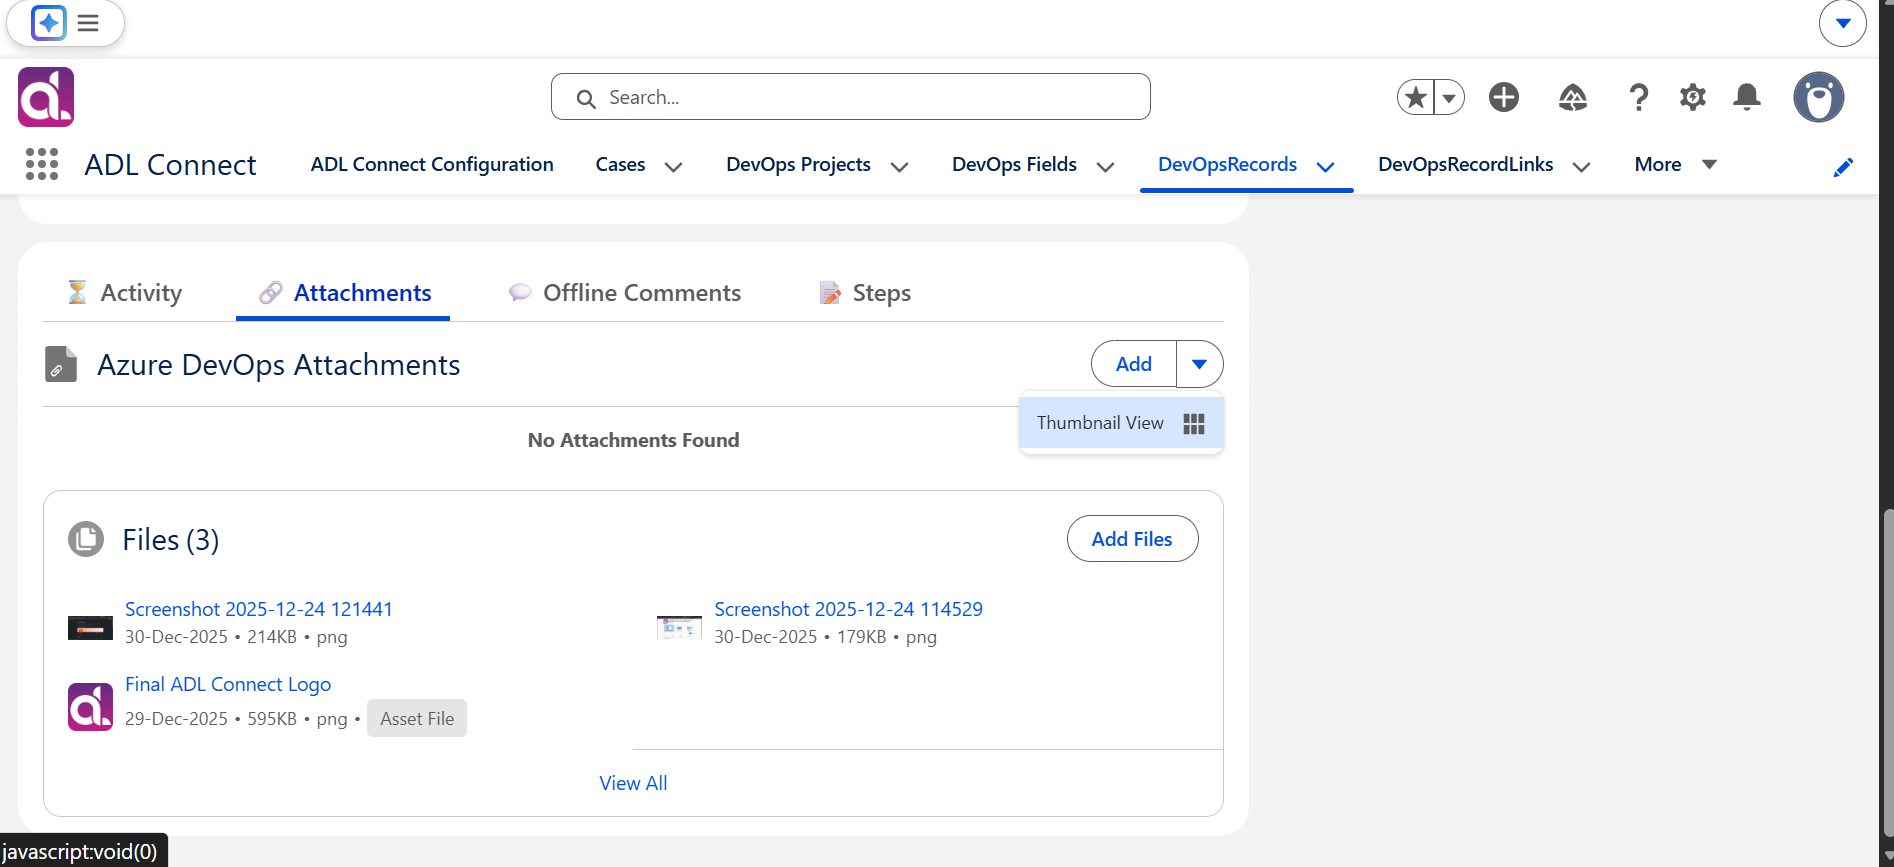
Tile View is especially useful for image-heavy attachments such as screenshots, diagrams, and UI mock-ups.
Uploading Attachments to Azure DevOps from Salesforce
Step 3: Upload New Attachments
- In the ADL AzureDevOps Attachments component, click Add or Upload Attachments.
- Select one or more files from your device.
- Confirm the upload.
The selected files are immediately uploaded to the associated Azure DevOps Work Item.
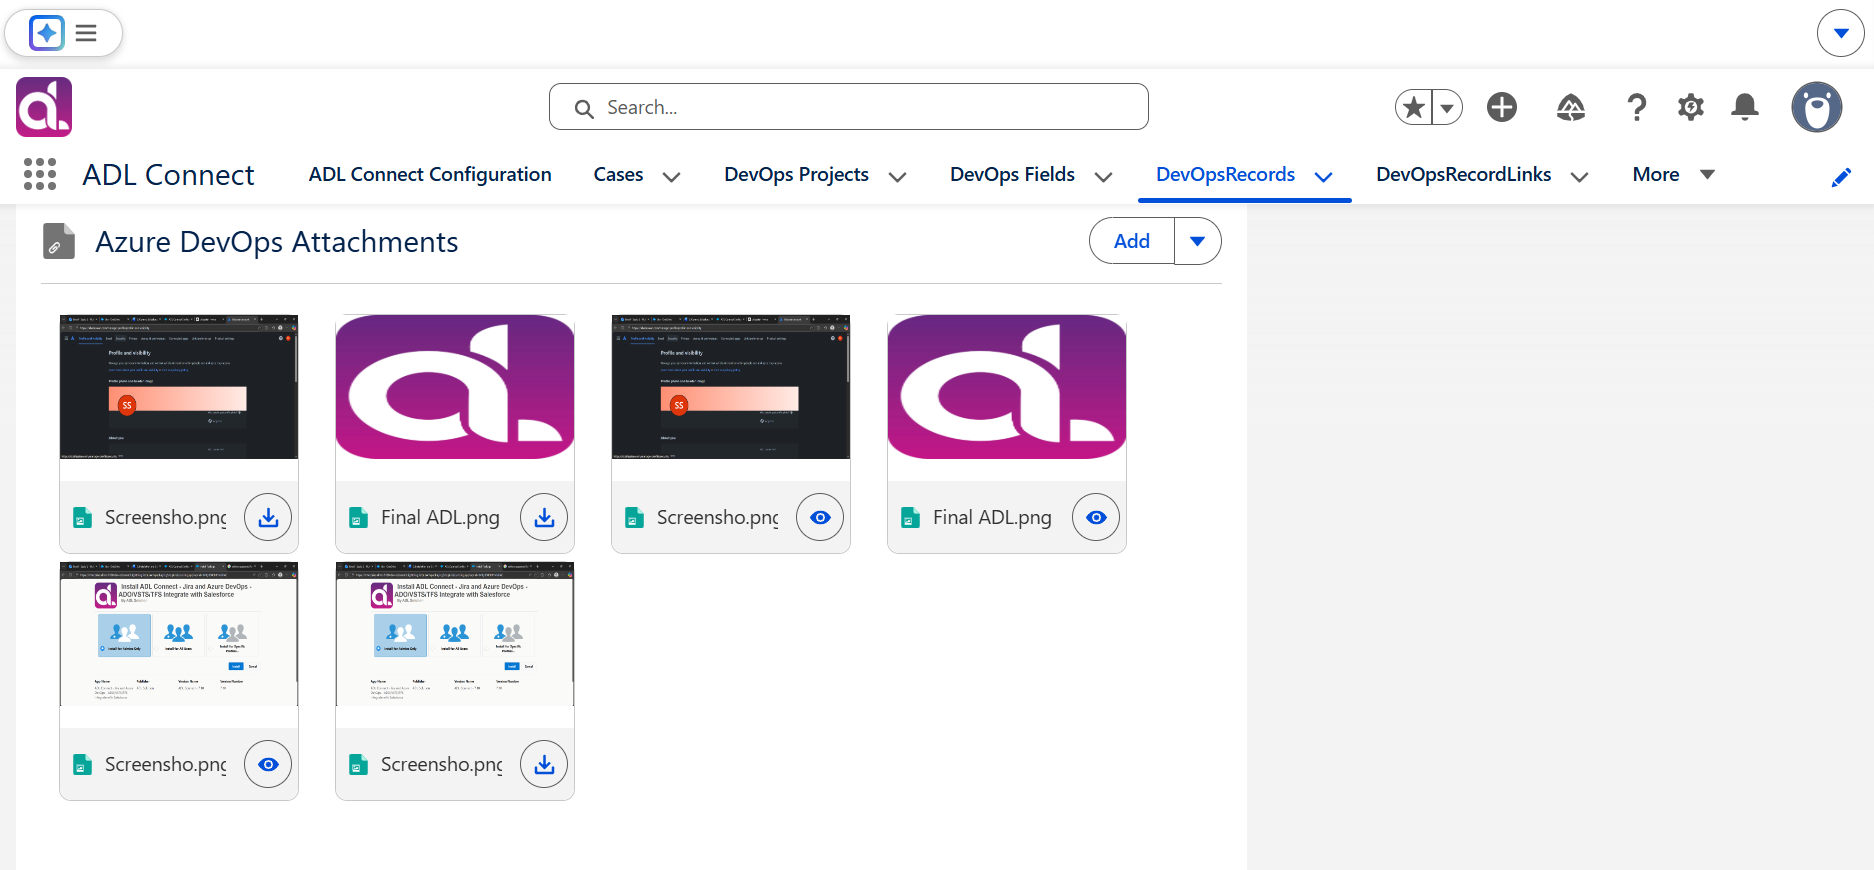
Step 4: Verify the Upload in Azure DevOps
- Open the corresponding Azure DevOps Work Item.
- Navigate to the Attachments section.
- Confirm that the files uploaded from Salesforce are visible.
This verifies that Salesforce → Azure DevOps attachment synchronization is functioning correctly.
Summary
Using the ADL AzureDevOps Attachments component, Salesforce users can:
- View all Azure DevOps attachments directly within Salesforce
- Preview images using Tile View without downloading
- Upload new files from Salesforce into Azure DevOps
- Maintain complete context for customer cases and development work
This capability reduces platform switching and significantly improves collaboration between support and engineering teams.
Search and Link Existing Work Item
ADL Connect allows Salesforce users to search for existing Azure DevOps Work Items directly from Salesforce and link them to Salesforce records such as Cases. This capability helps prevent duplicate issue creation, improves traceability, and automatically retrieves related Azure DevOps details—including comments and attachments—into Salesforce.
Prerequisites
Before using the Search and Link feature, ensure that:
- Azure DevOps integration is configured in ADL Connect
- A Project Mapping exists between Salesforce and Azure DevOps
- The Salesforce record page includes the ADL AzureDevOps Details component
- Users have the required Salesforce and Azure DevOps permissions
Step 1: Initiate an Azure DevOps Work Item Search
- Open the Salesforce record where ADL Connect is enabled (for example, a Case).
- In the ADL AzureDevOps Details component, click Search.
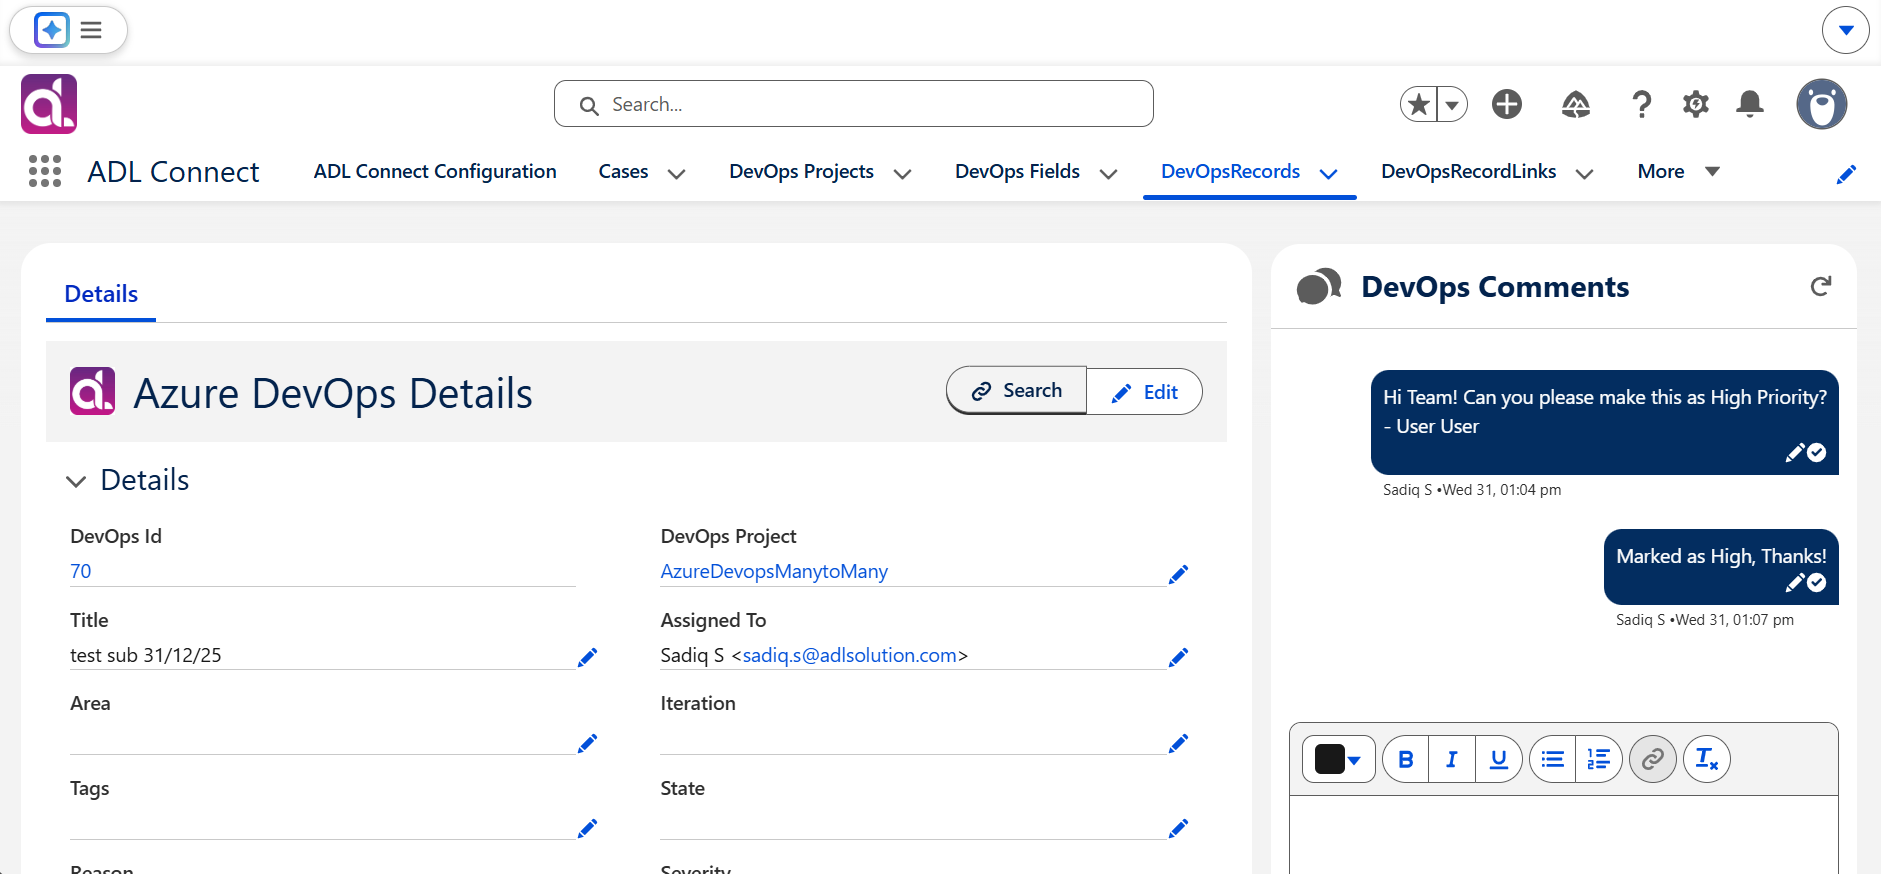
This opens the Azure DevOps Work Item search interface within Salesforce.
Step 2: Enter a Search Keyword
- In the search field, enter a keyword related to the Azure DevOps Work Item you want to locate.
- Keywords may include Work Item ID, summary text, description keywords, or other searchable values.
- Review the list of Azure DevOps Work Items returned by the search.
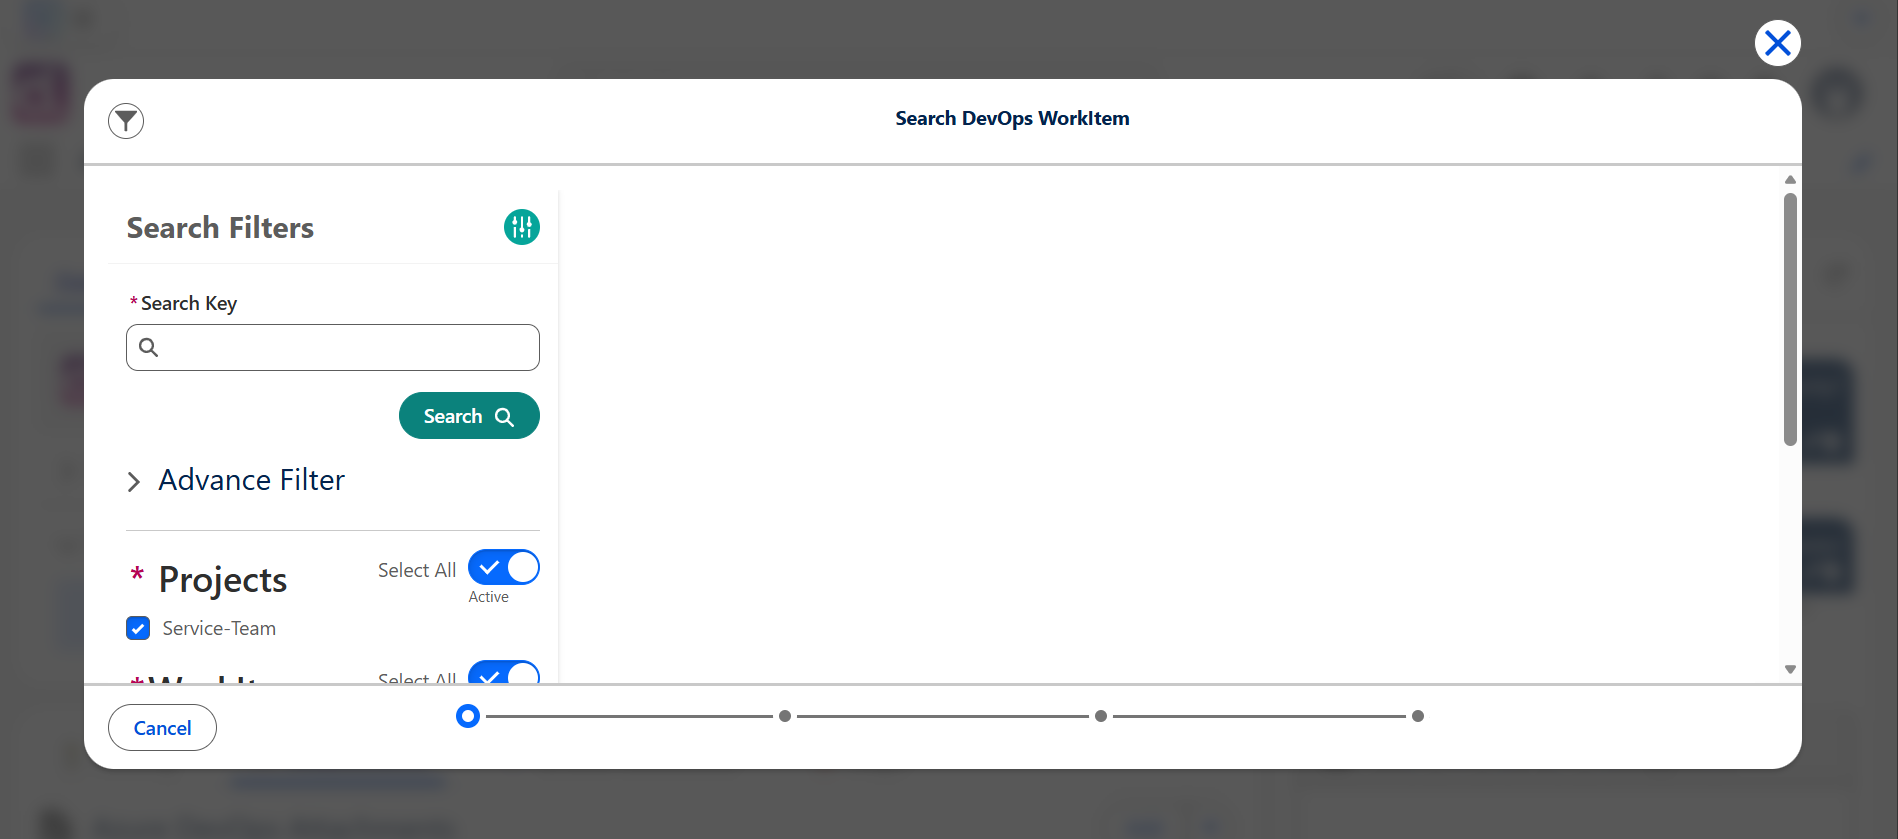
Search results are fetched in real time from Azure DevOps, ensuring the latest data is displayed.
Step 3: Select the Azure DevOps Work Item to Link
- From the search results, select the Azure DevOps Work Item to associate with the Salesforce record.
- ADL Connect displays a preview of mapped fields.
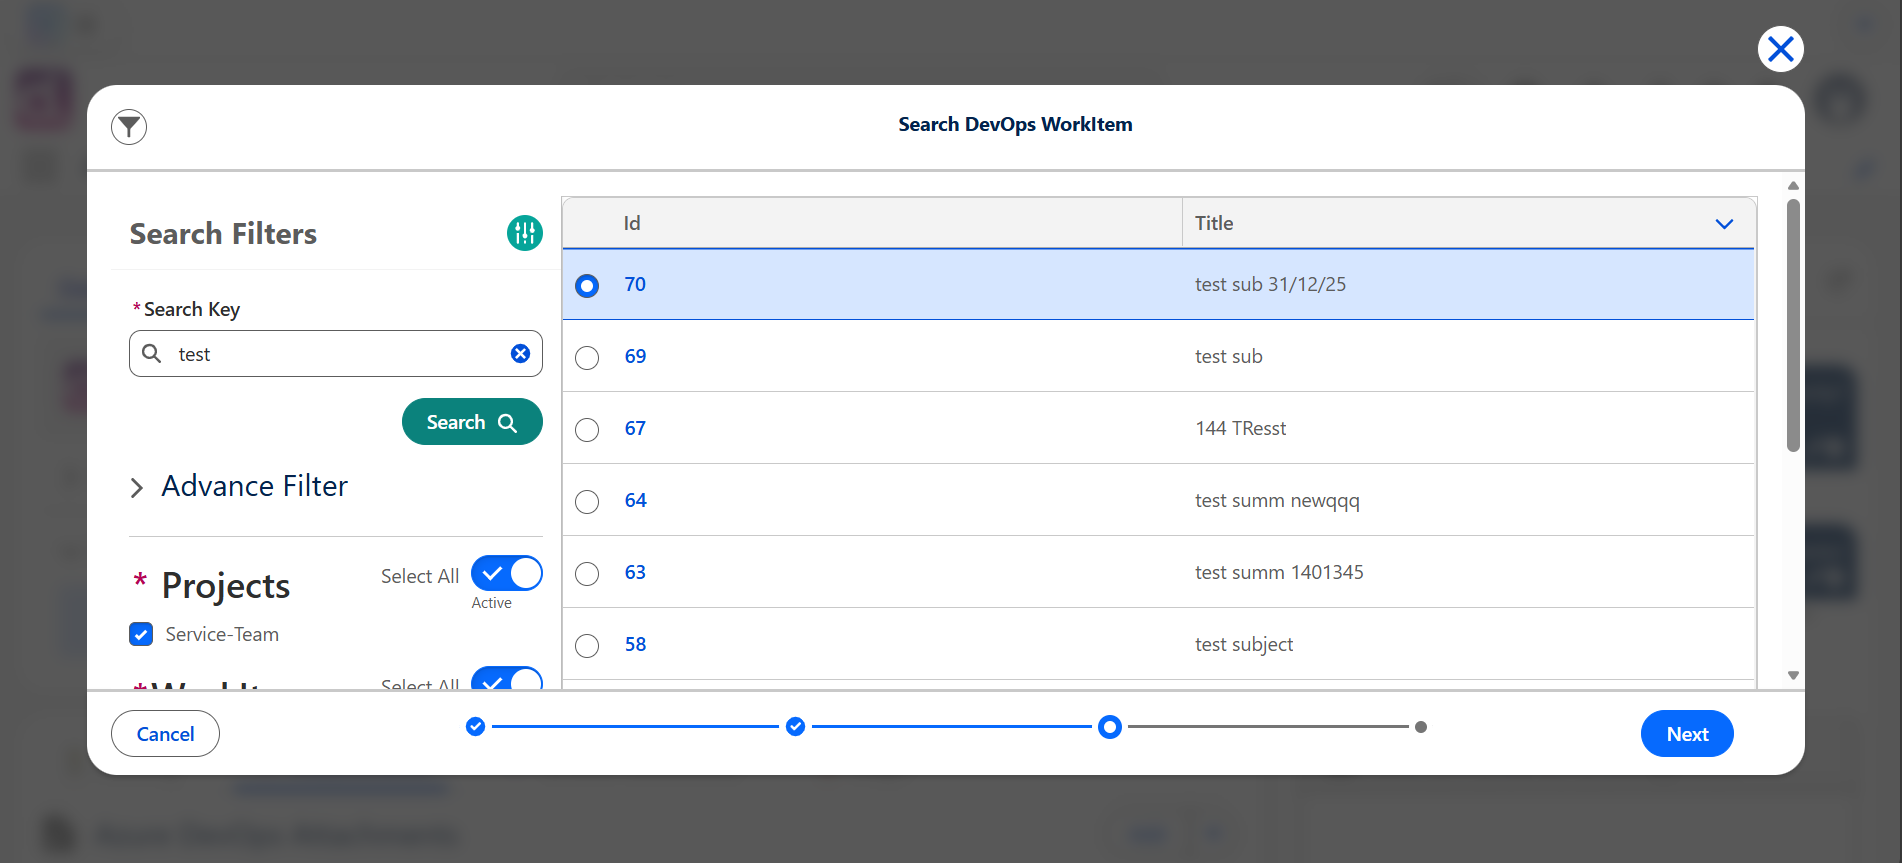
During preview:
- Fields are pre-populated based on your Project Mapping configuration
- You can verify that the correct Work Item is being linked
Step 4: Save the Link
- Click Save to complete the linking process.
- The selected Azure DevOps Work Item is now associated with the Salesforce record.
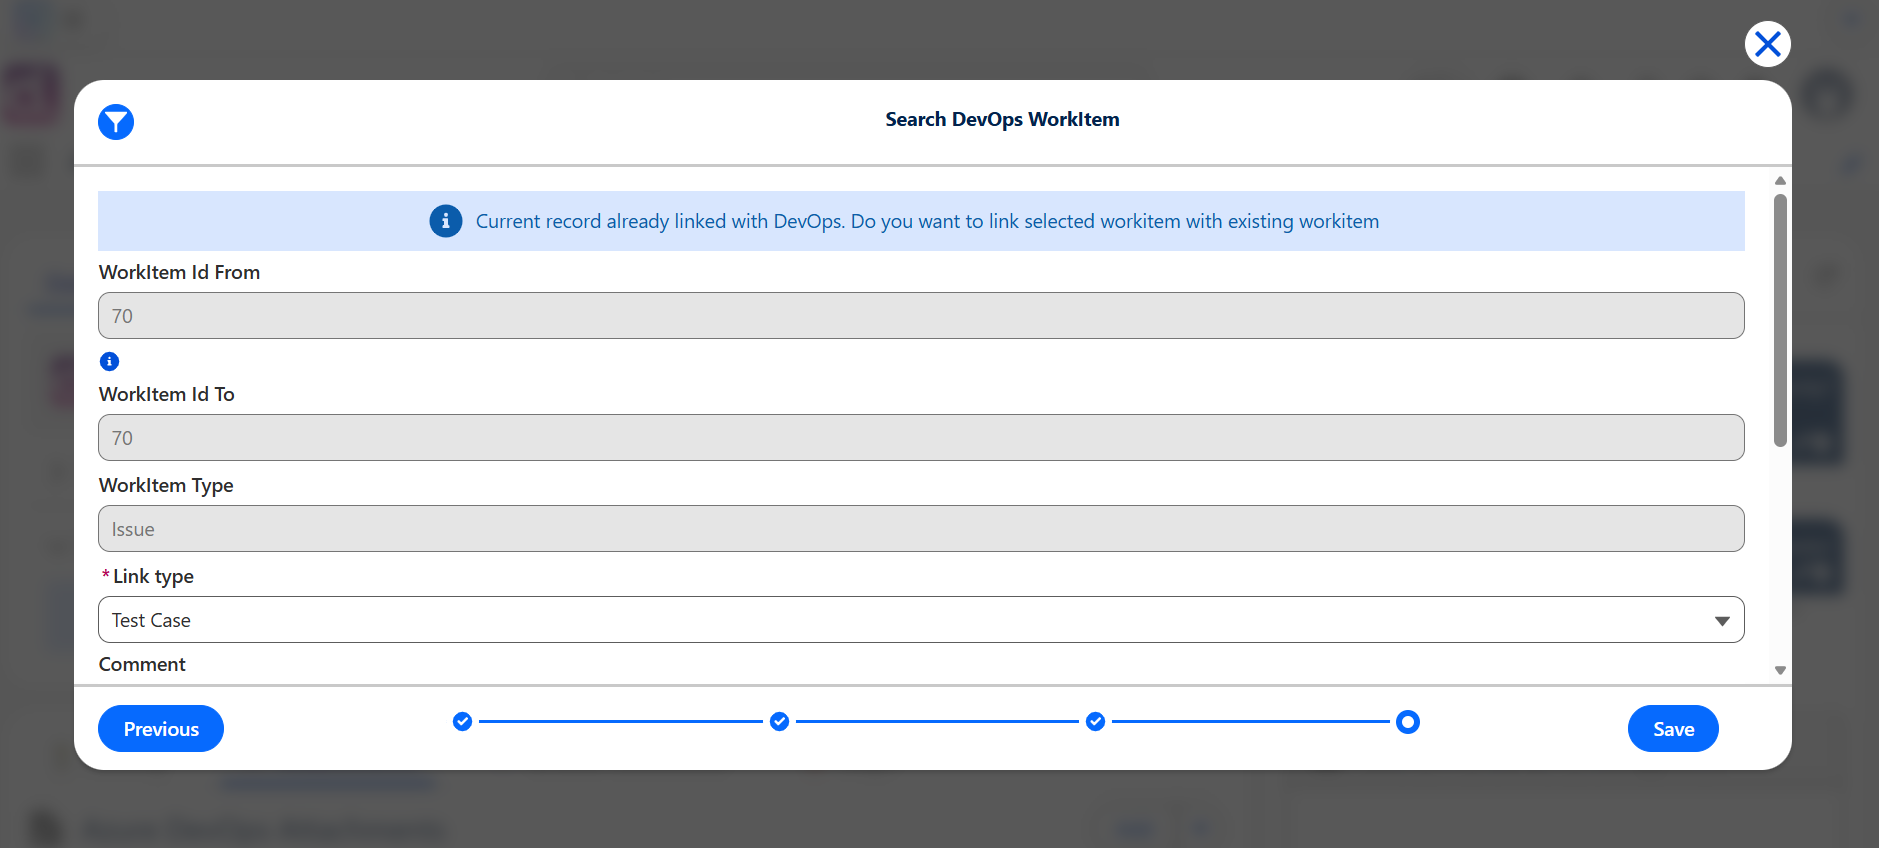
This creates a direct relationship between Salesforce and the existing Azure DevOps Work Item.
Automatic Retrieval of Azure DevOps Details
After the Work Item is linked:
- ADL Connect automatically retrieves associated comments, attachments, and other mapped data
- Retrieved details are displayed within the relevant ADL AzureDevOps components on the Salesforce page
- Salesforce users gain full visibility into Azure DevOps activity without navigating away from Salesforce
Summary
Using the Search and Link feature, Salesforce users can:
- Search Azure DevOps Work Items directly from Salesforce
- Avoid creating duplicate Azure DevOps Work Items
- Link the correct Work Item to a Case or other Salesforce record
- Automatically retrieve existing comments, attachments, and status information
This functionality creates a unified workflow and strengthens collaboration between support, engineering, and product teams by keeping all relevant issue context inside Salesforce.
Migration & Upgrade
Ran into a problem while updating ADL Connect? This guide gets you back to a working state without losing your DevOps links. The approach is simple: back up your links, reinstall the app, then restore the links.
Before you touch a production org
⚠ Rehearse in a sandbox first. Run the whole flow end to end in a full/partial sandbox and confirm your links come back before you do this in production.
- Take a full data export of the org (Setup → Data Export) as an extra safety net — treat the backup File as one copy, not the only copy.
- Set the namespace constant. Both scripts start with
final String NS = 'ADL_AzureDevOps__';. Keep it for a customer org; set it to''only if you are testing in a namespace-less dev/scratch org.
Step 1 — Back up your links
- Open the org → Setup → Developer Console → Debug → Open Execute Anonymous Window.
- Paste 01_backup.apex (below), tick Open Log, and click Execute.
- It saves everything to a File named ADLConnect_Migration_Backup. Open Files and download a copy to keep off-org.
/* ============================================================================
   ADL Connect  |  PRE-8.0 -> 8.x MIGRATION  |  STEP 1 : BACKUP
   ----------------------------------------------------------------------------
   100% Anonymous Apex - nothing to deploy. Paste into Developer Console ->
   Execute Anonymous and Run. There is NO Apex class to create.

   WHERE : run in the OLD (source) org, BEFORE uninstalling the current package.
   WHAT  : serialises everything needed to restore the DevOps data AND its
           relationships into a single JSON File (ContentVersion). A File
           survives the package uninstall.

   Backed up (so every relationship can be rebuilt):
     1. DevOpsProject__c ........ ALL fields
     2. DevOpsField__c .......... ALL fields (master-detail child of a project)
     3. DevOpsRecord__c ......... ALL fields, where DevOpsId__c != null
                                  (always - the junction points at it)
     4. SFDCObjectName targets .. for each object named in
                                  DevOpsProject__c.SFDCObjectName__c that is NOT
                                  DevOpsRecord (e.g. Case): only
                                  Id, DevOpsId__c, DevOpsProject__c  (DevOpsId != null)
     5. DevOpsRecordLink__c ..... ALL fields (junction Case <-> DevOpsRecord)

   ALSO take a manual Data Loader export of the same objects (see runbook) as a
   second, independent copy before you uninstall.

   Governor limits (synchronous Apex): 50k query rows, heap 6 MB. For large orgs,
   use the Data Loader export instead of / in addition to this script.
   ============================================================================ */

// --- Package namespace prefix as it appears in THIS org ---------------------
//     Managed-package customer org   -> 'ADL_AzureDevOps__'
//     Namespace-less dev/scratch org -> ''      (adjust before running)
final String NS = 'ADL_AzureDevOps__';

// --- Core Package Objects & Fields ------------------------------------------
final String PROJECT_OBJ   = NS + 'DevOpsProject__c';
final String FIELD_OBJ     = NS + 'DevOpsField__c';
final String RECORD_OBJ    = NS + 'DevOpsRecord__c';
final String LINK_OBJ      = NS + 'DevOpsRecordLink__c';
final String F_DEVOPSID    = NS + 'DevOpsId__c';        // external-id text on every target object
final String F_DEVOPSPROJ  = NS + 'DevOpsProject__c';   // project lookup on every target object
final String F_SFDCOBJNAME = NS + 'SFDCObjectName__c';  // the SF object a project maps to

// Initialize global describe and backup payload map
Map<String, Schema.SObjectType> gd = Schema.getGlobalDescribe();
Map<String, Object> backup = new Map<String, Object>();
backup.put('namespace',   NS);
backup.put('generatedAt', String.valueOf(Datetime.now()));

// ============================================================================
// 1) DevOpsProject__c  ---- ALL fields
// ============================================================================
List<String> projFields = new List<String>();
for (Schema.SObjectField f : gd.get(PROJECT_OBJ.toLowerCase()).getDescribe().fields.getMap().values()) {
    if (f.getDescribe().isAccessible()) projFields.add(f.getDescribe().getName());
}
List<SObject> projects = Database.query('SELECT ' + String.join(projFields, ',') + ' FROM ' + PROJECT_OBJ);
backup.put('projects', projects);

// ============================================================================
// 2) DevOpsField__c    ---- ALL fields
// ============================================================================
List<String> fieldFields = new List<String>();
for (Schema.SObjectField f : gd.get(FIELD_OBJ.toLowerCase()).getDescribe().fields.getMap().values()) {
    if (f.getDescribe().isAccessible()) fieldFields.add(f.getDescribe().getName());
}
backup.put('fields', Database.query('SELECT ' + String.join(fieldFields, ',') + ' FROM ' + FIELD_OBJ));

// ============================================================================
// 3) DevOpsRecord__c   ---- ALL fields, DevOpsId != null (always)
// ============================================================================
List<String> recFields = new List<String>();
for (Schema.SObjectField f : gd.get(RECORD_OBJ.toLowerCase()).getDescribe().fields.getMap().values()) {
    if (f.getDescribe().isAccessible()) recFields.add(f.getDescribe().getName());
}
backup.put('records', Database.query(
    'SELECT ' + String.join(recFields, ',') + ' FROM ' + RECORD_OBJ + ' WHERE ' + F_DEVOPSID + ' != null'));

// ============================================================================
// 4) Target Objects (Case, custom objects) -- link fields only
// ============================================================================
Set<String> targetNames = new Set<String>();
for (SObject p : projects) {
    String onn = (String) p.get(F_SFDCOBJNAME);
    if (String.isNotBlank(onn)) targetNames.add(onn);
}

Map<String, Object> targets = new Map<String, Object>();
for (String rawName : targetNames) {
    // Resolve a stored target object name that may or may not carry the namespace
    Schema.SObjectType t = gd.get(rawName.toLowerCase());
    if (t == null) t = gd.get((NS + rawName).toLowerCase());
    if (t == null) {
        System.debug('BACKUP: skipping unknown SFDCObjectName -> ' + rawName);
        continue;
    }

    String apiName = t.getDescribe().getName();
    if (apiName.equalsIgnoreCase(RECORD_OBJ)) continue;   // Already captured in 'records' (#3)

    // --- Dynamic Field Resolution ---
    // Target objects (like Case or Test_Custom_Object__c) often have DevOps fields created manually
    // by admins, meaning they won't have the managed package namespace. We check if the namespaced
    // field exists; if not, we gracefully fallback to the local custom field name without the namespace.
    Map<String, Schema.SObjectField> fieldMap = t.getDescribe().fields.getMap();

    String targetDevOpsId = fieldMap.containsKey(F_DEVOPSID.toLowerCase()) ? F_DEVOPSID : 'DevOpsId__c';
    String targetDevOpsProj = fieldMap.containsKey(F_DEVOPSPROJ.toLowerCase()) ? F_DEVOPSPROJ : 'DevOpsProject__c';

    // Safety check: Ensure the fields actually exist before building the query to prevent crashes
    if (!fieldMap.containsKey(targetDevOpsId.toLowerCase()) || !fieldMap.containsKey(targetDevOpsProj.toLowerCase())) {
        System.debug('BACKUP: skipping ' + apiName + ' - missing required ' + targetDevOpsId + ' or ' + targetDevOpsProj + ' fields.');
        continue;
    }

    Map<String, Object> entry = new Map<String, Object>();
    entry.put('object', apiName);
    entry.put('mode', 'linkOnly');
    entry.put('records', Database.query(
        'SELECT Id, ' + targetDevOpsId + ', ' + targetDevOpsProj + ' FROM ' + apiName +
        ' WHERE ' + targetDevOpsId + ' != null'));
    targets.put(apiName, entry);
}
backup.put('targets', targets);

// ============================================================================
// 5) DevOpsRecordLink__c  ---- junction Case <-> DevOpsRecord, ALL fields
// ============================================================================
Schema.SObjectType linkType = gd.get(LINK_OBJ.toLowerCase());
if (linkType != null) {
    List<String> lf = new List<String>();
    for (Schema.SObjectField f : linkType.getDescribe().fields.getMap().values()) {
        if (f.getDescribe().isAccessible()) lf.add(f.getDescribe().getName());
    }
    backup.put('recordLinks', Database.query('SELECT ' + String.join(lf, ',') + ' FROM ' + LINK_OBJ));
}

// ============================================================================
// --- Store the JSON as a downloadable File (survives uninstall) -------------
// ============================================================================
String jsonData = JSON.serialize(backup);
ContentVersion cv = new ContentVersion();
cv.Title        = 'ADLConnect_Migration_Backup';          // fixed title -> easy to find on restore
cv.PathOnClient = 'ADLConnect_Migration_Backup.json';
cv.VersionData  = Blob.valueOf(jsonData);
insert cv;

// ============================================================================
// --- Summary ----------------------------------------------------------------
// ============================================================================
System.debug('=========== ADL CONNECT BACKUP COMPLETE ===========');
System.debug('ContentVersion Id : ' + cv.Id);
System.debug('File Title        : ' + cv.Title + '   (use this to restore)');
System.debug('Payload size      : ' + jsonData.length() + ' chars');
System.debug('Projects          : ' + projects.size());
System.debug('Fields            : ' + ((List<SObject>) backup.get('fields')).size());
System.debug('DevOpsRecords     : ' + ((List<SObject>) backup.get('records')).size());
if (backup.containsKey('recordLinks')) System.debug('RecordLinks       : ' + ((List<SObject>) backup.get('recordLinks')).size());
for (String obj : targets.keySet()) {
    Map<String, Object> e = (Map<String, Object>) targets.get(obj);
    System.debug('Target ' + obj + ' [linkOnly] : ' + ((List<SObject>) e.get('records')).size() + ' record(s)');
}
System.debug('NOW: download this File AND take a Data Loader export before uninstalling.');
Step 2 — Reinstall ADL Connect
- Setup → Installed Packages — uninstall the current version, then install the latest (same namespace,
ADL_AzureDevOps). TheADLConnect_Migration_BackupFile stays in the org. - Re-grant the integration user’s API access and Case Read/Create/Edit if they were not carried over.
Step 3 — Restore your links
- Open Setup → Developer Console → Execute Anonymous Window.
- Paste 02_restore.apex (below), tick Open Log, and click Execute — run it once.
- It reads the backup File and puts your DevOps links back.
Run once. Running the restore twice creates duplicates.
/* ============================================================================
   ADL Connect  |  PRE-8.0 -> 8.x MIGRATION  |  STEP 2 : RESTORE
   ----------------------------------------------------------------------------
   WHERE : run in the NEW org, AFTER the 8.x package is installed.
   WHAT  : reads the backup File from 01_backup.apex, recreates the data and
           rewires EVERY relationship.

   Order (parents before children):
     1. DevOpsProject__c ....... insert new; keep old-Id -> new-Id map
     2. DevOpsField__c ......... insert new; rewire project master
     3. DevOpsRecord__c ........ insert new; rewire project lookups;
                                 keep old-Id -> new-Id map
     4. targets "linkOnly" ..... UPDATE existing Case/custom records
     5. DevOpsRecordLink__c .... insert new; rewire DevOpsRecord (new) + keep Case

   * DevOpsComment__c processing has been omitted per request.
   ============================================================================ */

final String NS           = 'ADL_AzureDevOps__';
final String BACKUP_TITLE = 'ADLConnect_Migration_Backup';

final String PROJECT_OBJ  = NS + 'DevOpsProject__c';
final String FIELD_OBJ    = NS + 'DevOpsField__c';
final String RECORD_OBJ   = NS + 'DevOpsRecord__c';
final String LINK_OBJ     = NS + 'DevOpsRecordLink__c';

final String F_DEVOPSID     = NS + 'DevOpsId__c';
final String F_DEVOPSPROJ   = NS + 'DevOpsProject__c';
final String F_DEVOPSRECORD = NS + 'DevOpsRecord__c';    // record lookup on junction
final String F_CASELINK     = NS + 'CaseRecordLink__c';  // Case lookup on junction

Map<String, Schema.SObjectType> gd = Schema.getGlobalDescribe();
Map<String, Id> projOldToNew   = new Map<String, Id>();
Map<String, Id> recordOldToNew = new Map<String, Id>();

// --- Load the Backup File ---
ContentVersion cv = [SELECT VersionData FROM ContentVersion WHERE Title = :BACKUP_TITLE ORDER BY CreatedDate DESC LIMIT 1];
Map<String, Object> backup = (Map<String, Object>) JSON.deserializeUntyped(cv.VersionData.toString());

// ============================================================================
// 1) PROJECTS
// ============================================================================
Schema.SObjectType projType = gd.get(PROJECT_OBJ.toLowerCase());
Map<String, Schema.SObjectField> projFmap = projType.getDescribe().fields.getMap();
List<SObject> projIns = new List<SObject>();
List<String> projOldId = new List<String>();

for (Object o : (List<Object>) backup.get('projects')) {
    Map<String, Object> src = (Map<String, Object>) o;
    projOldId.add((String) src.get('Id'));
    SObject rec = projType.newSObject();

    for (String key : src.keySet()) {
        Schema.SObjectField sf = projFmap.get(key.toLowerCase());
        if (sf == null) continue;
        Schema.DescribeFieldResult dfr = sf.getDescribe();
        if (!dfr.isCreateable() || dfr.getType() == Schema.DisplayType.REFERENCE) continue;
        Object v = src.get(key);
        if (v == null) continue;

        // Handle Date/Time deserialization
        if (dfr.getType() == Schema.DisplayType.DATE) v = (Date) JSON.deserialize(JSON.serialize(v), Date.class);
        else if (dfr.getType() == Schema.DisplayType.DATETIME) v = (Datetime) JSON.deserialize(JSON.serialize(v), Datetime.class);
        rec.put(dfr.getName(), v);
    }
    projIns.add(rec);
}
// Insert and map old IDs to newly generated IDs
List<Database.SaveResult> projRes = Database.insert(projIns, false);
for (Integer i = 0; i < projRes.size(); i++) {
    if (projRes[i].isSuccess()) projOldToNew.put(projOldId[i], projRes[i].getId());
}

// ============================================================================
// 2) FIELDS (Rewire the Master-Detail lookup to Project)
// ============================================================================
Schema.SObjectType fldType = gd.get(FIELD_OBJ.toLowerCase());
Map<String, Schema.SObjectField> fldFmap = fldType.getDescribe().fields.getMap();
List<SObject> fldIns = new List<SObject>();

for (Object o : (List<Object>) backup.get('fields')) {
    Map<String, Object> src = (Map<String, Object>) o;
    String oldProj = (String) src.get(F_DEVOPSPROJ);

    // Skip if the parent project wasn't mapped successfully
    if (oldProj == null || !projOldToNew.containsKey(oldProj)) continue;

    SObject rec = fldType.newSObject();
    for (String key : src.keySet()) {
        Schema.SObjectField sf = fldFmap.get(key.toLowerCase());
        if (sf == null) continue;
        Schema.DescribeFieldResult dfr = sf.getDescribe();
        if (!dfr.isCreateable()) continue;
        Object v = src.get(key);
        if (v == null) continue;

        if (dfr.getType() == Schema.DisplayType.REFERENCE) {
            String ref = String.valueOf(v);
            if (projOldToNew.containsKey(ref)) rec.put(dfr.getName(), projOldToNew.get(ref));
            continue;
        }
        if (dfr.getType() == Schema.DisplayType.DATE) v = (Date) JSON.deserialize(JSON.serialize(v), Date.class);
        else if (dfr.getType() == Schema.DisplayType.DATETIME) v = (Datetime) JSON.deserialize(JSON.serialize(v), Datetime.class);
        rec.put(dfr.getName(), v);
    }
    fldIns.add(rec);
}
Database.insert(fldIns, false);

// ============================================================================
// 3) DEVOPS RECORDS (Rewire Project lookups)
// ============================================================================
Schema.SObjectType recType = gd.get(RECORD_OBJ.toLowerCase());
Map<String, Schema.SObjectField> recFmap = recType.getDescribe().fields.getMap();
List<SObject> recIns = new List<SObject>();
List<String> recOldId = new List<String>();

for (Object o : (List<Object>) backup.get('records')) {
    Map<String, Object> src = (Map<String, Object>) o;
    recOldId.add((String) src.get('Id'));
    SObject rec = recType.newSObject();

    for (String key : src.keySet()) {
        Schema.SObjectField sf = recFmap.get(key.toLowerCase());
        if (sf == null) continue;
        Schema.DescribeFieldResult dfr = sf.getDescribe();
        if (!dfr.isCreateable()) continue;
        Object v = src.get(key);
        if (v == null) continue;

        if (dfr.getType() == Schema.DisplayType.REFERENCE) {
            String ref = String.valueOf(v);
            if (projOldToNew.containsKey(ref)) rec.put(dfr.getName(), projOldToNew.get(ref));
            continue;
        }
        if (dfr.getType() == Schema.DisplayType.DATE) v = (Date) JSON.deserialize(JSON.serialize(v), Date.class);
        else if (dfr.getType() == Schema.DisplayType.DATETIME) v = (Datetime) JSON.deserialize(JSON.serialize(v), Datetime.class);
        rec.put(dfr.getName(), v);
    }
    recIns.add(rec);
}
// Insert and map old IDs to newly generated IDs
List<Database.SaveResult> recRes = Database.insert(recIns, false);
for (Integer i = 0; i < recRes.size(); i++) {
    if (recRes[i].isSuccess()) recordOldToNew.put(recOldId[i], recRes[i].getId());
}

// ============================================================================
// 4) TARGETS (Update existing Case/Custom records with new Project Lookups)
// ============================================================================
Map<String, Object> targets = (Map<String, Object>) backup.get('targets');
if (targets != null) {
    for (String objName : targets.keySet()) {
        Map<String, Object> entry = (Map<String, Object>) targets.get(objName);
        Schema.SObjectType t = gd.get(objName.toLowerCase());
        Map<String, Schema.SObjectField> fieldMap = t.getDescribe().fields.getMap();

        // Dynamically resolve fields for standard/custom target objects
        // that might not have the package namespace.
        String targetDevOpsId = fieldMap.containsKey(F_DEVOPSID.toLowerCase()) ? F_DEVOPSID : 'DevOpsId__c';
        String targetDevOpsProj = fieldMap.containsKey(F_DEVOPSPROJ.toLowerCase()) ? F_DEVOPSPROJ : 'DevOpsProject__c';

        List<SObject> upd = new List<SObject>();
        for (Object o : (List<Object>) entry.get('records')) {
            Map<String, Object> src = (Map<String, Object>) o;
            Id recId = (Id) src.get('Id');
            if (recId == null) continue;

            SObject rec = t.newSObject(recId);
            rec.put(targetDevOpsId, (String) src.get(targetDevOpsId));

            String oldProj = (String) src.get(targetDevOpsProj);
            if (oldProj != null && projOldToNew.containsKey(oldProj)) {
                rec.put(targetDevOpsProj, projOldToNew.get(oldProj));
            }
            upd.add(rec);
        }
        Database.update(upd, false);
    }
}

// ============================================================================
// 5) RECORD LINKS (Junction Object between Case and DevOpsRecord)
// ============================================================================
if (backup.containsKey('recordLinks')) {
    Schema.SObjectType linkType = gd.get(LINK_OBJ.toLowerCase());
    Map<String, Schema.SObjectField> linkFmap = linkType.getDescribe().fields.getMap();
    List<SObject> linkIns = new List<SObject>();

    for (Object o : (List<Object>) backup.get('recordLinks')) {
        Map<String, Object> src = (Map<String, Object>) o;
        String oldRec = (String) src.get(F_DEVOPSRECORD);

        // Skip if the parent DevOpsRecord wasn't mapped successfully
        if (oldRec == null || !recordOldToNew.containsKey(oldRec)) continue;

        SObject rec = linkType.newSObject();
        for (String key : src.keySet()) {
            Schema.SObjectField sf = linkFmap.get(key.toLowerCase());
            if (sf == null) continue;
            Schema.DescribeFieldResult dfr = sf.getDescribe();
            if (!dfr.isCreateable()) continue;
            Object v = src.get(key);
            if (v == null) continue;

            if (dfr.getType() == Schema.DisplayType.REFERENCE) {
                String ref = String.valueOf(v);

                // Map to the newly created DevOpsRecord__c
                if (recordOldToNew.containsKey(ref)) {
                    rec.put(dfr.getName(), recordOldToNew.get(ref));
                }
                // Target ID (like Case) is stable because this is the same org
                else if (dfr.getName().equalsIgnoreCase(F_CASELINK)) {
                    rec.put(dfr.getName(), (Id) v);
                }
                continue;
            }
            rec.put(dfr.getName(), v);
        }
        linkIns.add(rec);
    }
    Database.insert(linkIns, false);
}

System.debug('=========== ADL CONNECT RESTORE COMPLETE ===========');
System.debug('Projects mapped old->new : ' + projOldToNew.size());
System.debug('Records  mapped old->new : ' + recordOldToNew.size());
Check it worked
Open a Case that was linked before — the DevOps link and its project are back. That’s it.
Frequently Asked Questions (FAQ)
General Overview
Q1: What is ADL Connect and what problem does it solve?
A: ADL Connect is a bidirectional integration tool that synchronizes Salesforce records with Azure DevOps Work Items. It eliminates duplicate data entry, improves collaboration between support and development teams, and provides real-time visibility into issue progress—without requiring users to switch systems.
Q2: Which Azure DevOps versions does ADL Connect support?
A: ADL Connect supports:
- Azure DevOps Services (Cloud)
- Azure DevOps Server (on-premises)
Authentication methods vary depending on the Azure DevOps deployment.
Q3: Can I try ADL Connect before purchasing a license?
A: Yes. ADL Connect offers a free 30-day trial via Salesforce AppExchange, allowing full feature evaluation before purchase.
Setup and Configuration
Q4: Do I need admin permissions to configure ADL Connect?
A: Yes.
- Salesforce: System Administrator permissions are required to install the package, configure page layouts, set up Salesforce Sites, and manage field-level security.
- Azure DevOps: Administrator permissions are required to create custom fields and manage API tokens.
Q5: Why is a custom Azure DevOps field required for Salesforce record IDs?
A: ADL Connect requires a custom short-text field in Azure DevOps to store the Salesforce record ID. This field enables the connector to:
- Link Azure DevOps Work Items back to Salesforce
- Maintain bidirectional field synchronization
- Prevent duplicate issue relationships
Without this field, linking and synchronization will not function correctly.
Q6: How do I authenticate Salesforce with Azure DevOps?
A: Authentication is performed using:
- Microsoft email or username
- Azure DevOps API Token
The token must be generated in Azure DevOps user settings and entered into the ADL Connect Authentication Console.
Q7: Which Salesforce objects can be synced with Azure DevOps Work Items?
A: ADL Connect supports:
- Standard objects (e.g., Case, Opportunity, Account)
- Custom objects
Any field can be mapped as long as the Salesforce and Azure DevOps data types are compatible.
Q8: What is a Project Mapping and why is it required?
A: A Project Mapping defines:
- Which Salesforce object maps to which Azure DevOps project
- Which Azure DevOps Work Item type is used
- Which Azure DevOps field stores the Salesforce record ID
It is the foundation for all field mappings and synchronization logic.
Synchronization Behavior
Q9: What synchronization directions are supported?
A: ADL Connect supports:
- Salesforce → Azure DevOps (Outbound)
- Azure DevOps → Salesforce (Inbound)
- Bidirectional synchronization
Sync direction is configurable at the field level.
Q10: How often does data synchronization occur?
A: Synchronization is near real-time.
- Outbound sync occurs immediately when Salesforce records are saved.
- Inbound sync occurs as soon as Azure DevOps sends webhook events to Salesforce via the configured Salesforce Site.
Q11: Can I control which fields sync between Salesforce and Azure DevOps?
A: Yes. Field-level mapping allows you to define:
- Field-to-field relationships
- Sync direction
- Required, optional, or read-only behavior
Q12: Are comments and attachments synchronized?
A: Yes.
- Comments synchronize bidirectionally between Salesforce and Azure DevOps.
- Attachments can be viewed, uploaded, and downloaded directly from Salesforce.
Q13: How does ADL Connect prevent accidental data overwrites?
A: Each field mapping includes a defined sync direction, allowing you to control which system acts as the source of truth for each field.
Usage Questions
Q14: Can Salesforce users create Azure DevOps Work Items without Azure DevOps licenses?
A: Yes. Salesforce users do not require Azure DevOps licenses to create or update Work Items through ADL Connect. Azure DevOps license restrictions apply only within Azure DevOps itself.
Q15: Can Azure DevOps Work Items be edited directly from Salesforce?
A: Yes. Using the ADL AzureDevOps Details component, users can update:
- State
- Summary
- Assignee
- Any mapped fields
All updates sync to Azure DevOps in real time.
Q16: Can I link an existing Azure DevOps Work Item instead of creating a new one?
A: Yes. The Search & Link feature allows users to:
- Search Azure DevOps by keyword
- Select an existing Work Item
- Link it to a Salesforce record
- Automatically retrieve comments and attachments
Q17: Can multiple Salesforce records link to the same Azure DevOps Work Item?
A: This depends on configuration. By default, one Salesforce record maps to one Azure DevOps Work Item, but advanced configurations can support one-to-many relationships.
Troubleshooting
Q18: Some Salesforce fields do not appear in the Azure DevOps Details component. What should I check?
Verify that:
- The field is on the Page Layout
- The field is included in the Lightning Record Page
- Field-Level Security allows visibility
- The field is included in Project Mapping and Field Mapping
Q19: Inbound synchronization is not working. What should I verify first?
Check the following:
- Salesforce Site domain is registered
- Correct Site Subdomain Prefix ID is used
- Guest User permissions are configured correctly
- Azure DevOps webhook points to the correct Site endpoint
- Inbound Rule is saved and mapped correctly
Q20: Why are Azure DevOps comments not appearing in Salesforce?
Common causes include:
- Azure DevOps webhook not configured
- Missing inbound permissions
- Azure DevOps Comments component not added to the page
- Incorrect project or field mapping
Q21: Why does the Azure DevOps Work Item ID not appear after creation?
Verify that:
- API token authentication is valid
- Project Mapping is correctly configured
- Salesforce record is saved before Work Item creation
- Azure DevOps custom Salesforce ID field exists and is mapped
Q22: Attachments are not appearing in Salesforce. What should I do?
Ensure that:
- ADL AzureDevOps Attachments component is added to the page
- Salesforce Site Guest User has read access to attachment fields
- Azure DevOps API permissions allow attachment access
Security and Access
Q23: How secure is Salesforce–Azure DevOps authentication?
A: Authentication uses API tokens and HTTPS endpoints. Passwords are never stored in Salesforce, and tokens can be revoked at any time in Azure DevOps.
Q24: Does the Salesforce Site Guest User pose a security risk?
A: No, when properly configured. Security is maintained by:
- Granting only required permissions
- Restricting object and field access
- Using Salesforce sharing rules
ADL Connect accesses only mapped objects and fields.
Q25: Can I restrict who can create Azure DevOps Work Items in Salesforce?
A: Yes. Component access can be controlled using:
- Profiles
- Permission sets
- Lightning page visibility rules
Licensing and Maintenance
Q26: Do all Salesforce users need ADL Connect licenses?
A: Only users who interact with ADL Connect components require licenses. Administrators configuring the integration also require licenses.
Q27: What happens if the ADL Connect license expires?
A: Issue creation and synchronization are disabled until renewal. Existing mappings and integrated data remain intact.
Q28: How often are updates released?
A: Updates are released periodically through Salesforce AppExchange. Administrators are notified when new versions are available.
Azure DevOps to Salesforce Connector - (MarketPlace)
Azure DevOps to Salesforce Connector (Marketplace)
ADL Connect for Azure DevOps is a powerful, bidirectional integration that connects Azure DevOps with Salesforce to create a unified workflow across Engineering, Support, and Customer-facing teams. The connector enables seamless management of Salesforce records — Cases, Accounts, Opportunities, Leads, and custom objects — directly from within the Azure DevOps work item view.
By bringing Salesforce context into Azure DevOps, ADL Connect eliminates the need for developers to leave their work management tool to update customer records, reduces context switching, and accelerates the feedback loop between engineering and the business.
Through its intuitive administrator configuration, secure OAuth 2.0-based authentication model, and flexible mapping framework, ADL Connect allows organizations to centralize cross-system collaboration while keeping data secure, auditable, and consistent across both platforms.
Purpose
The primary objective of ADL Connect for Azure DevOps is to provide a seamless bridge between Azure DevOps users and Salesforce users, ensuring that customer-impacting work items, escalations, and development activities progress efficiently throughout their lifecycle without manual duplication.
This integration is particularly beneficial for:
Azure DevOps Administrators
Require a configurable, scalable, and secure integration to connect engineering workflows with Salesforce data.
Developers and Engineering Teams
Need direct visibility into the Salesforce Cases, Accounts, or Opportunities associated with the Azure DevOps work item they are working on — without requiring a Salesforce license.
Support and Customer Success Teams
Benefit from real-time visibility into engineering progress on issues originating from Salesforce, with bidirectional synchronization of comments and field updates.
Project Managers and Product Owners
Gain unified traceability between customer requests (Salesforce) and development execution (Azure DevOps).
ADL Connect ensures both engineering and customer-facing teams operate with a single source of truth, improving collaboration and reducing time-to-resolution.
What This Article Covers
This introductory article provides a high-level understanding of ADL Connect for Azure DevOps and what users can expect from the integration.
1. Core Features of ADL Connect for Azure DevOps
An overview of the essential capabilities, including:
- Many-to-many record linking between Azure DevOps work items and Salesforce records — a single work item can be linked to multiple Salesforce parent records, and a single Salesforce record can be linked to multiple Azure DevOps work items.
- Create Salesforce records directly from Azure DevOps with prefilled values from the work item (Title, Description, Assigned To, etc.).
- Search and link existing Salesforce records to the current Azure DevOps work item using a built-in lookup search panel.
- Inline editing of linked Salesforce records without leaving the Azure DevOps work item.
- Bidirectional synchronization of:
- Field values
- Comments
- Attachments
- Status changes
- Multi-org support — connect multiple Salesforce organizations (Production and Sandbox) to a single Azure DevOps organization, each managed independently.
- Secure OAuth 2.0 authentication with encrypted credential storage.
- Configurable field mappings, object mappings, and panel layouts scoped per Azure DevOps Project and Work Item Type.
These capabilities enable reliable synchronization and streamlined collaboration between Azure DevOps and Salesforce.
2. Installation and Initial Setup
A brief overview of the setup process, including:
- Installing ADL Connect for Azure DevOps.
- Preparing each Salesforce organization with the required Connected App and the AzureDevOpsRecordLink__c custom object together with the necessary parent lookup fields.
- Connecting one or more Salesforce organizations through the Salesforce Configuration page using OAuth.
- Configuring Project, Work Item Type, and field mappings between Azure DevOps and Salesforce objects.
- Defining Panel Fields that determine which Salesforce columns appear on the Azure DevOps work item panel.
This establishes the foundation required to successfully activate and use the integration.
3. How Azure DevOps and Salesforce Data Sync Works
An explanation of the bidirectional synchronization model, covering:
- How outbound synchronization pushes Azure DevOps work item updates into linked Salesforce records.
- How inbound synchronization retrieves Salesforce updates into the Azure DevOps work item panel in real time.
- The role of:
- AzureDevOpsRecord__c and AzureDevOpsRecordLink__c join objects
- Field mappings per (Azure DevOps Project, Work Item Type, Parent Object)
- The configurable parentLinkField on AzureDevOpsRecordLink__c
- Sync rules, conditions, and conflict handling
- Handling of comments, attachments, and rich-text content across both platforms.
This section helps users understand the expected behavior of the connector once configured.
4. Key Benefits for Operational Teams
A summary of the practical advantages organizations gain by using ADL Connect for Azure DevOps:
- Reduced manual data entry and administrative overhead by eliminating duplicate work across Azure DevOps and Salesforce.
- Improved visibility into customer impact for engineering teams working in Azure DevOps.
- Faster issue resolution through centralized communication and a shared system of record.
- Enhanced collaboration between Engineering, Support, Sales, and Customer Success teams.
- Stronger data integrity with administrator-validated mappings and per-organization isolation.
- Enterprise-grade security with encrypted credential storage, secure OAuth authentication, and administrator-controlled configuration.
These benefits lead to stronger cross-functional alignment, improved customer outcomes, and a more efficient engineering-to-business feedback loop.
Installation and Connection Setup
To begin using ADL Connect for Azure DevOps, the first step is to install the extension from the Azure DevOps Marketplace and complete the initial connection configuration. This setup establishes a secure communication channel between Azure DevOps and Salesforce, enabling all subsequent synchronization activities.
1. Launch the Configuration Console
Open the ADL Connect administration page from:
Azure DevOps Organization Settings → Extensions → ADL Connect → Salesforce Configuration
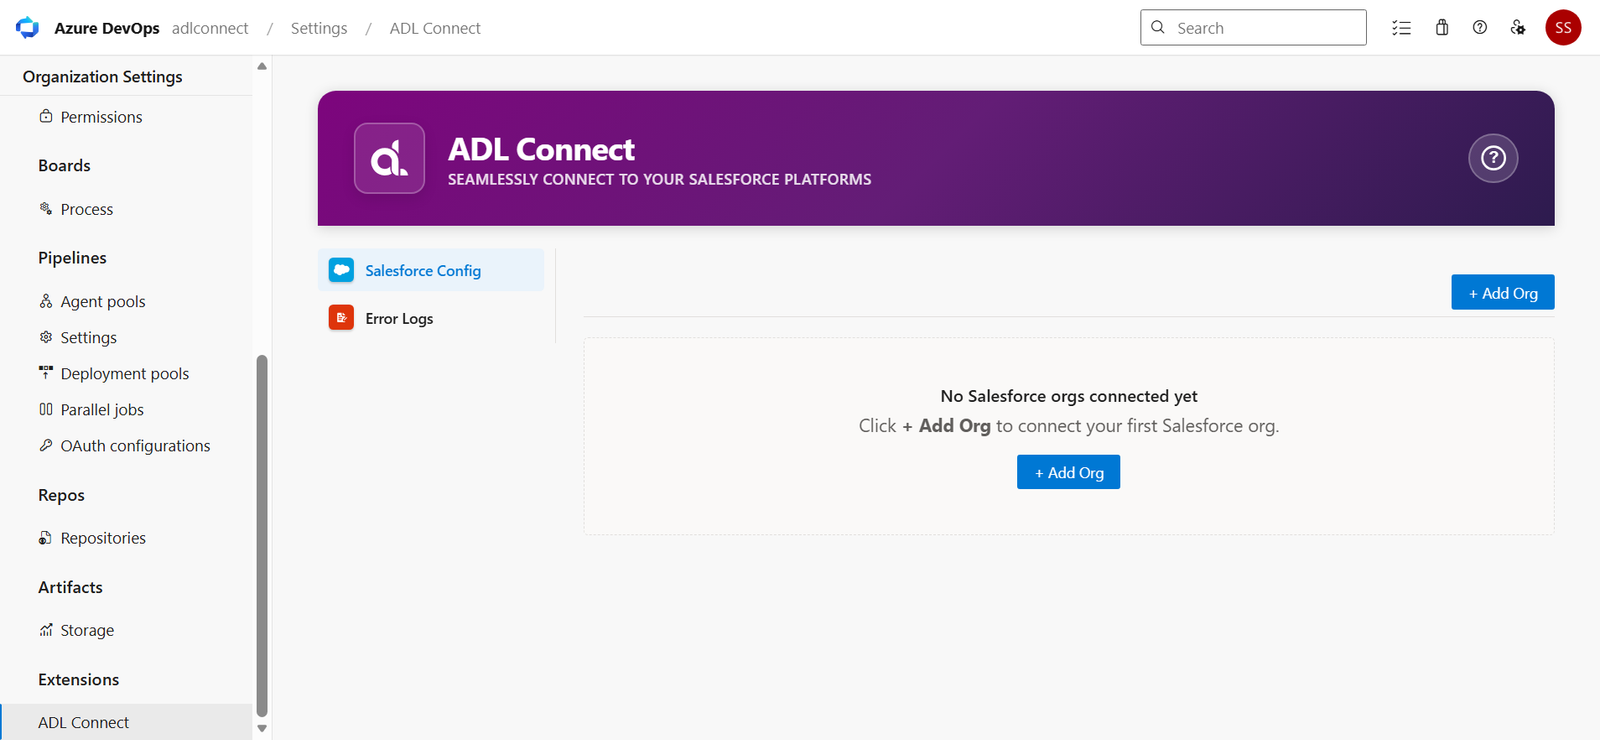
The configuration console serves as the central workspace for managing the integration, including:
- Connecting one or more Salesforce orgs (Production and Sandbox) via OAuth 2.0
- Configuring Azure DevOps project and Salesforce object mappings for different work item types
- Defining field mapping rules between Azure DevOps work item fields and Salesforce fields, including parent-record mappings
- Configuring Panel Fields — the columns displayed in the Azure DevOps work item panel for each linked Salesforce parent object
- Managing inbound and outbound synchronization settings
- Reviewing Error Logs for diagnostics, troubleshooting, and audit tracking (available as a separate administration page)
Creating the Salesforce External Client App (OAuth Credentials)
Before connecting a Salesforce org to ADL Connect for Azure DevOps, you must create an External Client App in Salesforce. This generates the Consumer Key and Consumer Secret required by the Azure DevOps-side Salesforce Configuration page to establish a secure OAuth 2.0 connection between Azure DevOps and Salesforce.
Note: Salesforce recommends using External Client Apps instead of the legacy Connected Apps for new integrations. The steps below use the External Client App Manager. If your Salesforce org still uses Connected Apps, the required configuration values—such as the Callback URL, OAuth Scopes, and OAuth Flow Settings—remain the same.
1. Open the External Client App Manager
- In Salesforce, click the gear icon → Setup.
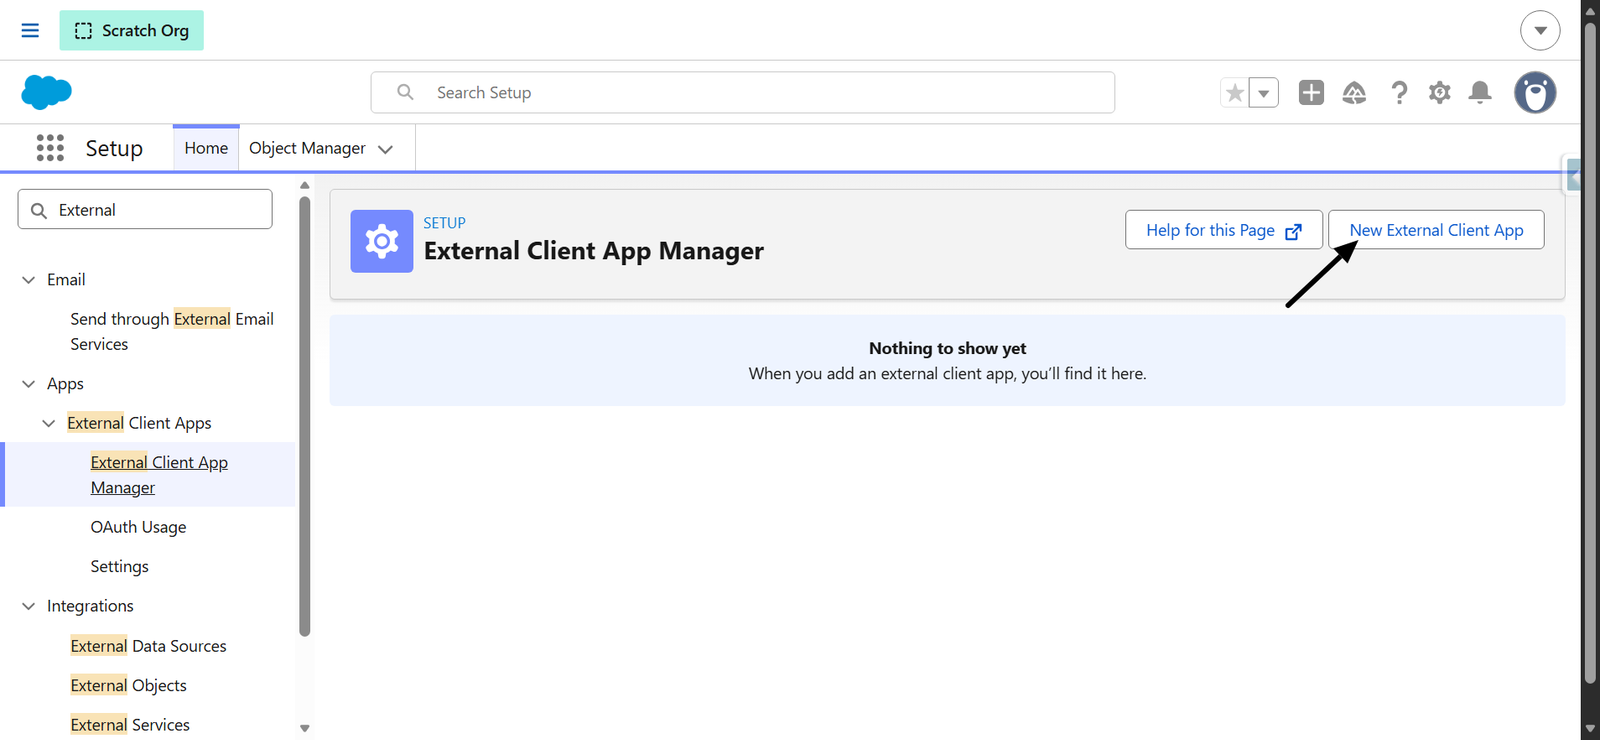
- In the Quick Find box on the left, type external and select External Client Apps → External Client App Manager.
- This page lists all External Client Apps already created in the org. Click New External Client App in the top-right to create a new one for the Azure DevOps integration.
2. Enter Basic Information
Fill in the Basic Information section:
- External Client App Name — e.g., ADLADOConnect (any descriptive name).
- API Name — auto-populated from the app name; leave as-is.
- Contact Email — a valid administrator email (e.g., sadiq.s@adlsolution.com).
- Distribution State — leave as Local.
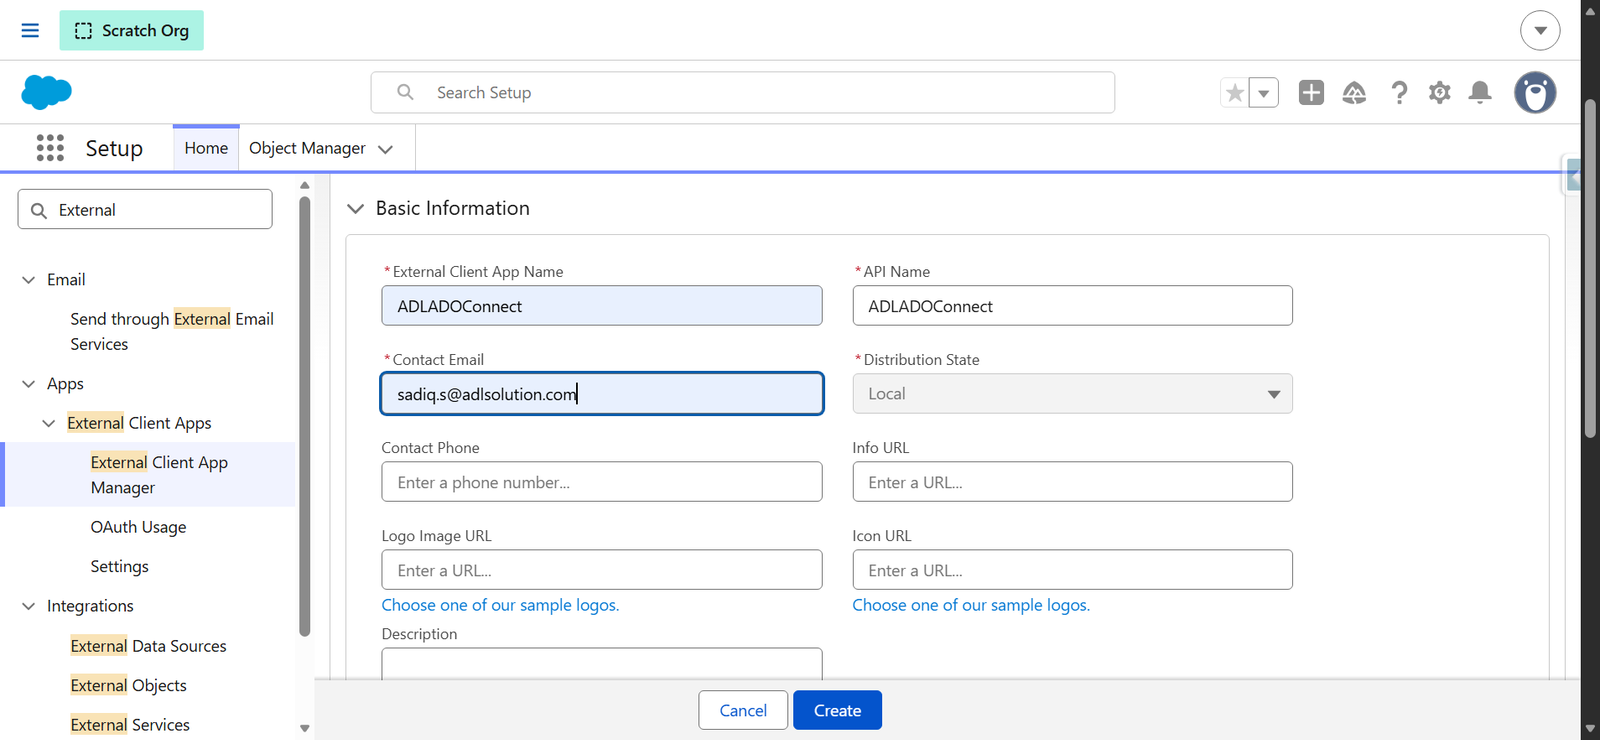
Leave Contact Phone, Info URL, Icon URL, Logo Image URL, and Description blank (optional).
3. Open Salesforce Configuration
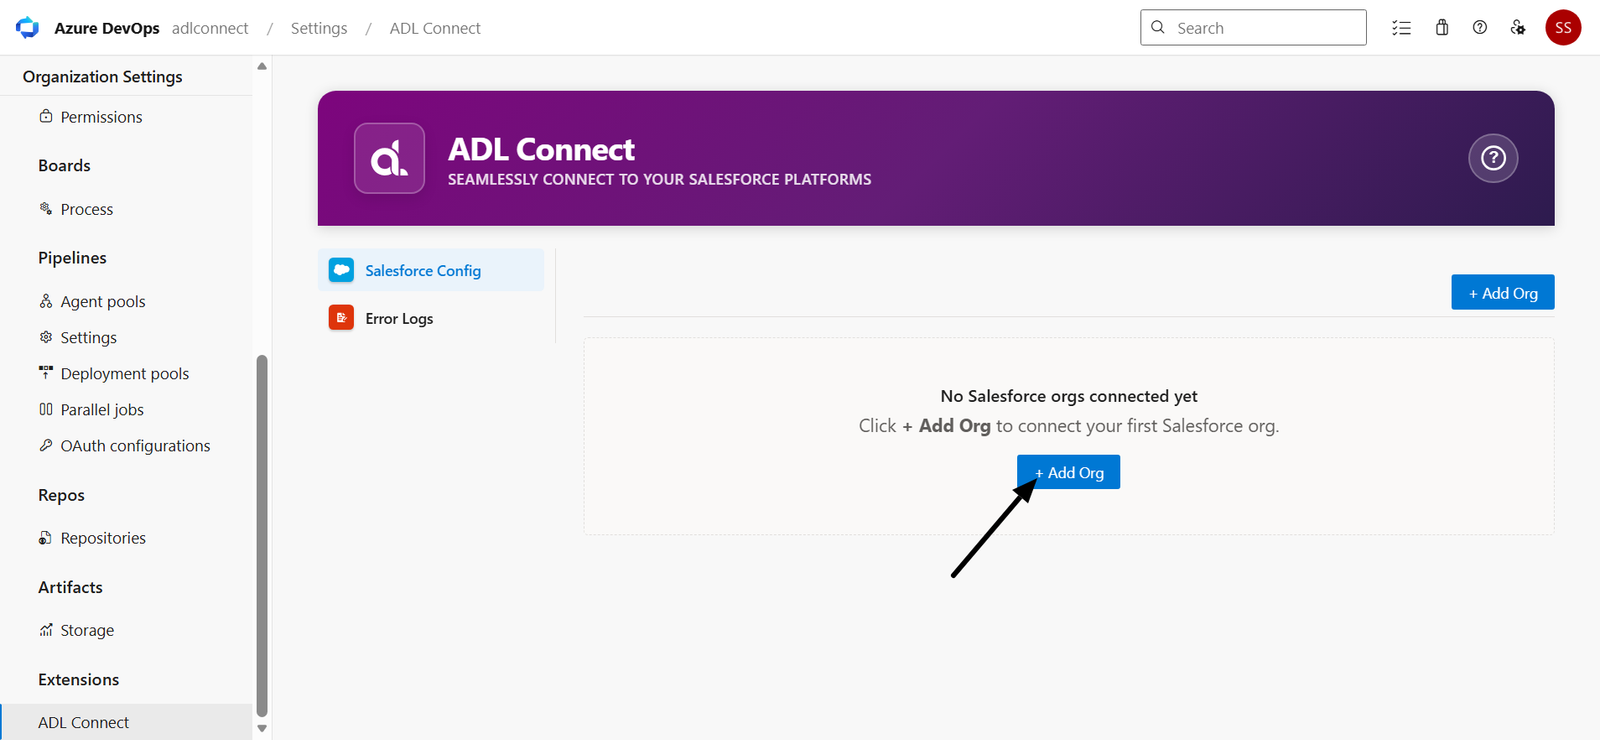
- In Azure DevOps, click the ⚙️ Project Settings icon → under Extensions in the left sidebar, select ADL Connect → Salesforce Configuration.
- The page opens with a No Salesforce orgs connected yet banner if no orgs have been linked yet.
- Click + Add Org in the top-right to start the connection flow.
4. Enter the Org Name and Choose the Environment
The New Salesforce Connection modal opens.
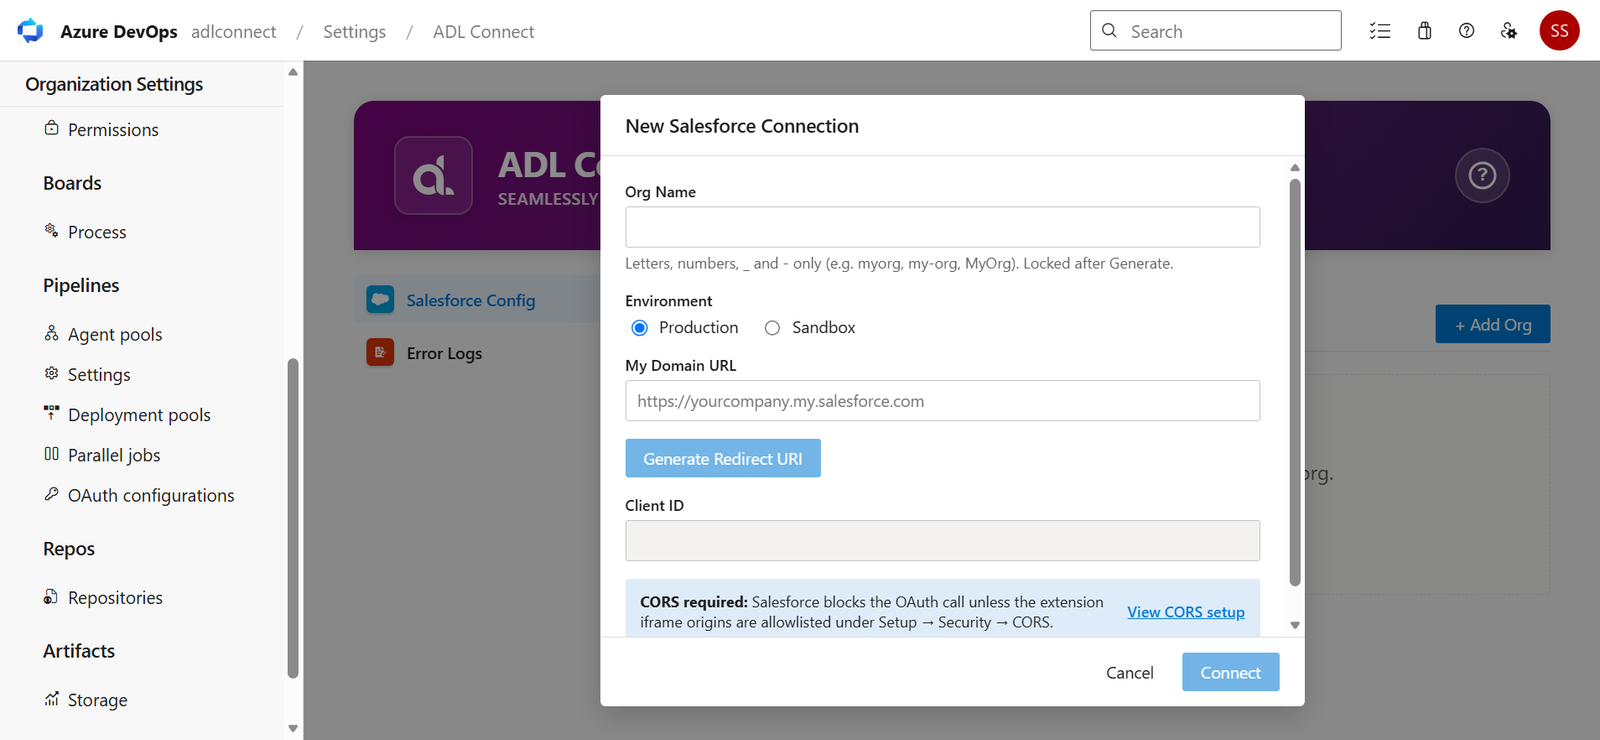
Fill in:
Org Name — a friendly identifier for this connection (e.g., ADLADOConnect).
- Copy the Salesforce My Domain URL from your browser and paste it into the My Domain URL field.
- Allowed characters: letters, numbers, underscore (_), and hyphen (-). No spaces.
- This name appears as the tab label on the Salesforce Configuration page and is used to scope mappings and stored credentials.
Environment — select either:
- Production — for live Salesforce orgs (login domain login.salesforce.com).
- Sandbox — for sandbox or scratch orgs (login domain test.salesforce.com).
Provide My Domain URL
- Go to Setup → Quick Find: My Domain → My Domain, then copy the Current My Domain URL (for example,
https://yourcompany.my.salesforce.com).
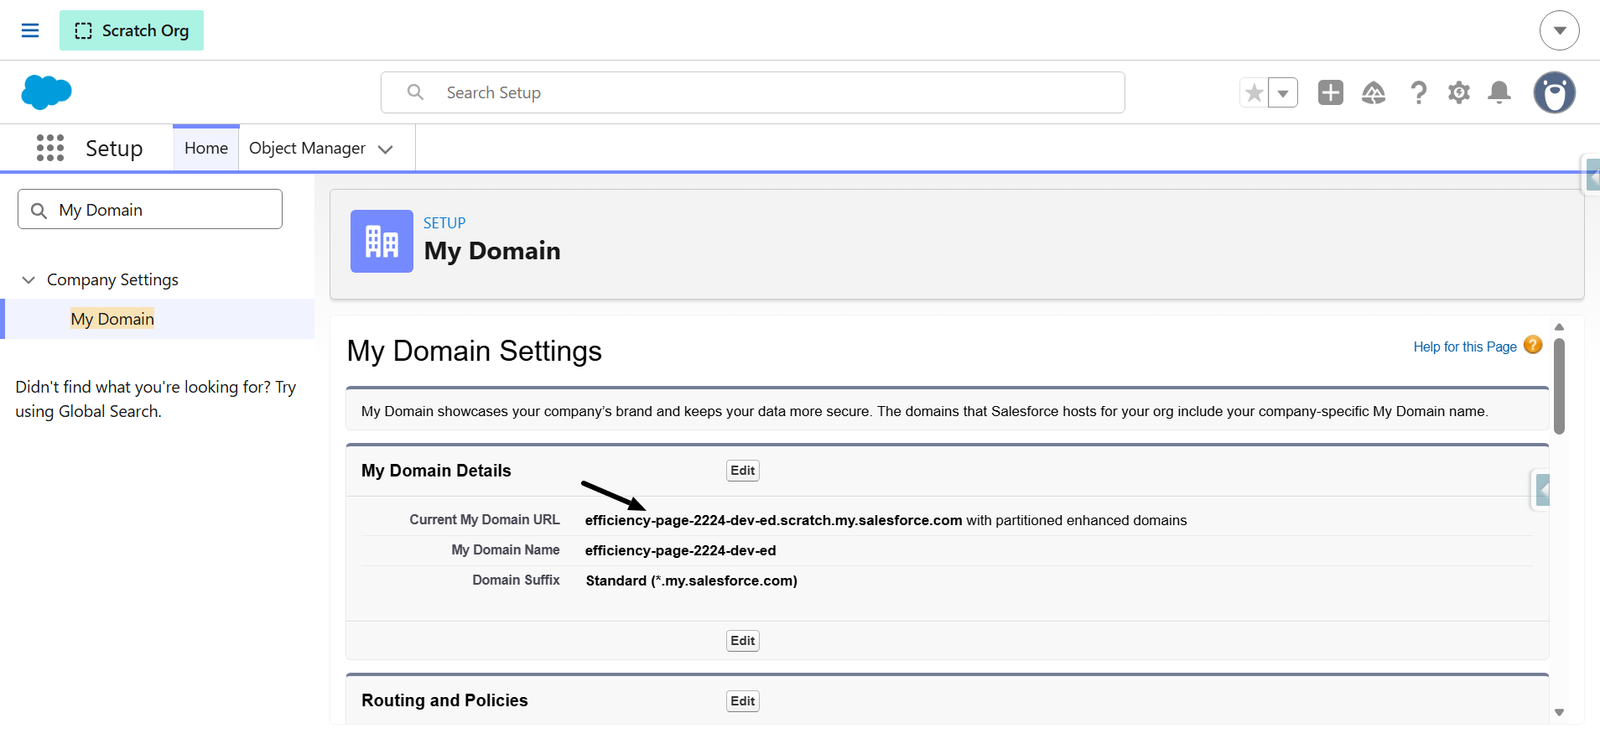
Note: The Client ID, Generate Redirect URI fields are disabled until you enter an Org Name and choose an environment.
5. Generate and Copy the Redirect URI
- Click Generate Redirect URI. The modal expands to show the Redirect URI specific to this org connection.
- Click Copy next to the Redirect URI field. If copying fails, manually copy the required value and proceed.
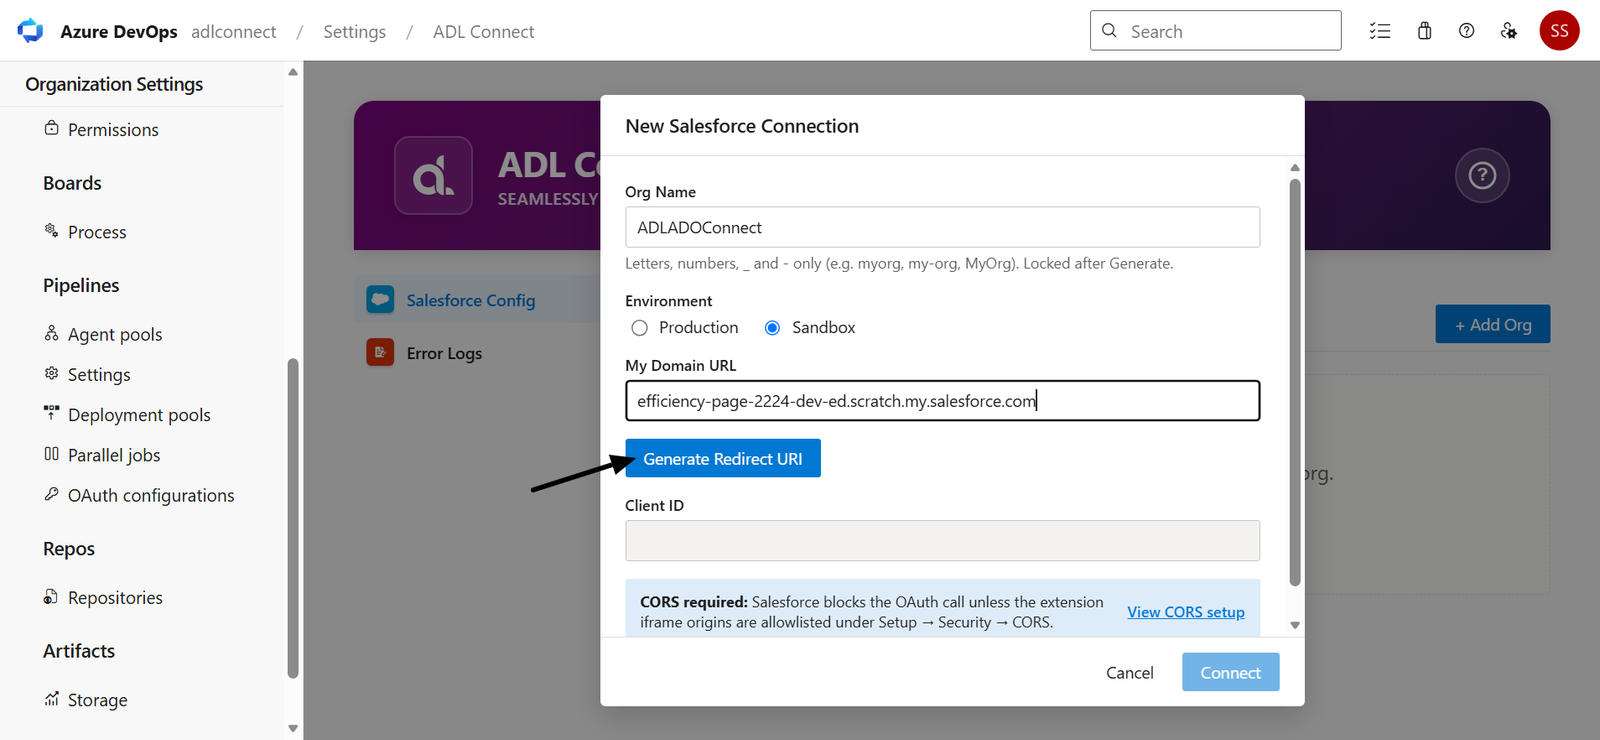
Important: This Redirect URI is the value you must paste into the Callback URL field of the Salesforce External Client App (see the Creating the Salesforce External Client App section). The URI is unique per org connection — it embeds the extension ID and the Org Name you entered.
A blue info banner reminds you:
- After creating the External Client App in Salesforce with this Redirect URI, wait 5–10 minutes for it to propagate before clicking Connect.
- Salesforce can take a few minutes to fully provision the OAuth endpoints for a newly created External Client App. Clicking Connect too early may result in an invalid_client_id or redirect_uri_mismatch error.
6. Enable OAuth and Configure the Callback URL
- In the API (Enable OAuth Settings) section, select the Enable OAuth checkbox.
- In the Callback URL field, enter the callback URL provided by your integration.
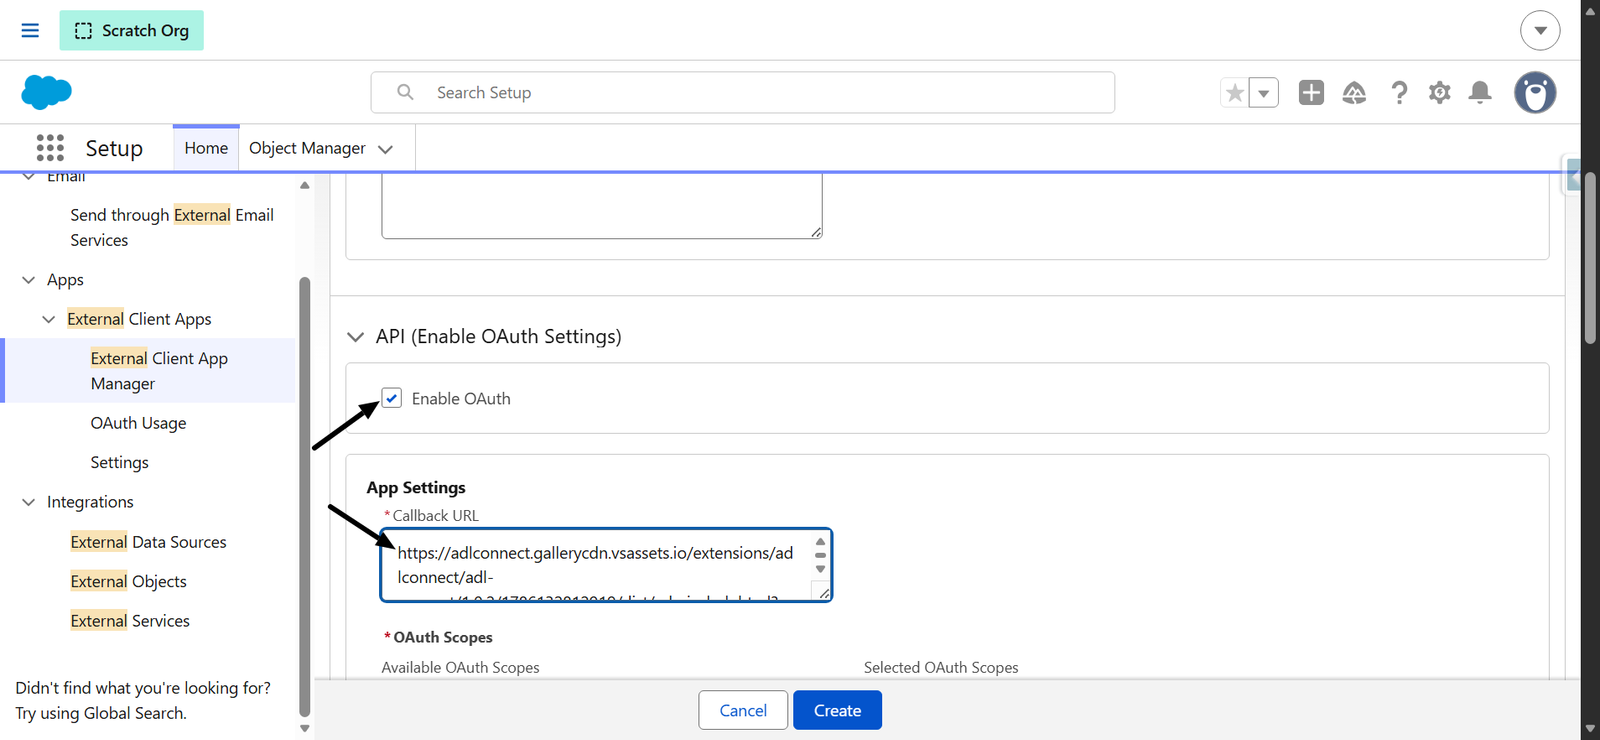
7. Select OAuth Scopes
Under OAuth Scopes, from the Available OAuth Scopes list, move the following two scopes into Selected OAuth Scopes using the right-arrow (▶) button:
- Full access (full)
- Perform requests at any time (refresh_token, offline_access)
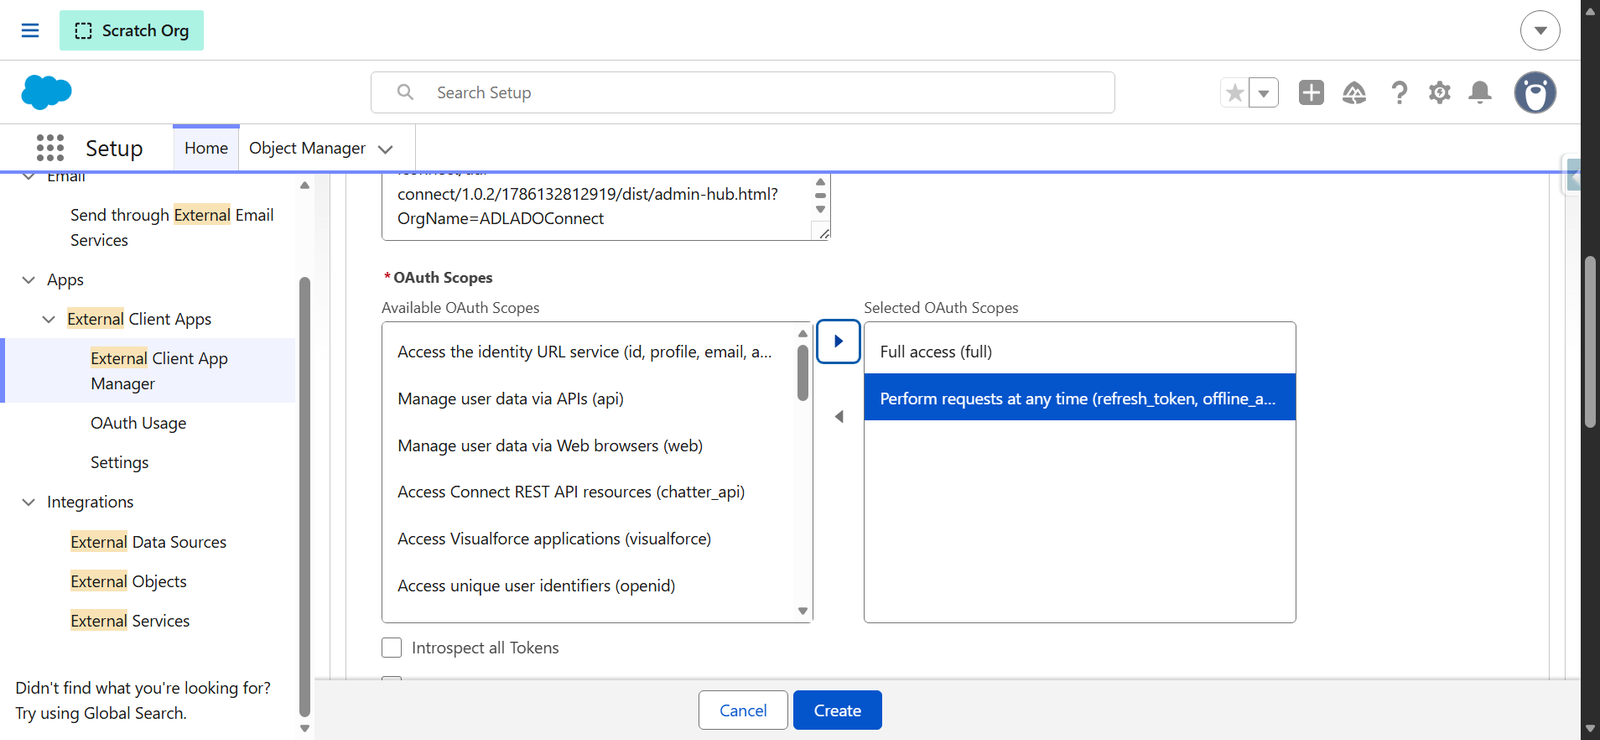
These two scopes are the minimum required for ADL Connect for Azure DevOps to read, write, and refresh tokens silently in the background.
Leave Introspect all Tokens and Configure ID token unchecked.
8. Configure Security Settings
In the Security section:
- Leave Require secret for Web Server Flow unchecked.
- Leave Require secret for Refresh Token Flow unchecked.
- Ensure Require Proof Key for Code Exchange (PKCE) extension for Supported Authorization Flows is selected.
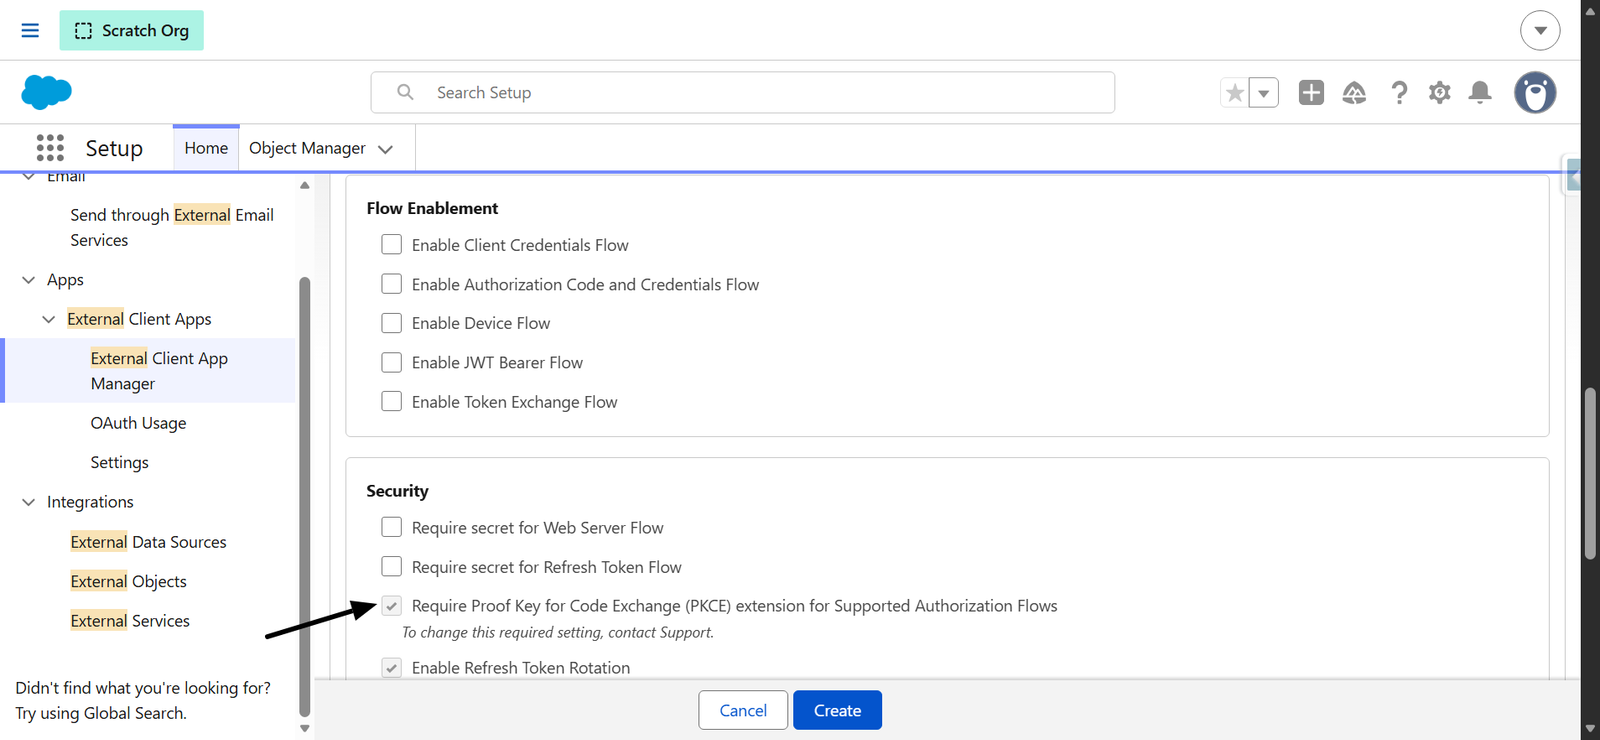
Click Create at the bottom of the page to save the External Client App.
Note: The security settings shown above match the current configuration displayed in the External Client App setup screen.
9. Retrieve the Consumer Key
After creation, open the newly created External Client App and locate the OAuth Settings section.
- Click Consumer Key and Secret → credentials (tooltip: Manage Consumer Details).
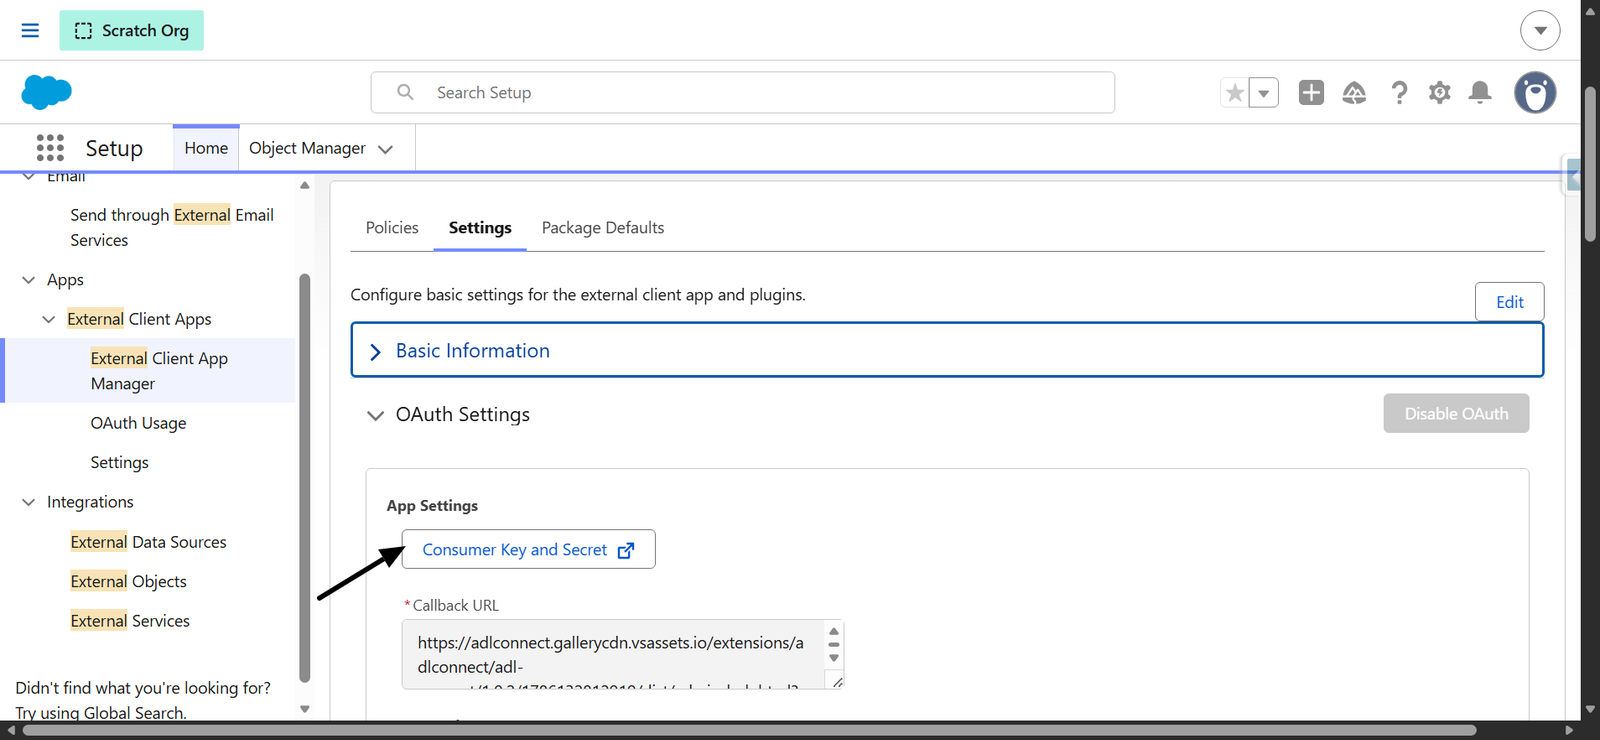
- You may be prompted to Verify Your Identity — Salesforce will email a verification code to the admin's email address. Enter the code and click Verify.
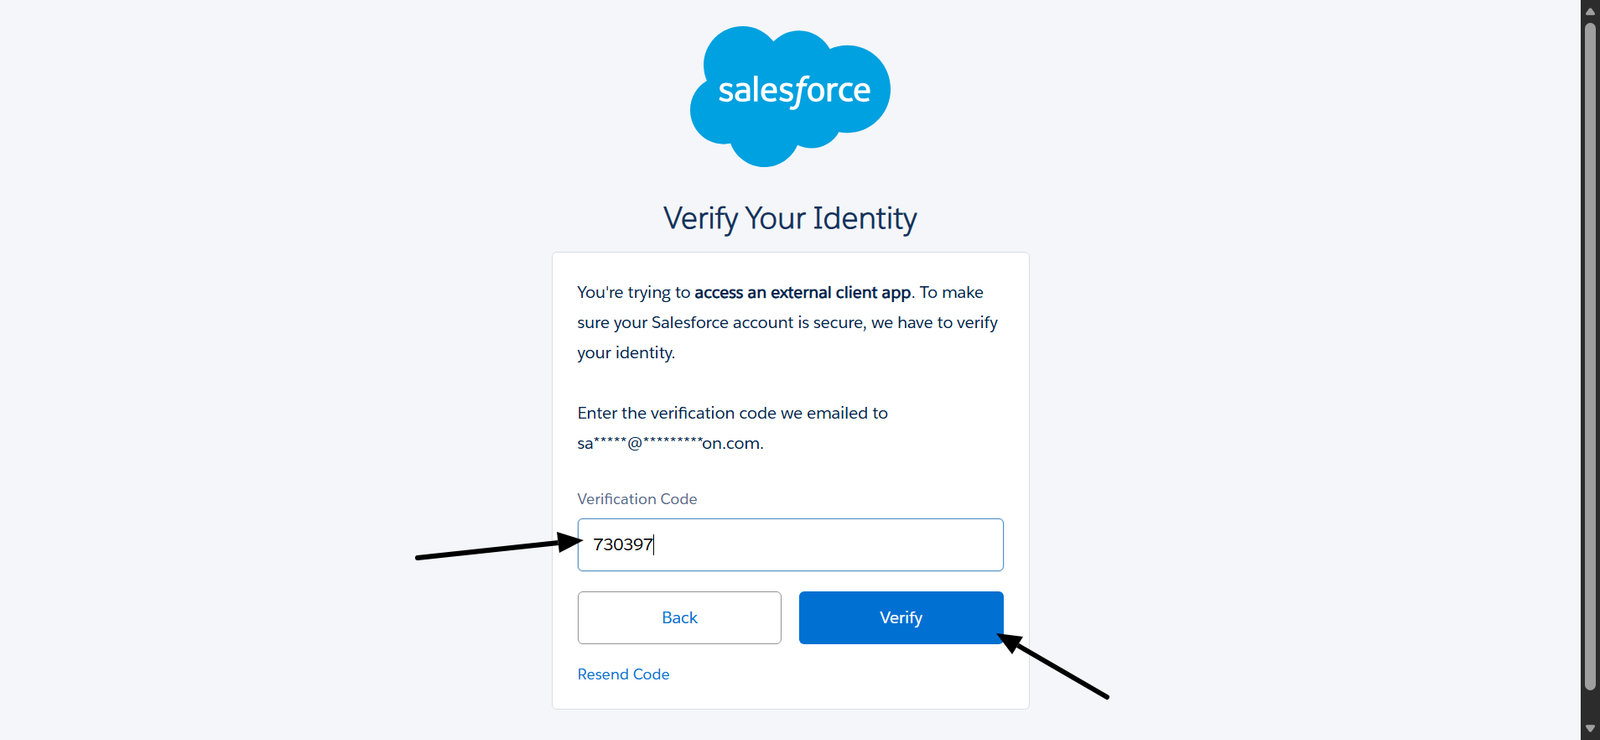
Once verified, the Consumer Details page displays:
- Consumer Key — the OAuth ClientID.
- Click Copy next to each value.
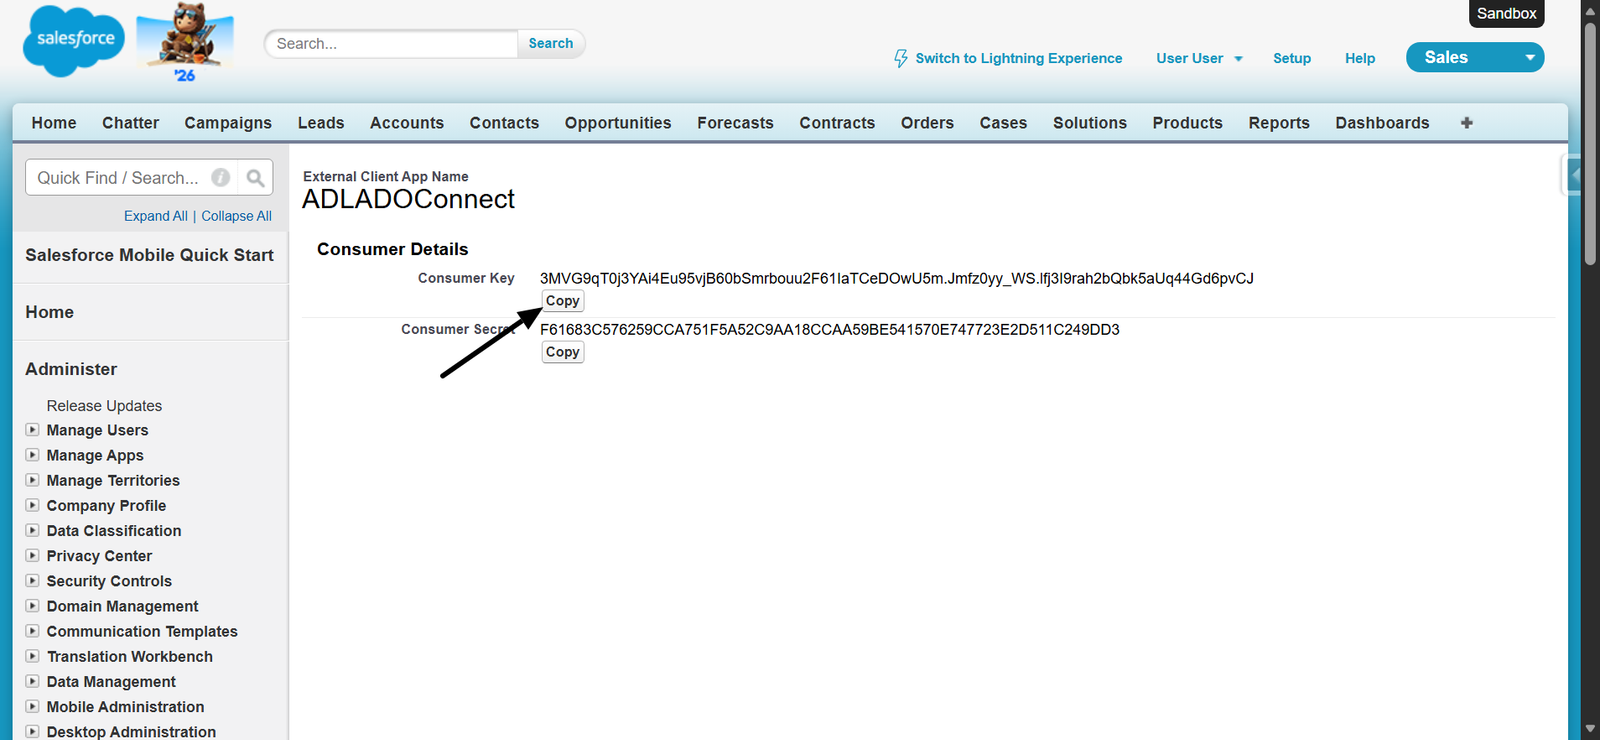
Configure Core Settings — Connect a Salesforce Org
Once the External Client App has been created in Salesforce and you have the Consumer Key and Consumer Secret in hand, return to Azure DevOps to complete the connection. The Core Settings step links your Salesforce org to ADL Connect for Azure DevOps using OAuth 2.0, with all tokens stored encrypted in secure extension storage scoped to this org.
1. Paste the Client ID
Switch to the Salesforce tab, copy the Consumer Key from the External Client App's Consumer Details page (see previous section), then return to Azure DevOps and paste them into the modal:
- Client ID → paste the Consumer Key.
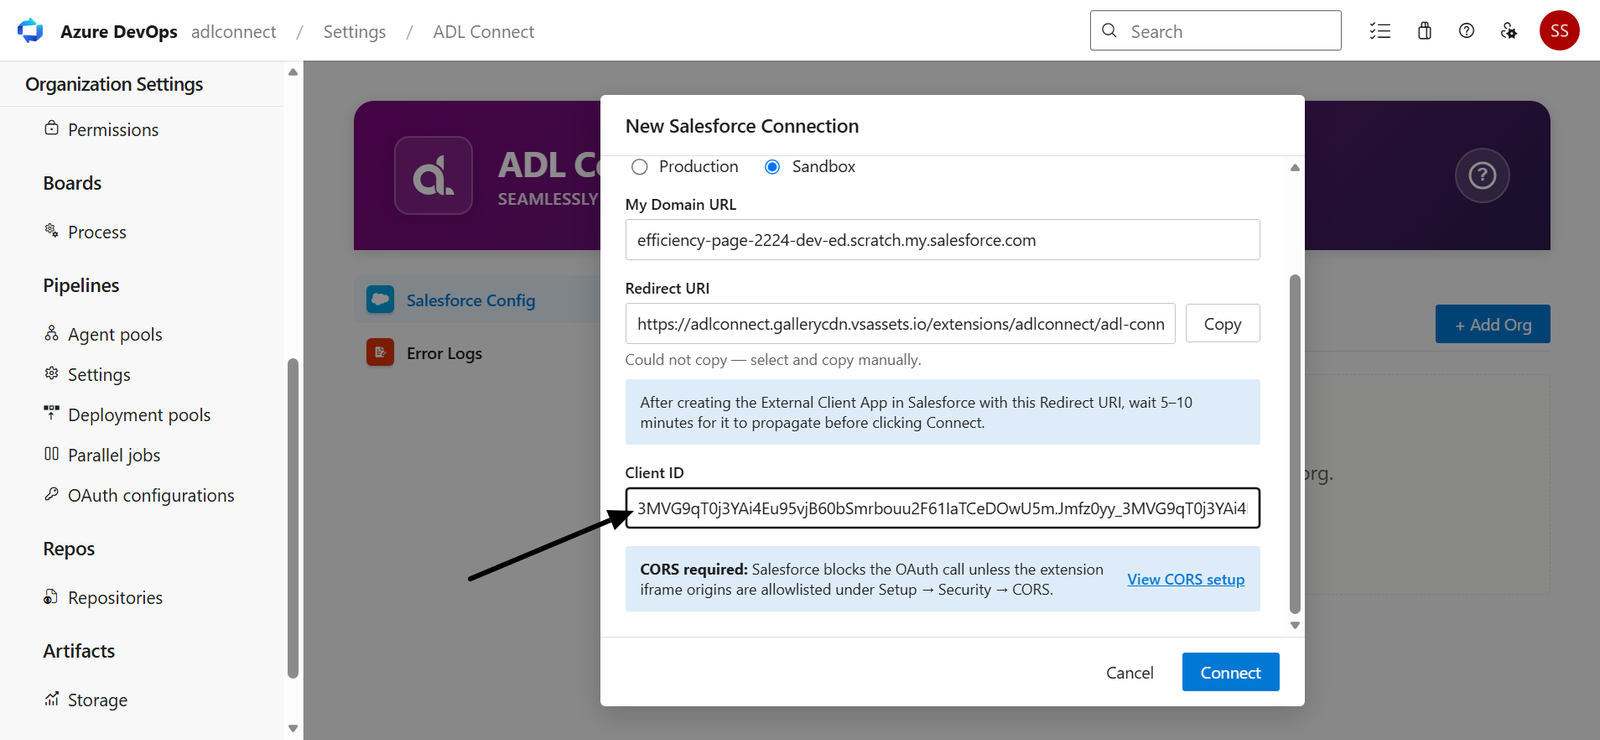
Verify:
- The selected environment (Production / Sandbox) matches the Salesforce org you created the External Client App in.
- The Redirect URI shown in this modal matches the Callback URL saved in the Salesforce External Client App exactly.
2. Configure Salesforce CORS Settings
Click the View CORS setup the Salesforce CORS Setup dialog appears if the required CORS origins have not yet been configured.
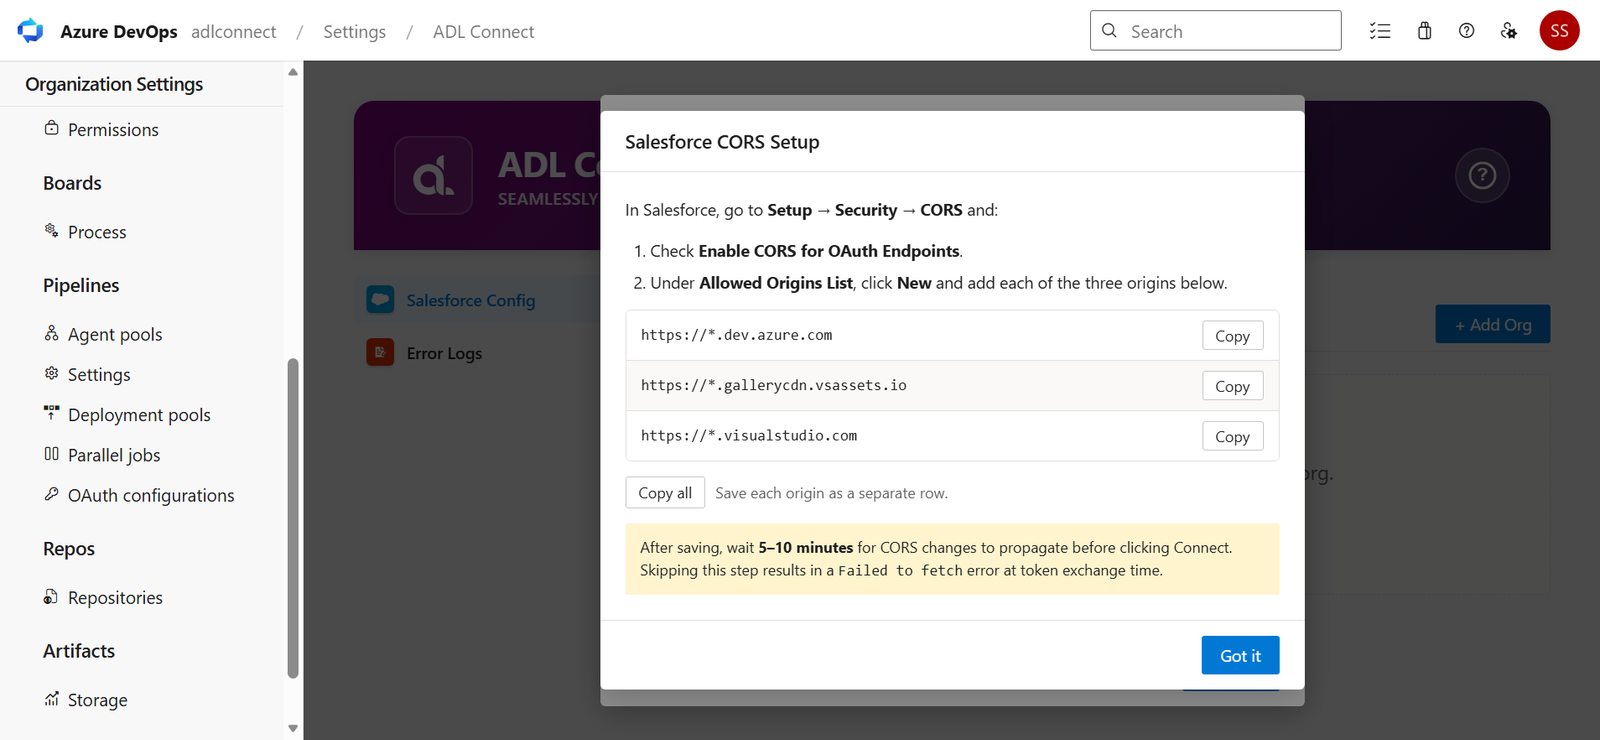
Salesforce blocks browser calls to the OAuth endpoints unless the ADL Connect iframe origins are added to the CORS Allowlist.
To configure the required CORS settings:
- Navigate to Setup → Security → CORS.
- Under Allowed Origins, click New.
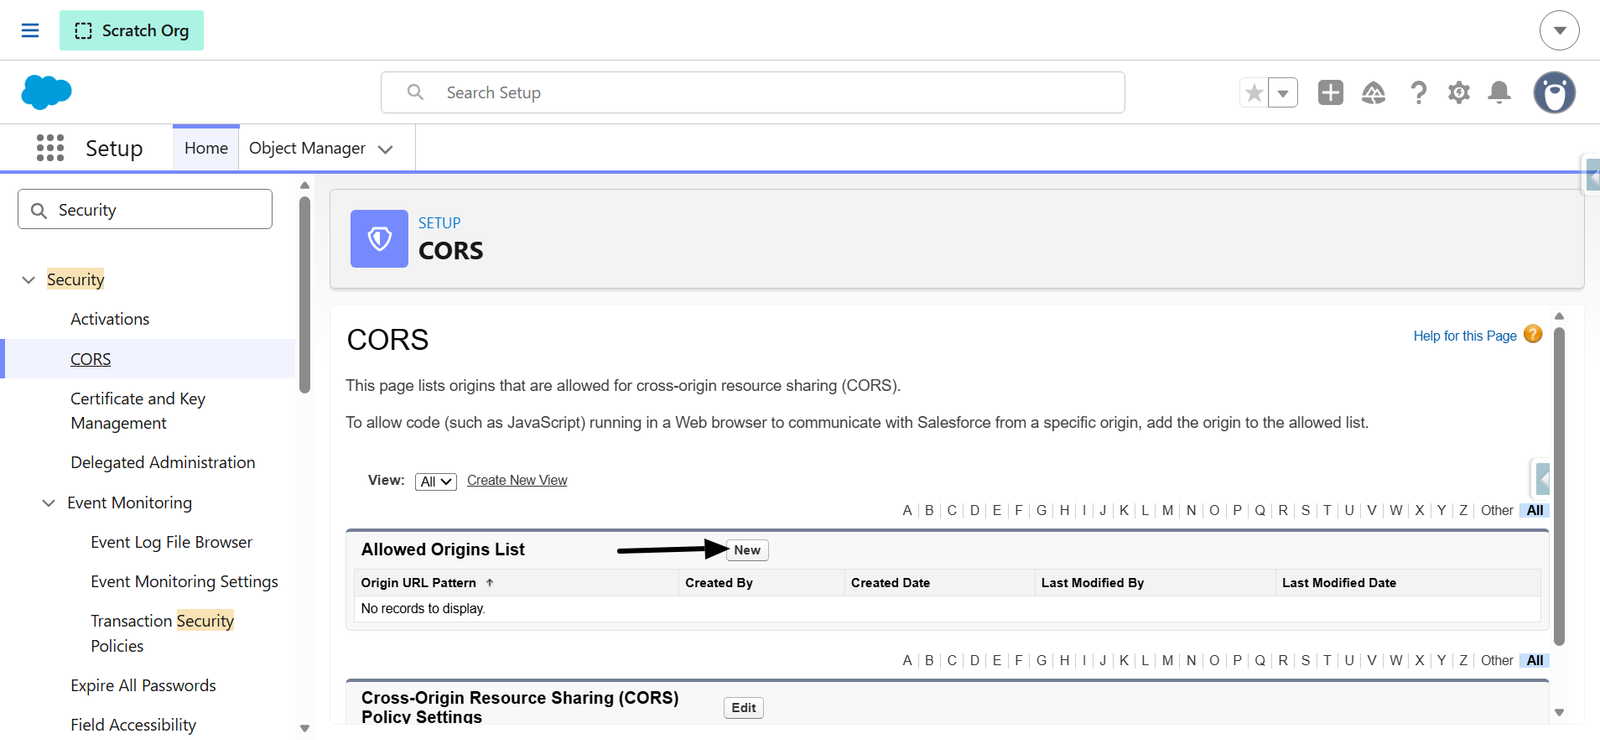
- Copy and add each origin displayed in the ADL Connect dialog as a separate CORS entry:
- Save each origin and Enable CORS for OAuth endpoints.
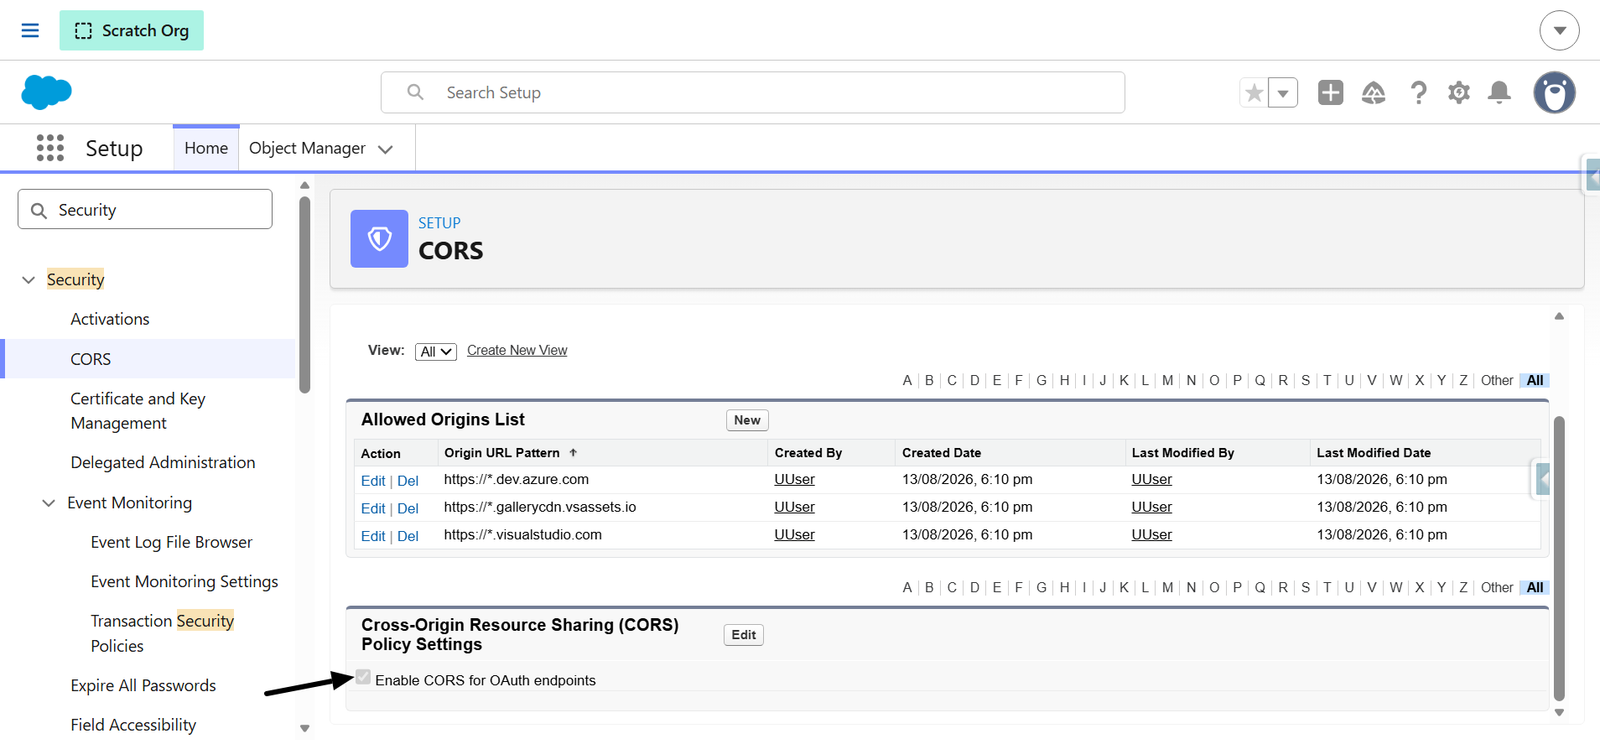
Note: After saving, wait 5–10 minutes for the CORS changes to propagate before clicking Continue. Salesforce may take a few minutes to apply the new CORS configuration. Proceeding immediately can result in a Failed to fetch error during the OAuth token exchange.
Once the changes have propagated, return to the Salesforce CORS Setup dialog and click Got it to continue with the connection process.
3. Clone the ADL External Connect Permission Set
To customize the default permission set, create a clone of the ADL External Connect permission set.
Navigate to Setup → Permission Sets, open ADL External Connect, and click Clone.
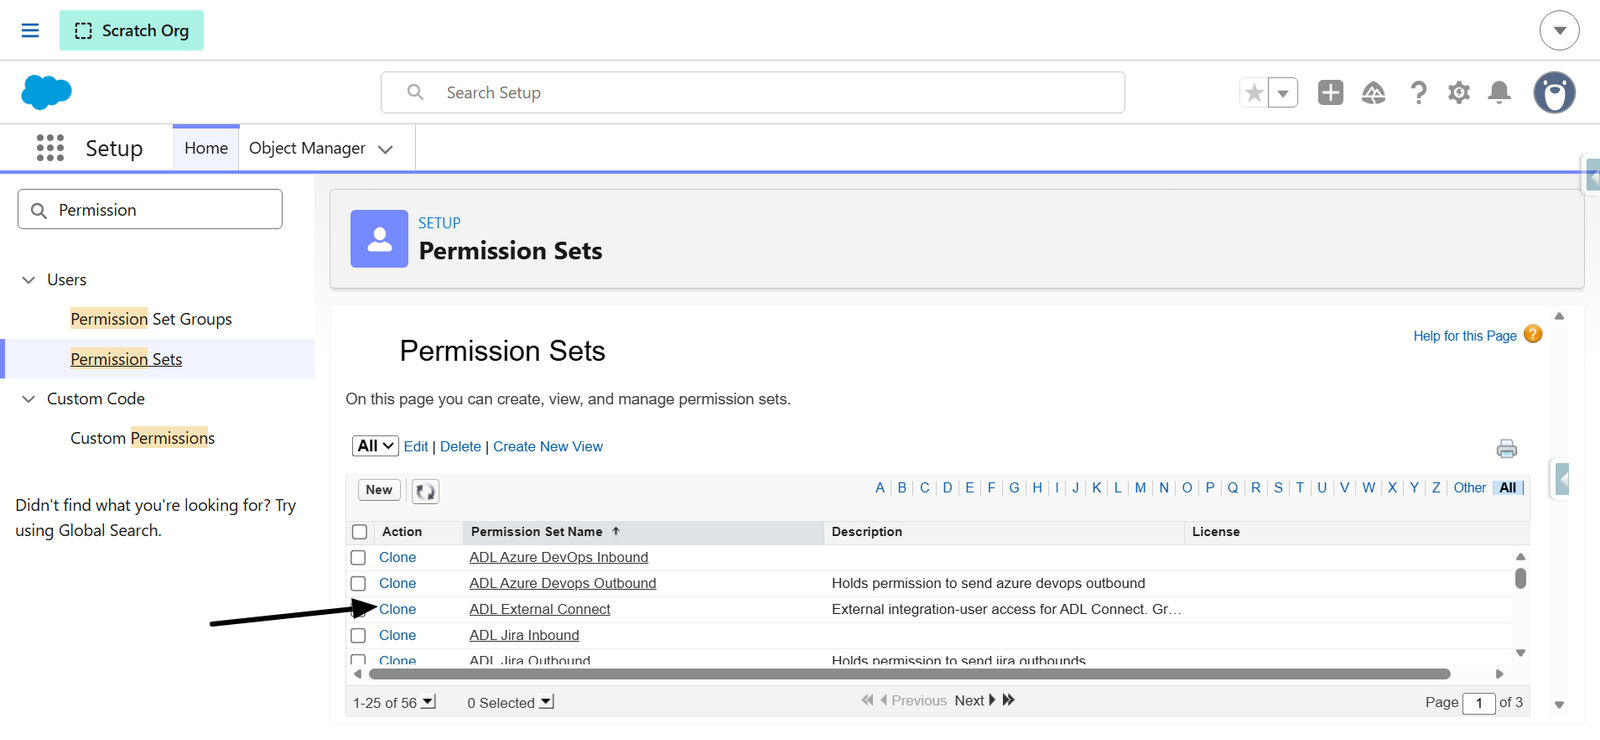
The Clone Permission Set page opens.
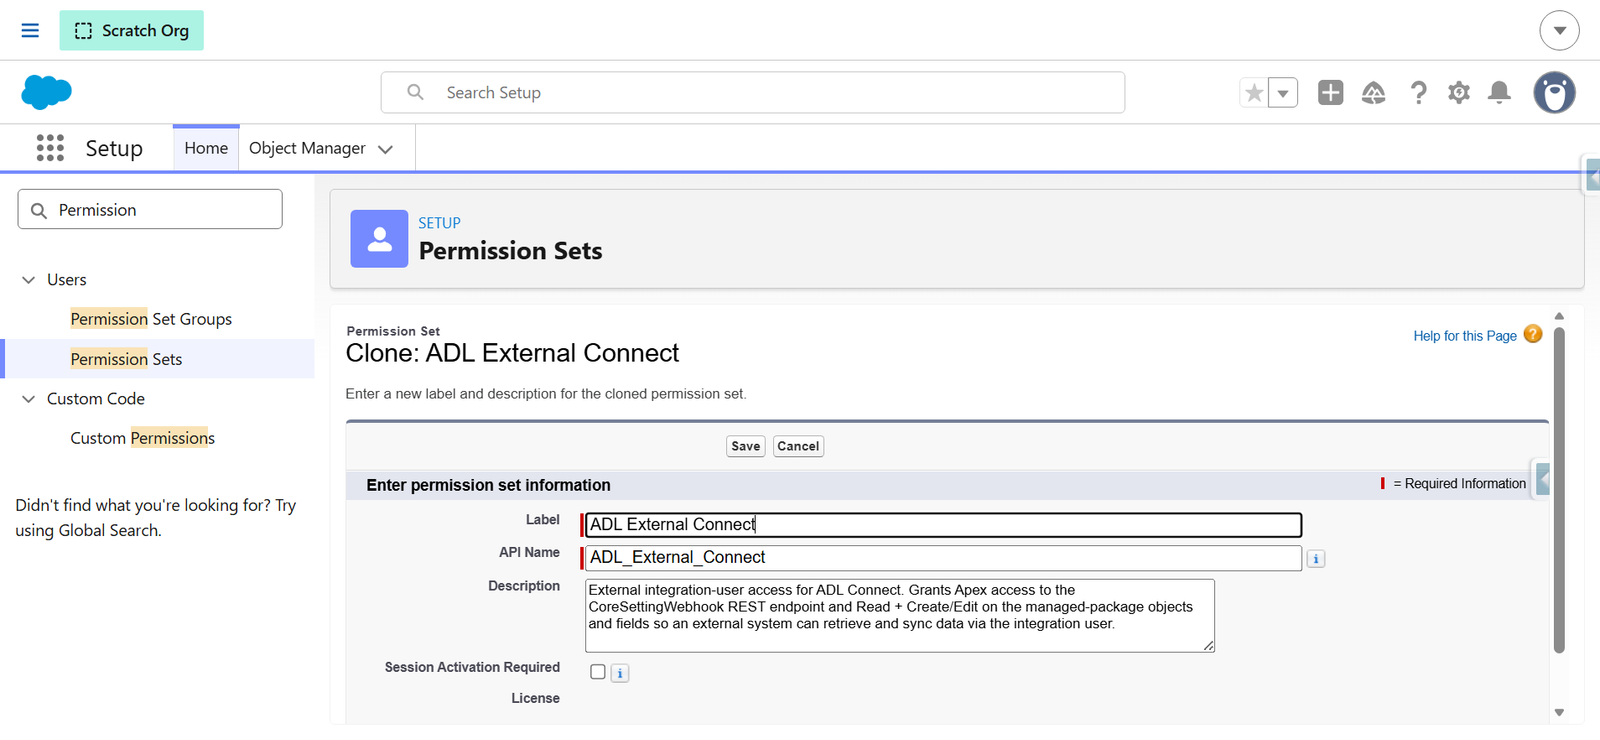
Update the following fields:
- Label – Enter a unique name for the cloned permission set (for example, ADL External Connect Custom).
- API Name – The API name is automatically populated based on the label. Modify it if required.
- Description – Review or update the description as needed.
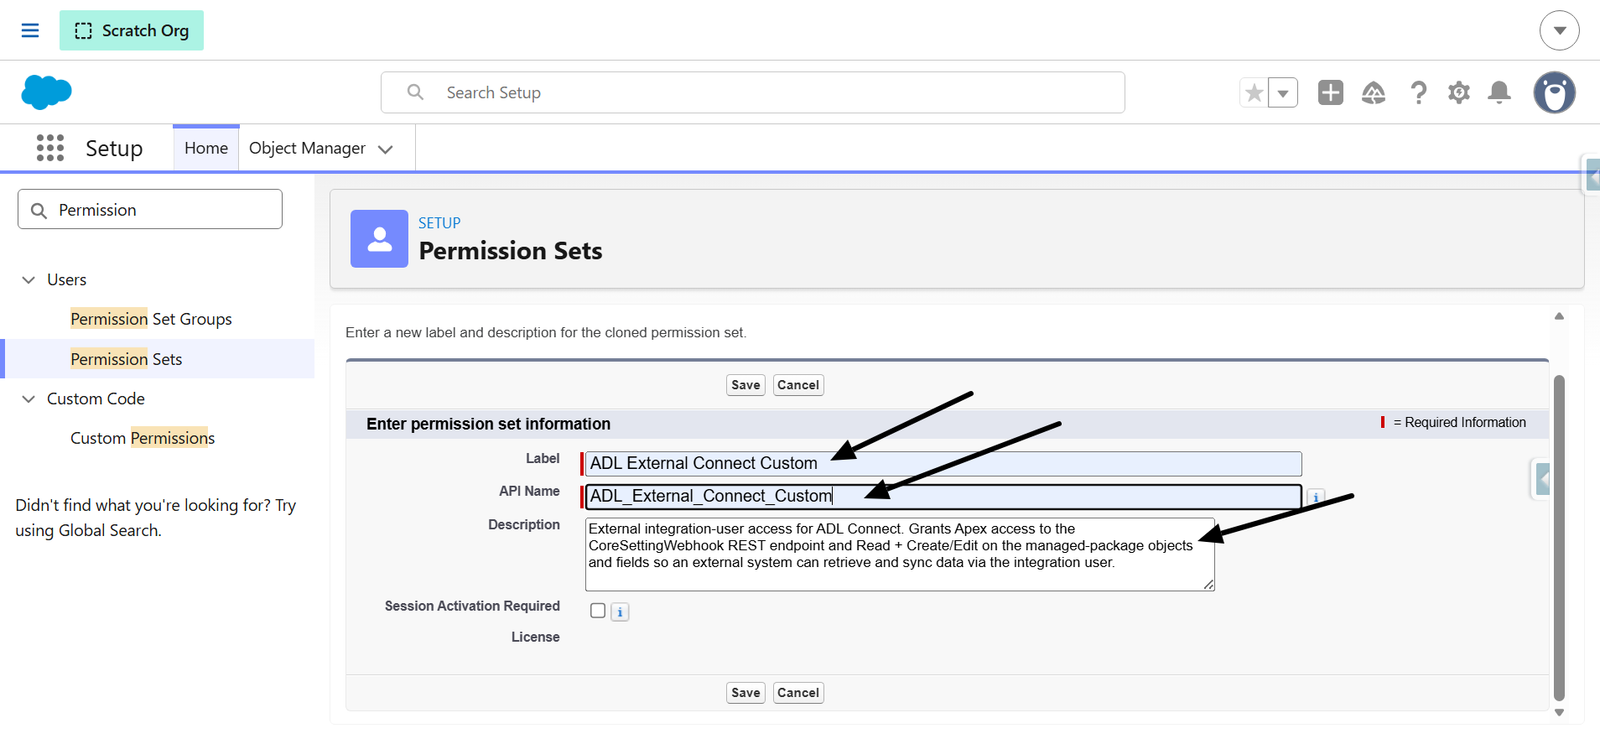
Click Save to create the cloned permission set.
Note: Cloning the permission set allows you to make organization-specific permission changes while preserving the original ADL External Connect permission set provided by the package.
4. Configure System Permissions
After cloning the permission set, configure the required system permissions for the cloned permission set.
Navigate to Setup → Permission Sets, open the cloned permission set (for example, ADL External Connect_Custom), and select System Permissions.
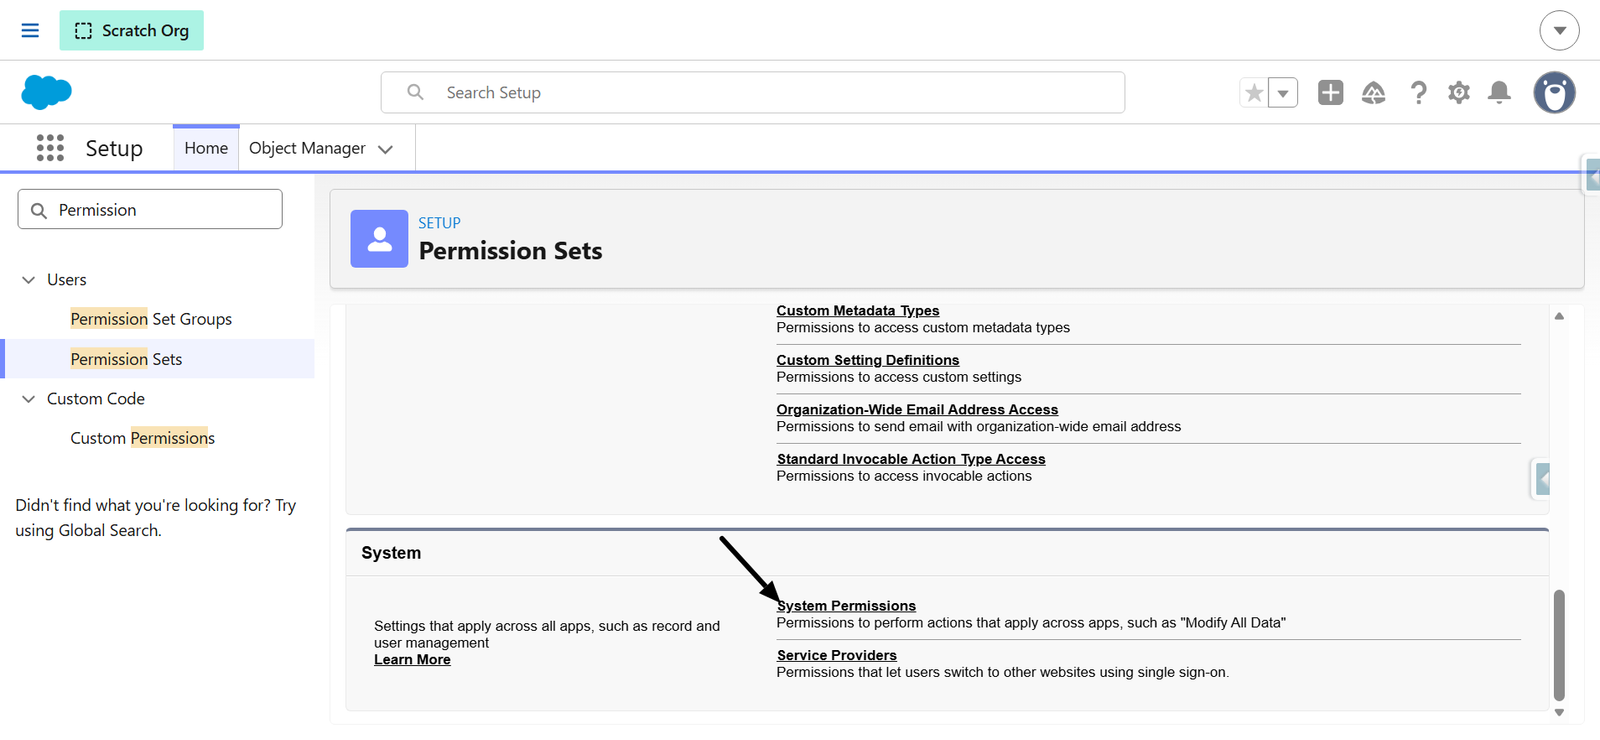
Enable the following system permissions:
- API Enabled
- API Only User
- View Roles and Role Hierarchy
- View Setup and Configuration
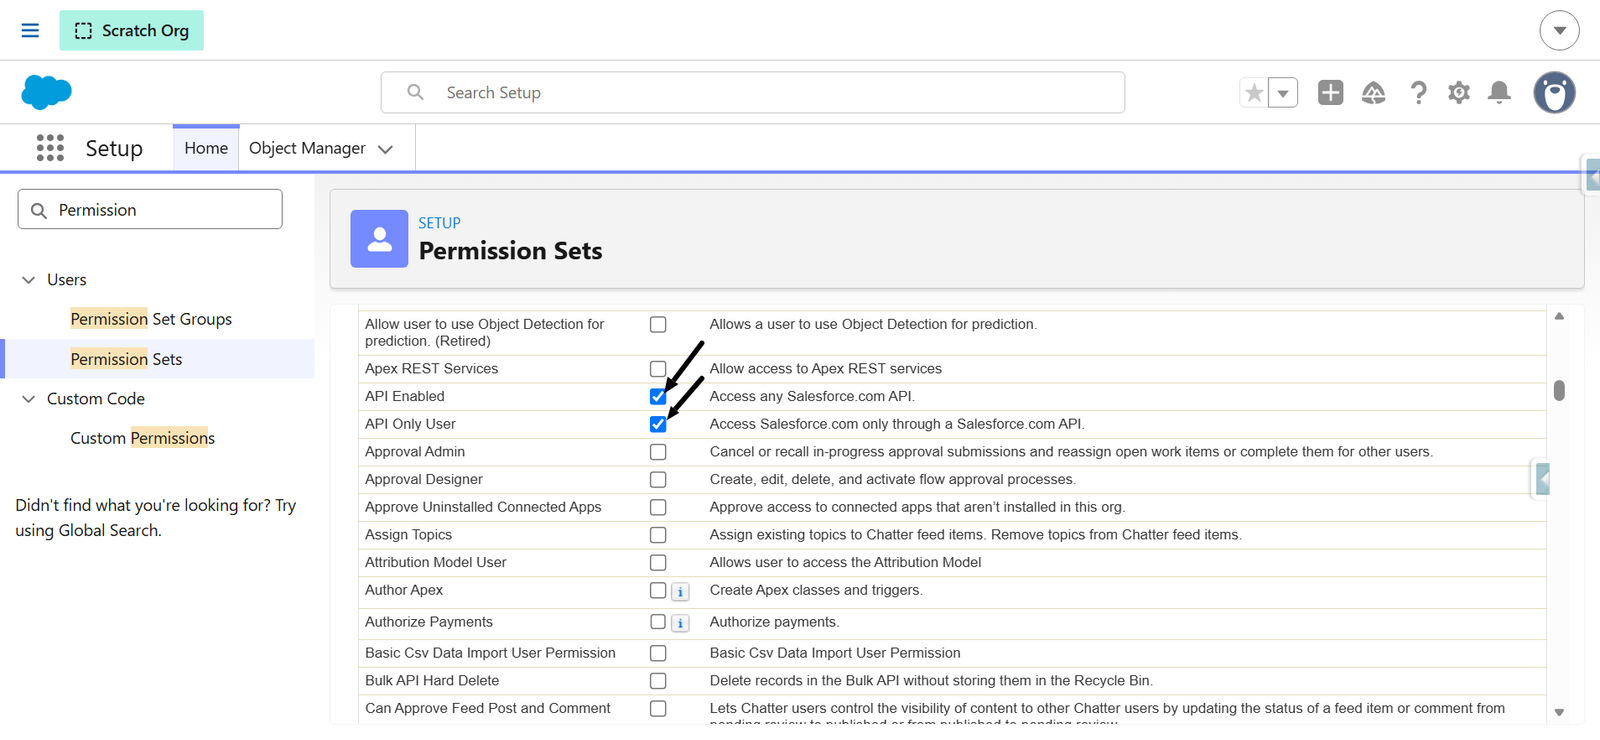
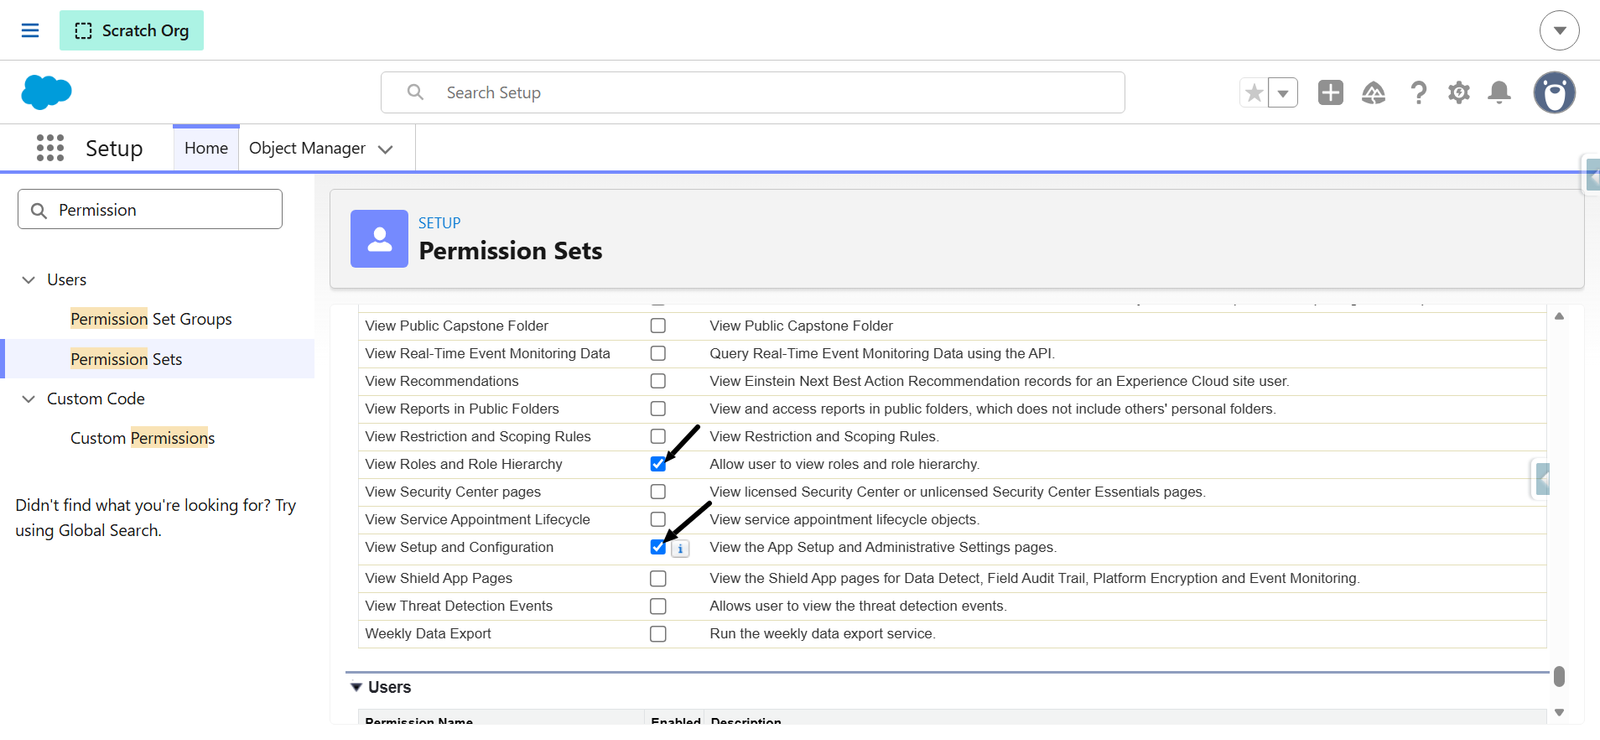
After enabling the required permissions, click Save.
If the Save Changes dialog appears, Salesforce displays the dependent permissions that will be enabled automatically.
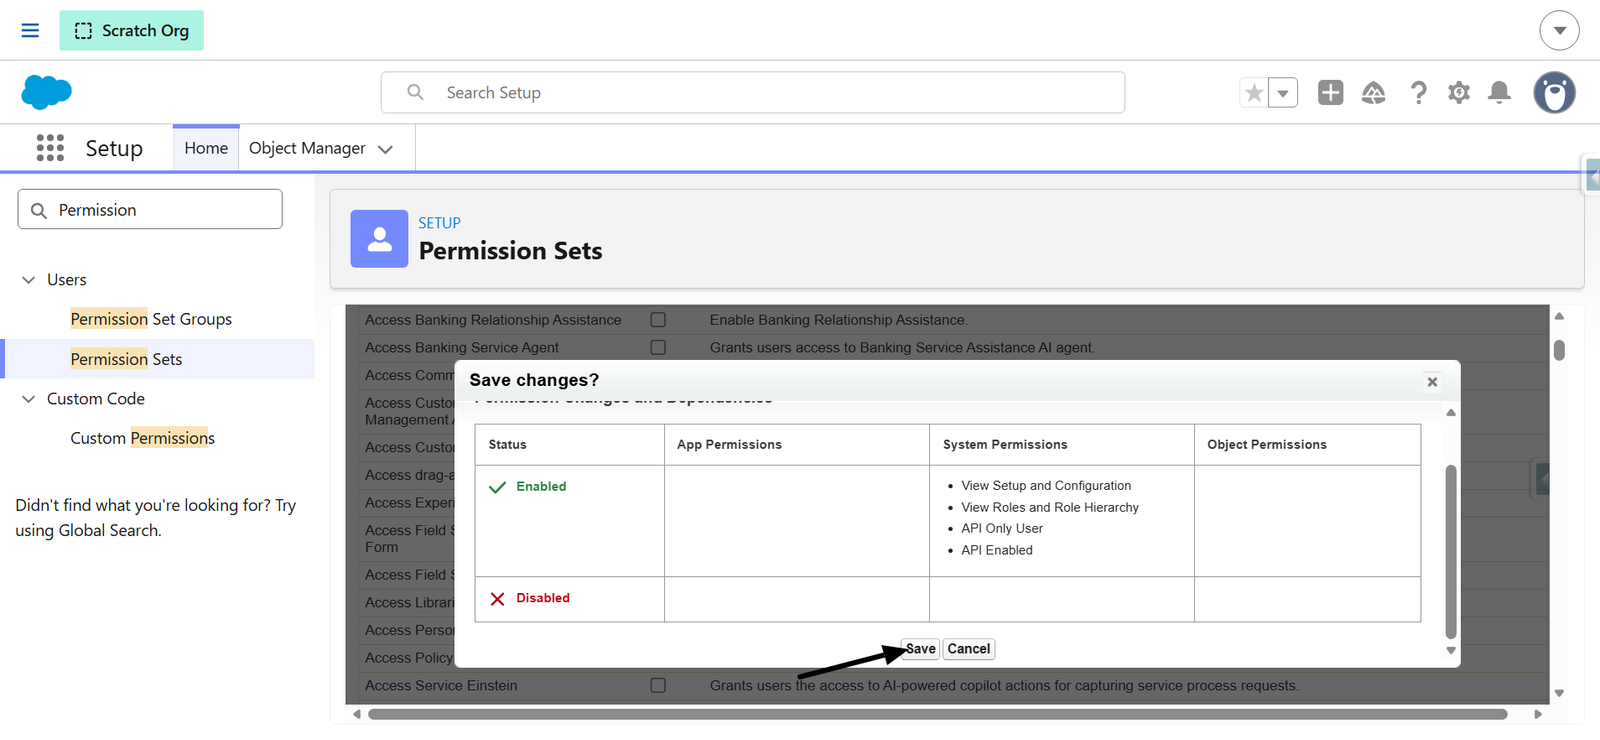
Review the permission changes and dependencies, then Scroll Up click Save to apply the updates.
Note: Salesforce may automatically enable additional dependent permissions when you save the permission set. Review the dependency dialog and confirm the changes before proceeding.
5. Assign the Permission Set to the User
Setup → Users → Users → Select the required User → Permission Set Assignments → Edit Assignments
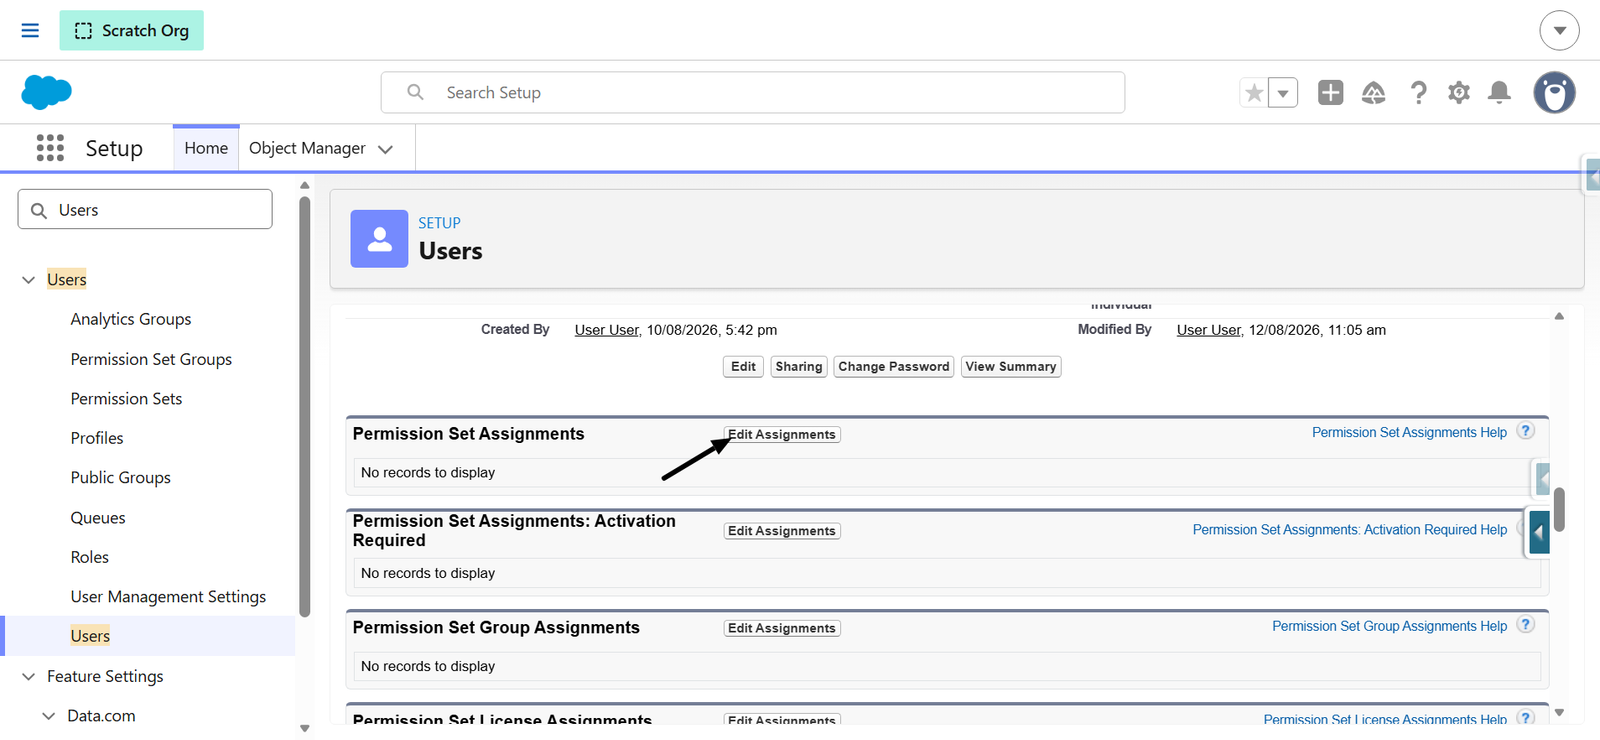
- On the Permission Set Assignments page, locate ADL External Connect_Custom in the Available Permission Sets list.
- Select ADL External Connect_Custom and click the Add ( > ) button to move it to the Enabled Permission Sets list.
- Verify that ADL External Connect_Custom appears under Enabled Permission Sets.
- Click Save to assign the permission set to the selected user.
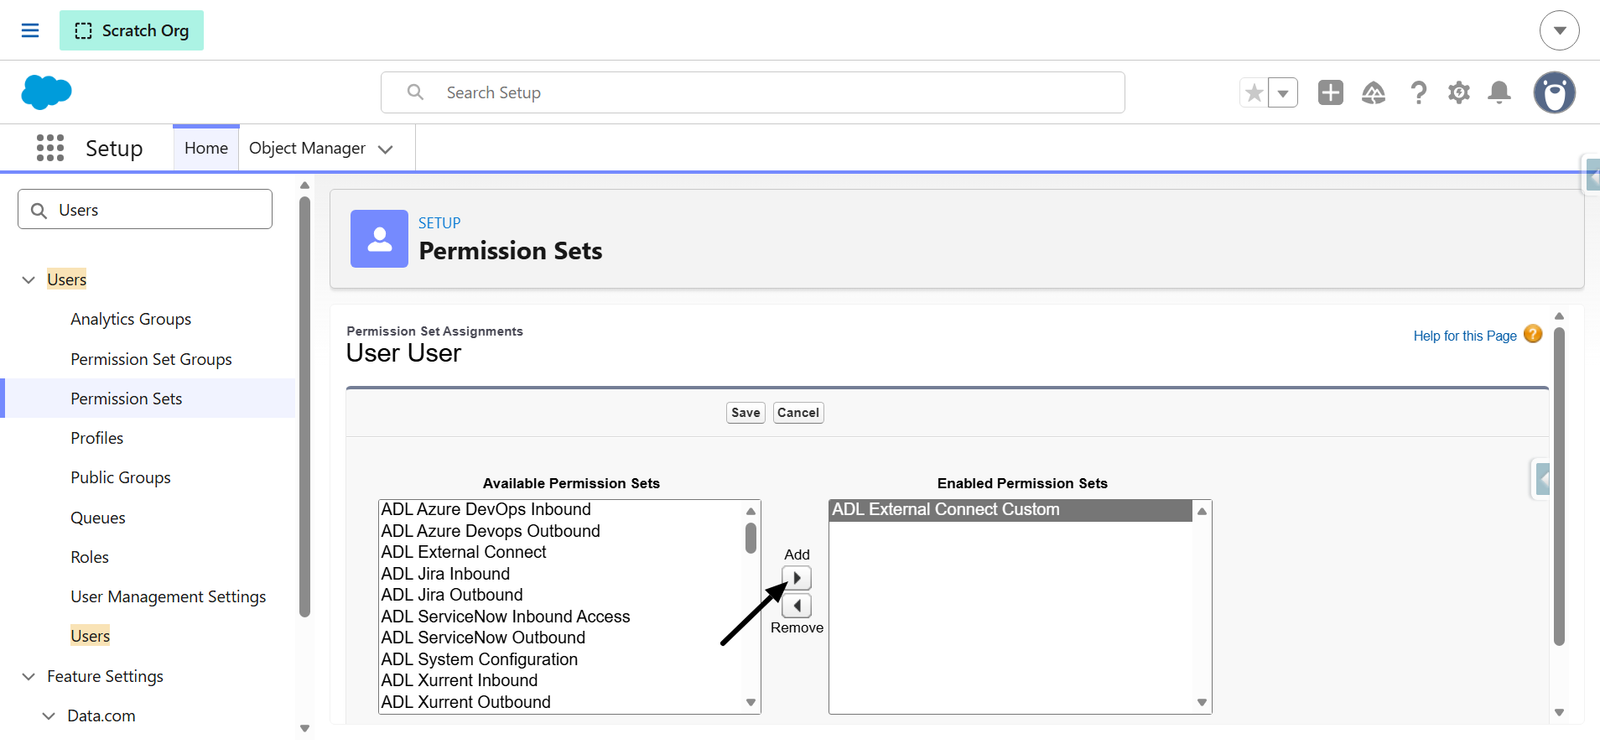
Note: After saving, the ADL External Connect_Custom permission set is assigned to the user, granting the permissions required to access ADL Connect.
6. Verify API Only User Configuration
Back to the Azure DevOps Configuration Page Click Connect,
The Salesforce login page opens.
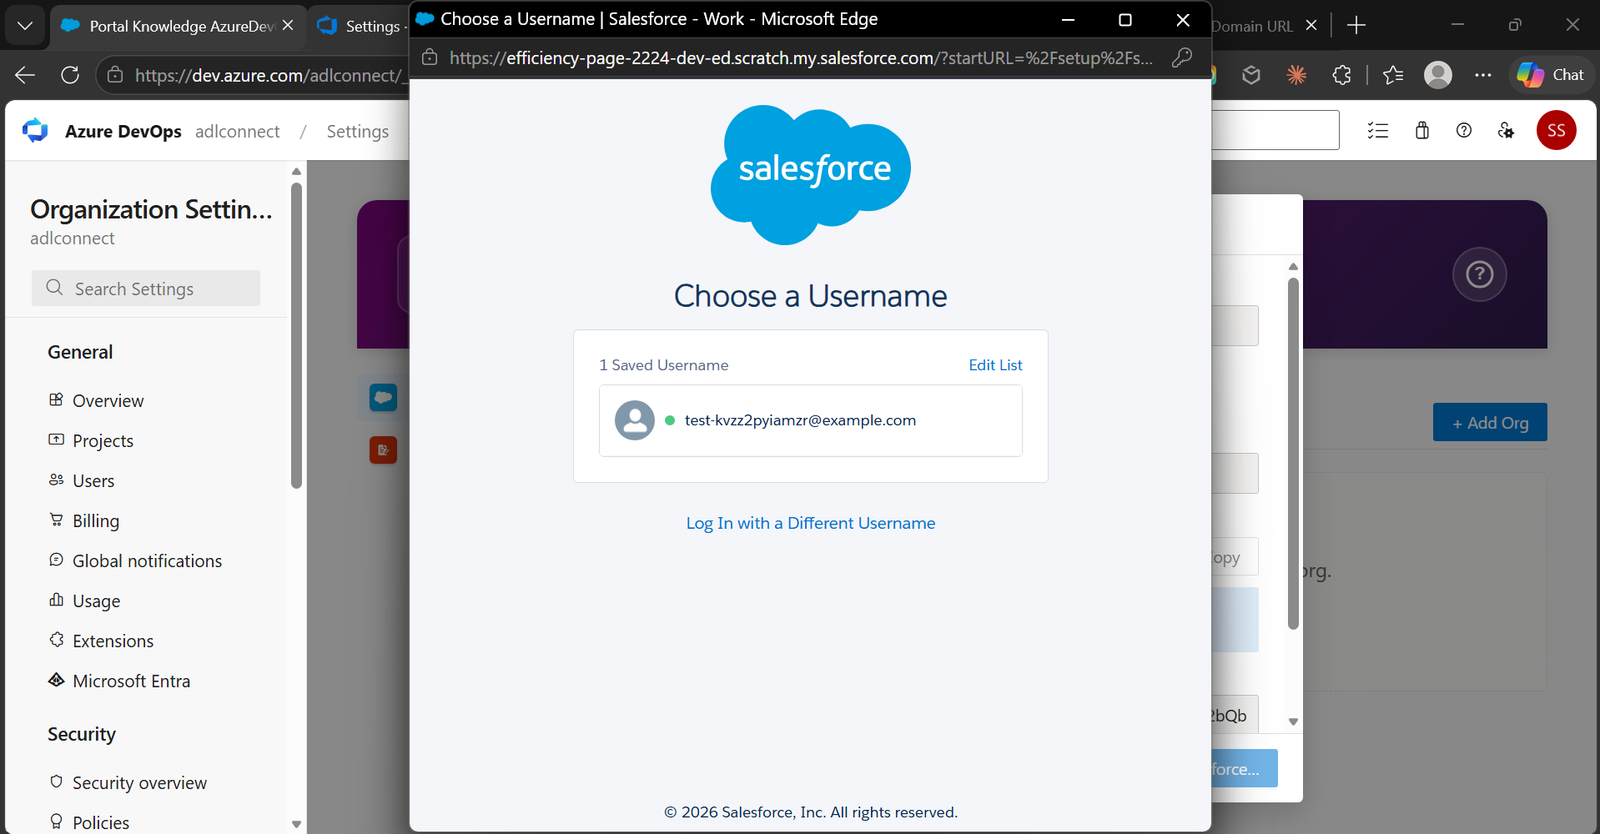
Enter the username and password of the Salesforce integration user — the account whose permissions ADL Connect will use to read and write data in this org.
7. Allow Access
Salesforce presents the Allow Access? consent screen for the External Client App.
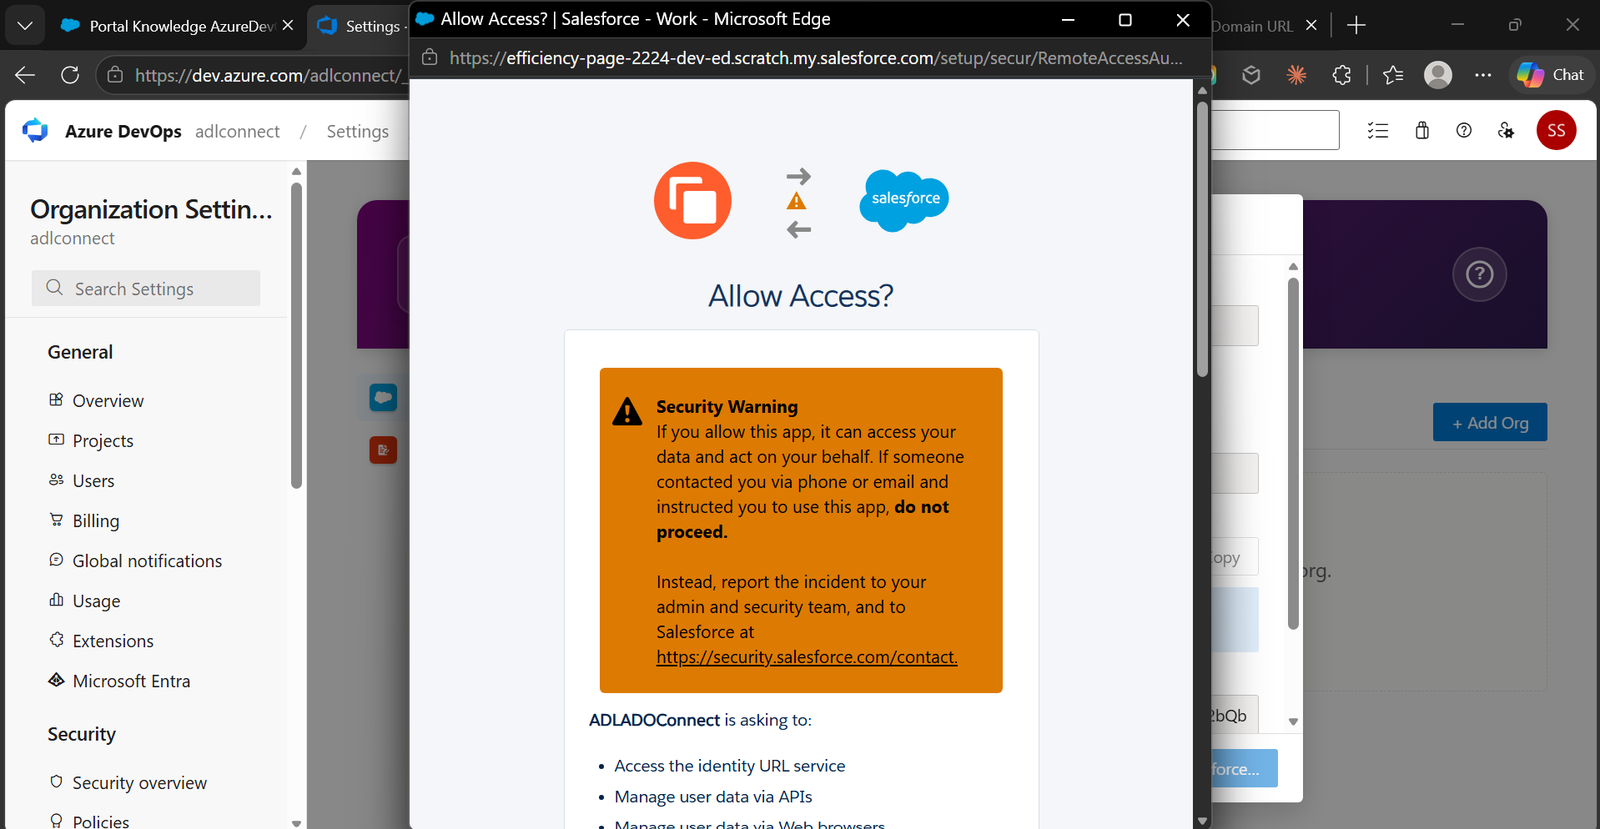
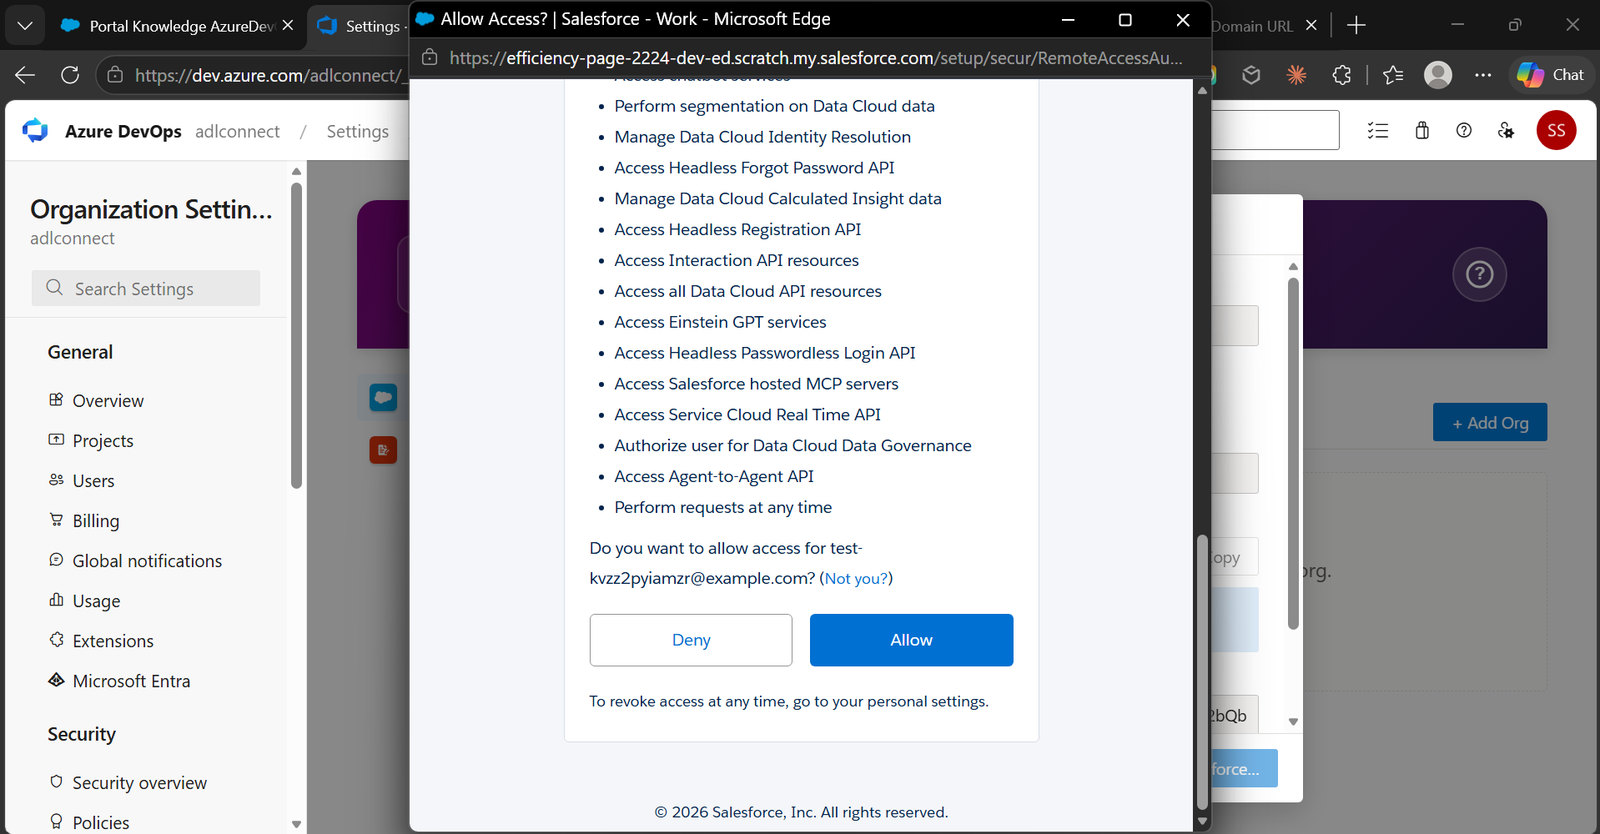
Review the permissions and click Allow to authorize the connection.
Salesforce displays a security warning advising not to proceed if someone asked you to do this over the phone or via email — this is a standard prompt for any third-party OAuth grant.
8. Confirm the Connection
Azure DevOps exchanges the authorization code for an access token and refresh token, both stored securely in encrypted extension storage under the configured organization name. After successful authentication, the browser redirects back to Azure DevOps, and the Salesforce Configuration page displays the Core Settings tab for the newly connected Salesforce organization.
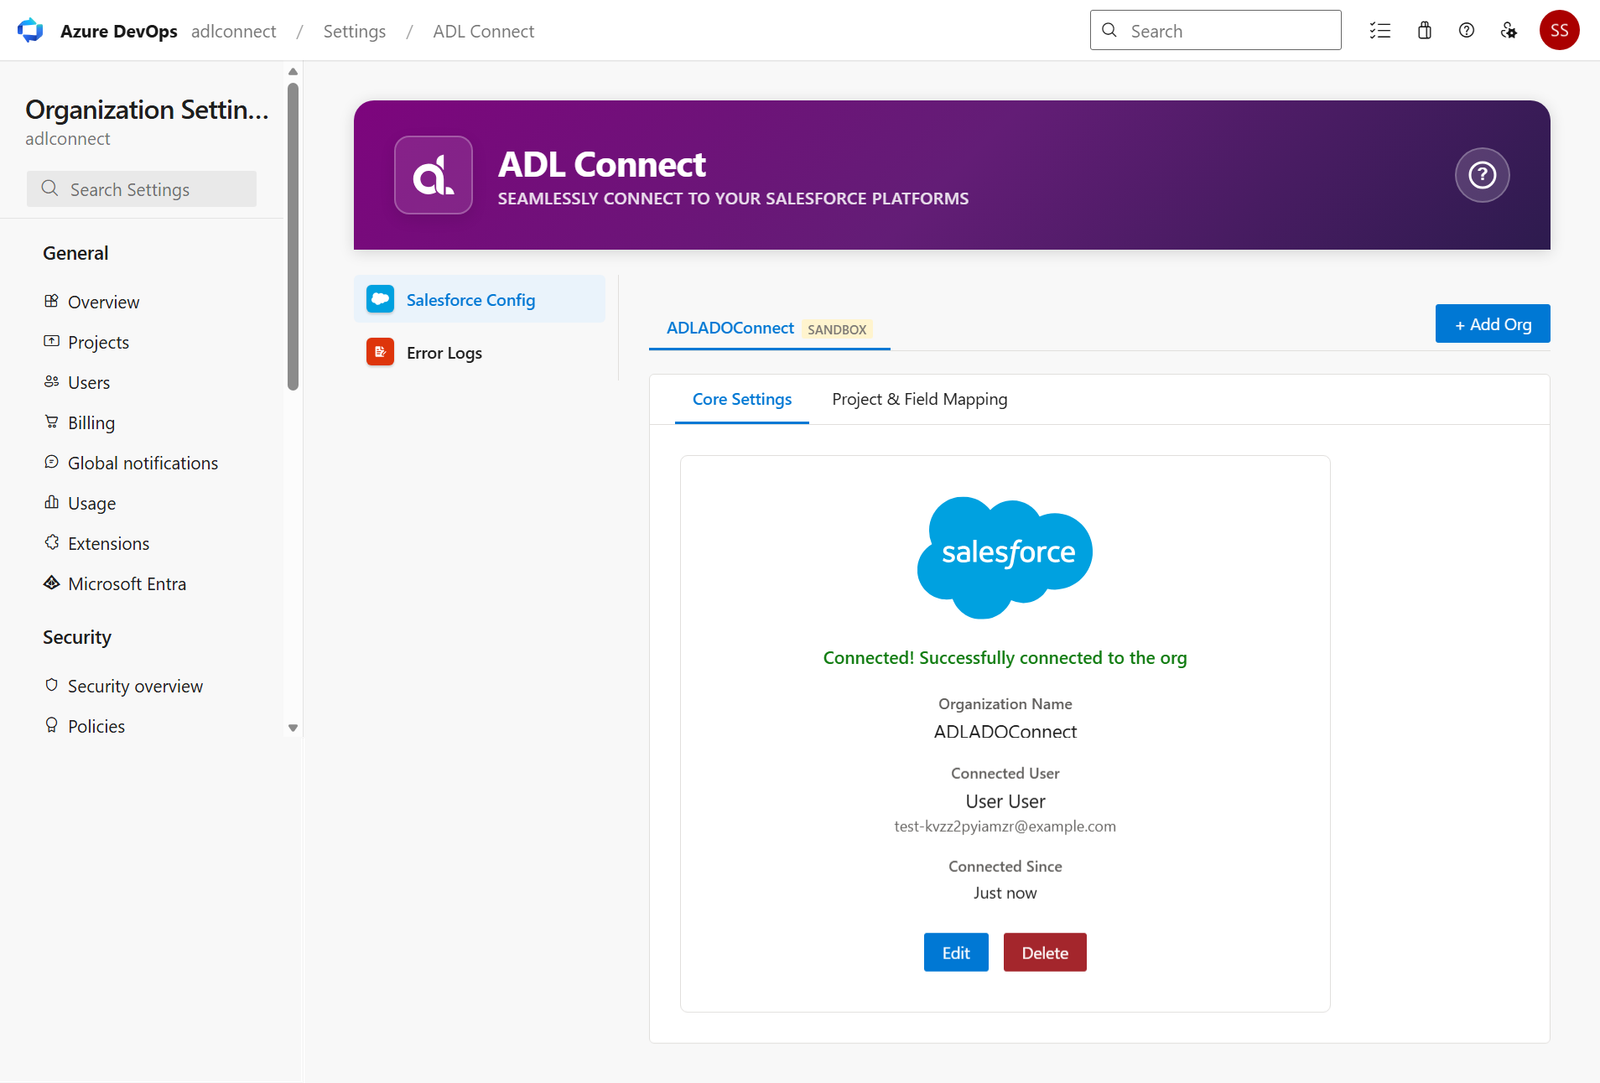
- Connected! Successfully connected to the org
- Organization Name — the Org Name you entered (e.g., ADLADOConnect)
- Connected Since — the elapsed time since the OAuth handshake completed
The org tab (e.g., ADLADOConnect) is now visible at the top of the Salesforce Configuration page. Two action buttons are available:
- Edit — update the Client ID / Client Secret if they are rotated in Salesforce.
- Delete — disconnect the org. This revokes the stored tokens and removes all mappings tied to this org.
9. Next Steps
With the org connected, switch to the Project & Field Mapping tab to configure:
- Which Azure DevOps projects and work types are eligible for Salesforce linking
- Which Salesforce parent objects (Case, Account, Opportunity, Lead, custom objects) can be linked from those issues
- Field-level mappings between Azure DevOps and Salesforce
- Panel Fields — the columns shown on the Azure DevOps work item panel for linked records
Repeat this Core Settings flow for each additional Salesforce org (e.g., a separate Sandbox for QA, or multiple Production orgs across business units) — each connection is fully isolated, with its own encrypted credentials and its own set of mappings.
Configure Project & Field Mapping — Create a New Mapping
After connecting a Salesforce org under Core Settings, the next step is to define which Azure DevOps projects can link to which Salesforce parent objects, and for which work types. Each row in the Project & Field Mapping table represents one combination of (Azure DevOps Project + Azure DevOps Work Type + Salesforce Parent Object) that ADL Connect for Azure will enable on the issue panel.
You can create multiple mappings per connected org — for example, link Tasks in the Support project to Cases, and Bugs in the Engineering project to Opportunities.
1. Open the Project & Field Mapping Tab
From the Salesforce Configuration page, click the org tab (e.g., ADLADOConnect) and switch from Core Settings to Project & Field Mapping.
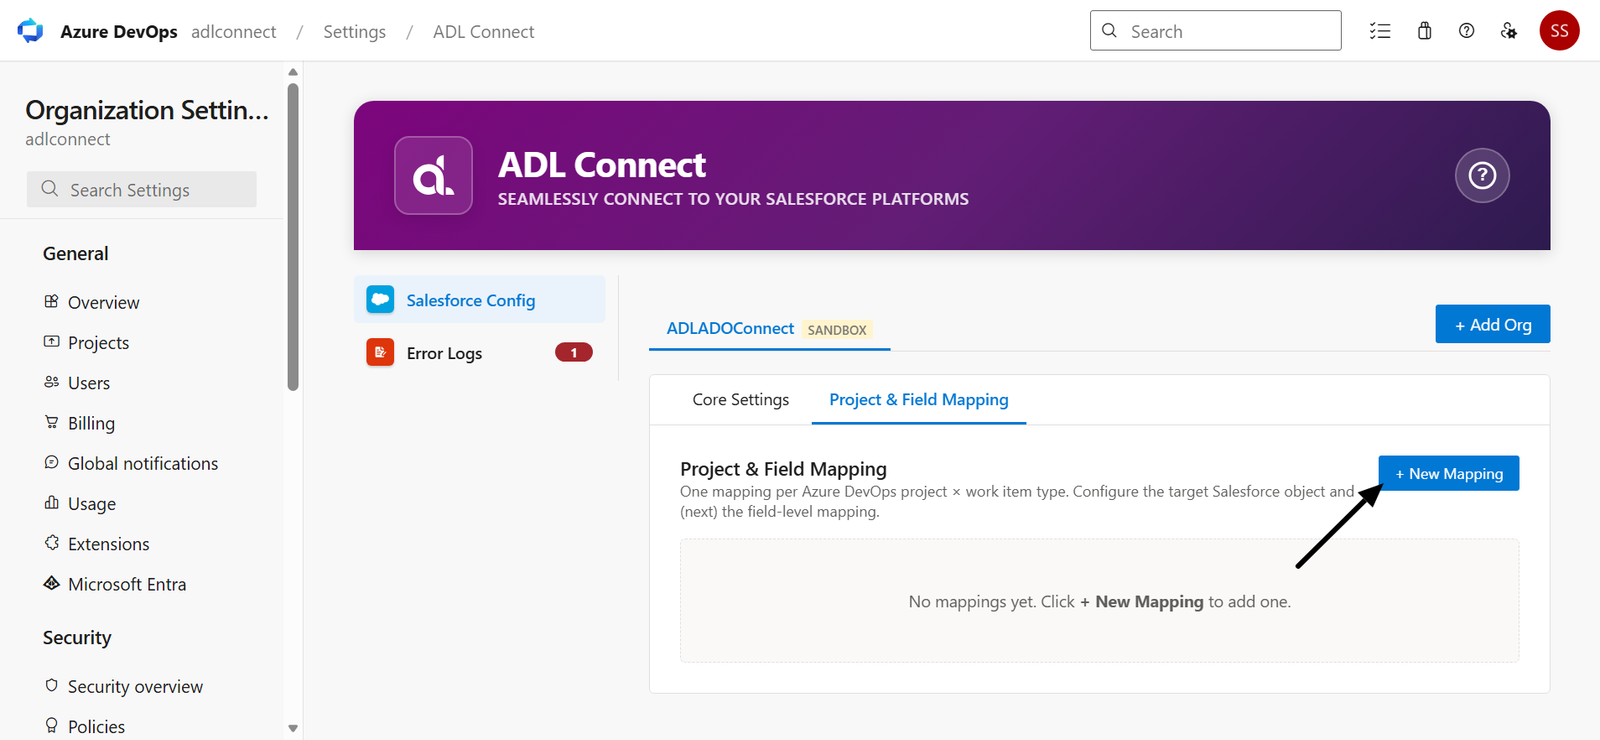
If no mappings exist yet, the table shows:
No mappings yet. Click "+ New Mapping" to add one.
Click + New Mapping in the top-right.
2. Enter the Mapping Details
The New Mapping Configuration modal opens.
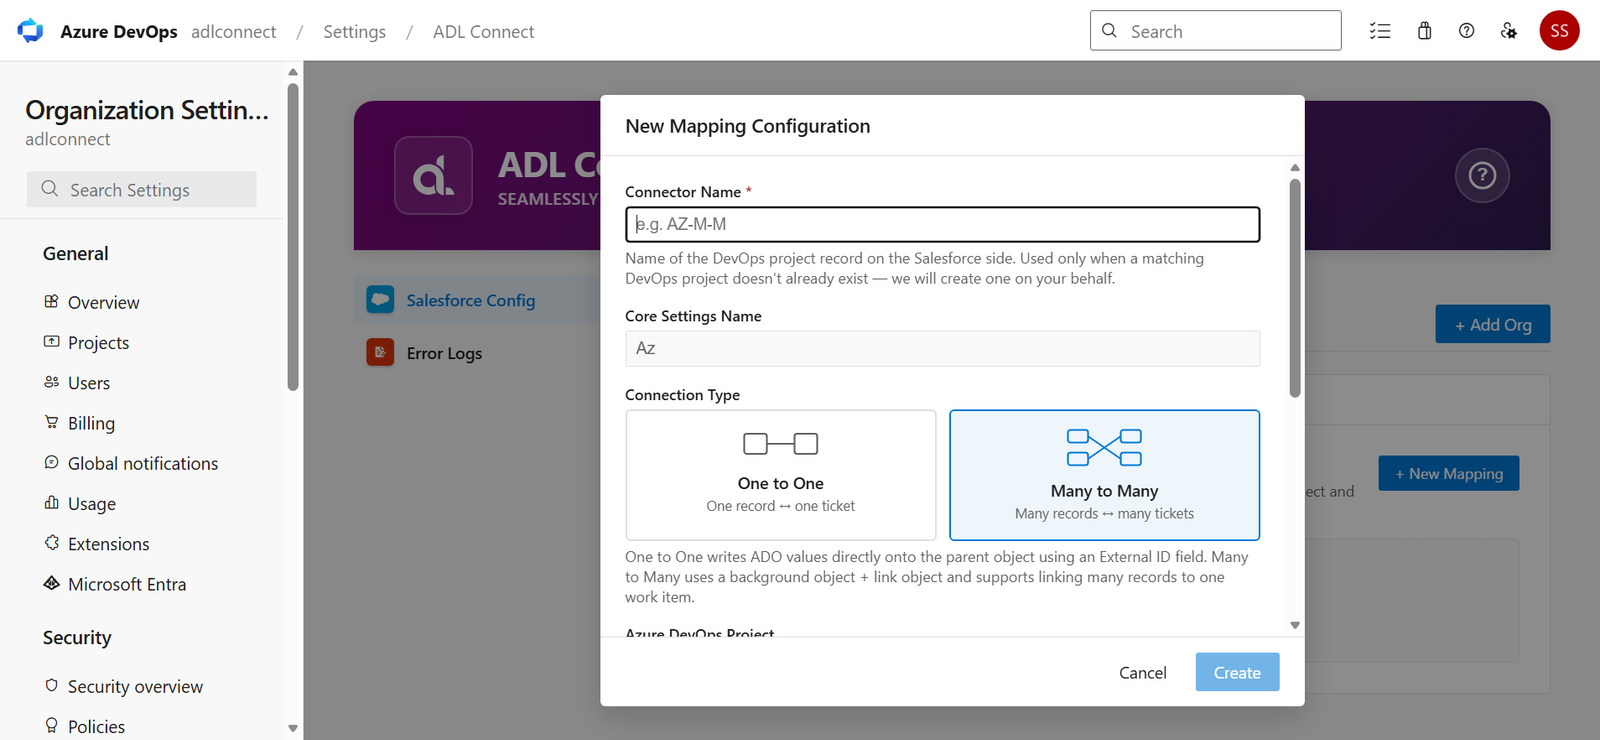
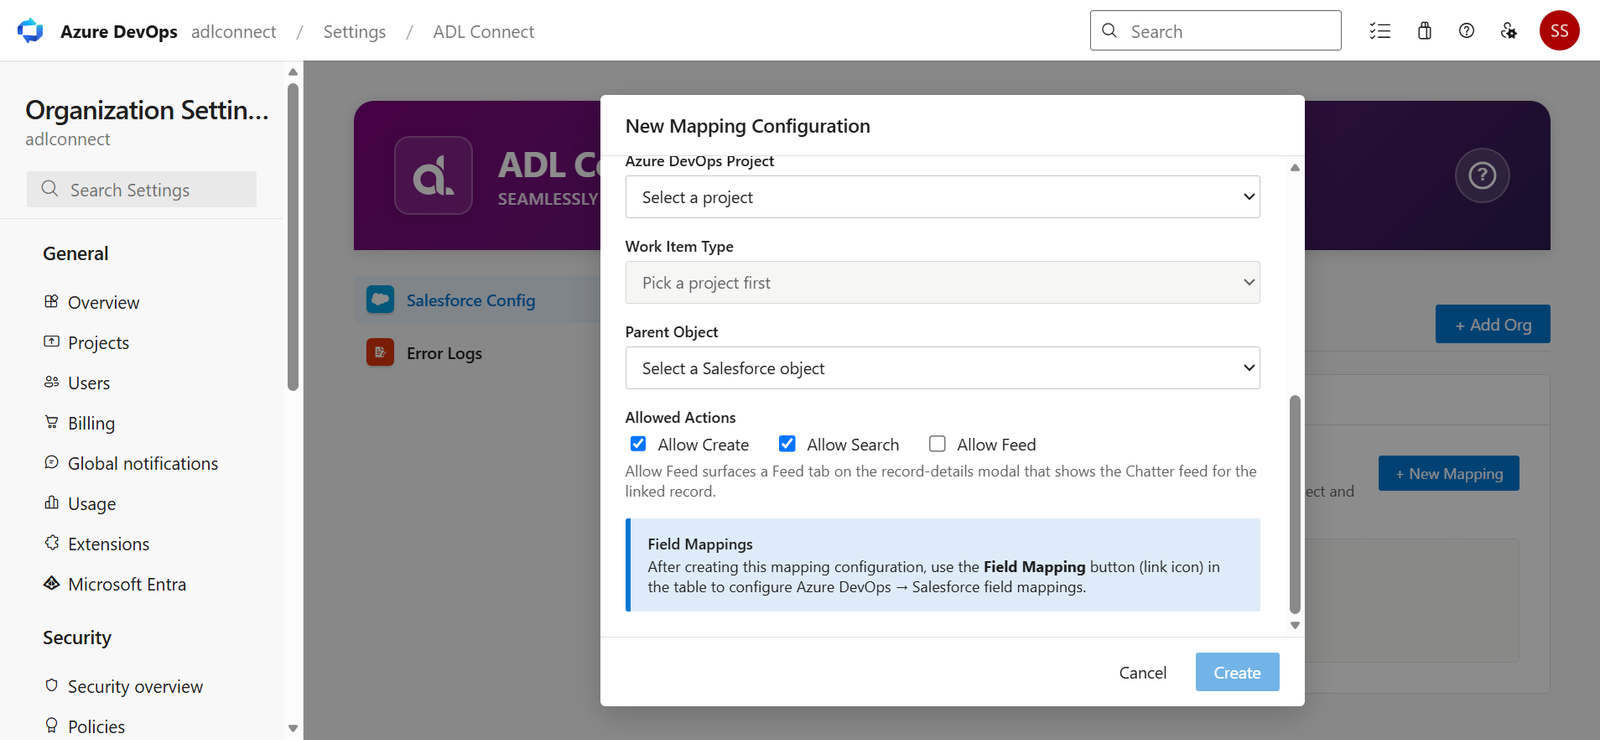
Fill in the dropdowns in order — each one populates the next:
Azure DevOps Connector Name
Select the Connector Name text box and enter a unique, descriptive name for the Azure DevOps connection (e.g., AZ-M-M).
Note: The connector name must be unique and should clearly identify the Azure DevOps connection.
Core Settings Name
Verify that the Core Settings Name field is automatically populated with the appropriate core settings configuration.
Note: The Core Settings Name is automatically populated based on the selected Azure DevOps organization and cannot be modified during mapping creation.
Connection Type
Select the appropriate Connection Type for the mapping configuration.
- One to One – Maps a single Salesforce record to a single Azure DevOps work item. This option is recommended when each Salesforce record should be associated with only one Azure DevOps work item.
- Many to Many – Maps multiple Salesforce records to multiple Azure DevOps work items using a link object. This option is recommended when a record needs to be associated with multiple work items or shared across multiple records.
Note: Select the connection type based on your integration requirements. The selected connection type determines how records are linked and synchronized between Salesforce and Azure DevOps and cannot be changed after the mapping configuration is created.
Azure DevOps Project
Select the Azure DevOps project this mapping applies to (e.g., Service-Team). The dropdown lists every Azure DevOps project accessible to ADL Connect on this site.
The Azure DevOps Work Type dropdown remains disabled until a project is selected, because work types are project scoped.
Azure DevOps Work Item Type
Once a project is chosen, the Azure DevOps Work Item Type dropdown loads the work types available in that project (e.g., Task, Issue, Epic). Select the work type that should trigger Salesforce linking on the issue panel.
Note: Only issues matching both the selected Project and Work Item Type will show the Salesforce Details panel with linking actions for this parent object. Issues outside this combination are unaffected.
Parent Object
Select the Salesforce parent sObject that issues of this type can be linked to — for example, Case (Case), Account (Account), Lead (Lead) or any custom object available in the connected org.
Important: The selected parent object must have a corresponding lookup field on DevOpsRecordLink__c following the convention RecordLink__c (e.g., CaseRecordLink__c, AccountRecordLink__c). If the field is missing or its reference to doesn't match, the modal will surface a clear error and block save. This guarantees mappings can never silently fail at runtime.
Allowed Actions
Choose which actions users can perform on the issue panel for this parent:
- ☑ Allow Create — display the + New button to create a new Salesforce record from the Azure DevOps work item (prefilled with mapped Azure DevOps values).
- ☑ Allow Search — display the Search button to search and link an existing Salesforce record.
- ☑ Allow Feed — Displays the Feed tab on the linked record details, enabling users to view and interact with the Salesforce Chatter feed associated with the linked record.
Both are enabled by default. Disable one if you want, for example, to permit linking existing Cases without allowing new Case creation from Aure DevOps.
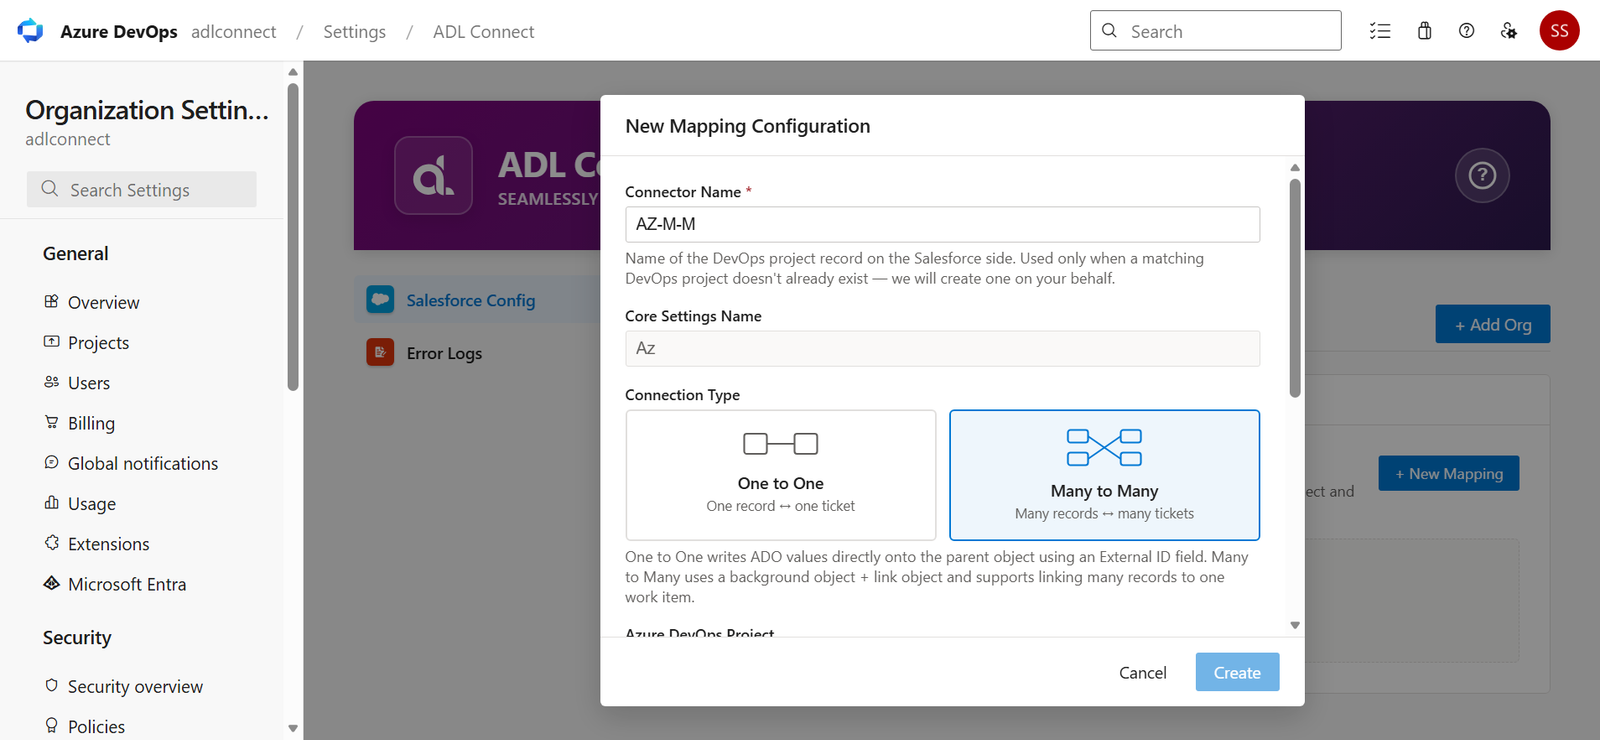
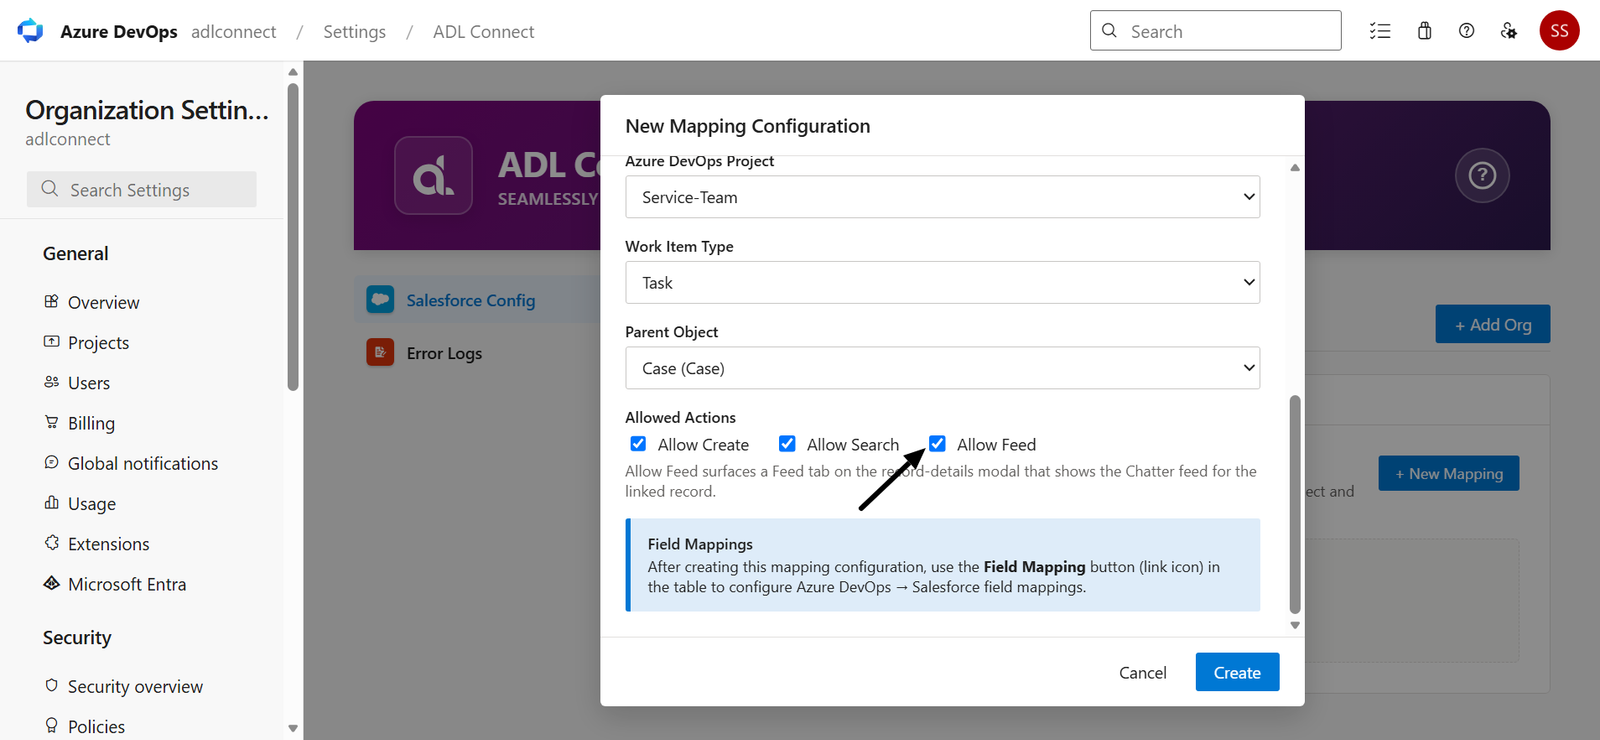
3. Save the Mapping Configuration
An info banner reminds you that field mappings are configured separately:
Field Mappings — After creating this mapping configuration, use the Field Mapping button (Link icon) in the table to configure Azure DevOps → Salesforce field mappings.
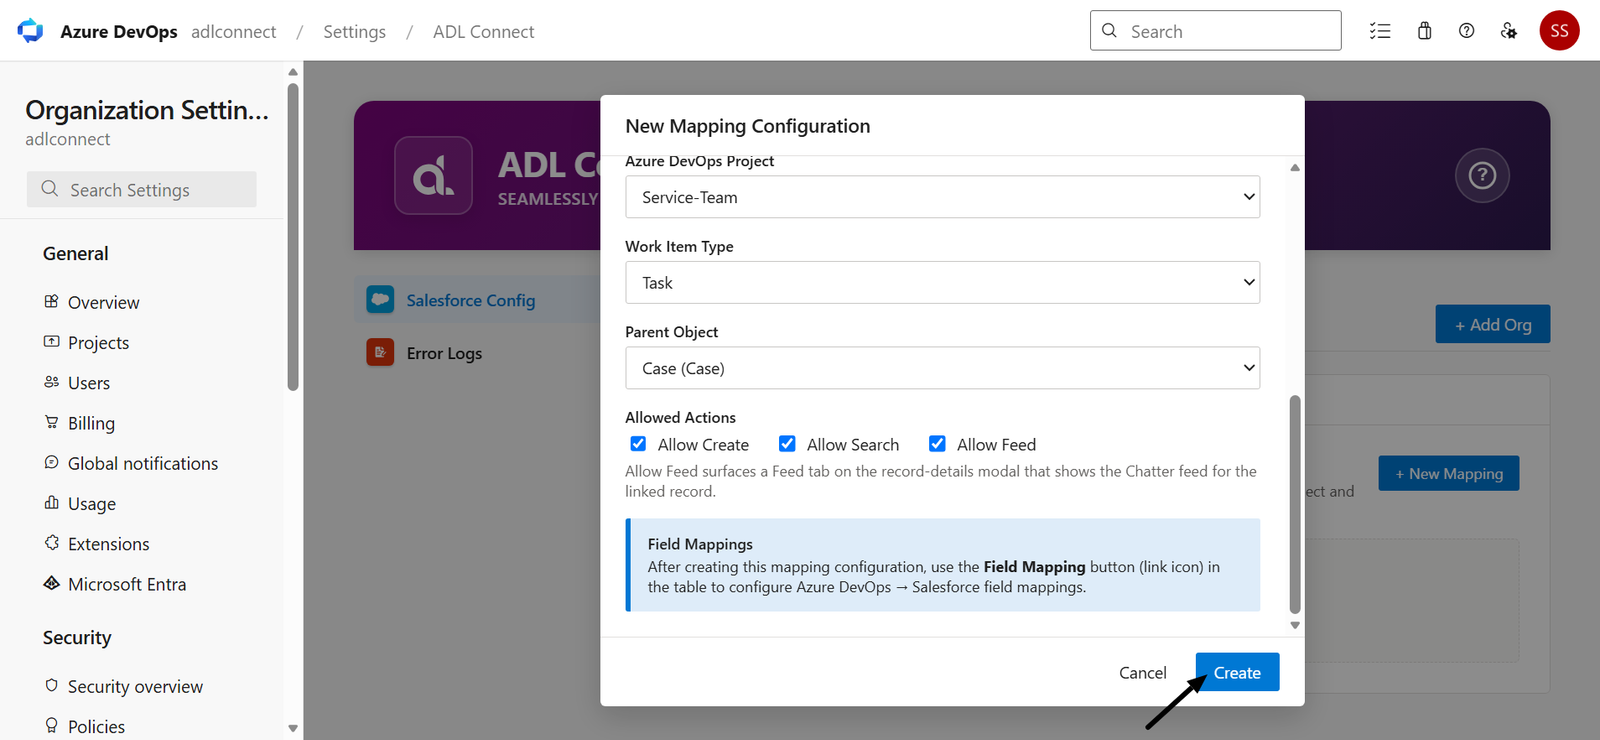
Click Create to save.
4. Review the Created Mapping
The new mapping appears as a row in the Project & Field Mapping table.
In this example:
- Connector Name: AZ-M-M
- Project: Service - Team
- Work Item Type: Task
- Parent Object: Case (Case)
- External ID Field: ADL_AzureDevOps__DevOpsId__c — the field that stores the unique Azure DevOps Work Item ID. This field is detected automatically from the installed package and displayed here for reference.
The row exposes four action controls:
- Panel Fields (grid icon) — Configure which Salesforce fields appear in the Azure DevOps work item panel for this parent object. At least one panel field must be configured for records to be displayed in the panel.
- Field Mapping (link icon) — Open the Field Mapping editor to configure synchronization between Azure DevOps work item fields and Salesforce fields in both directions.
- Edit (pencil icon) — Modify the project, work item type, parent object, external ID field, or other mapping configuration.
- Delete (red delete icon) — Remove the project and field mapping configuration. Existing linked Salesforce records remain intact; only the mapping configuration is deleted.
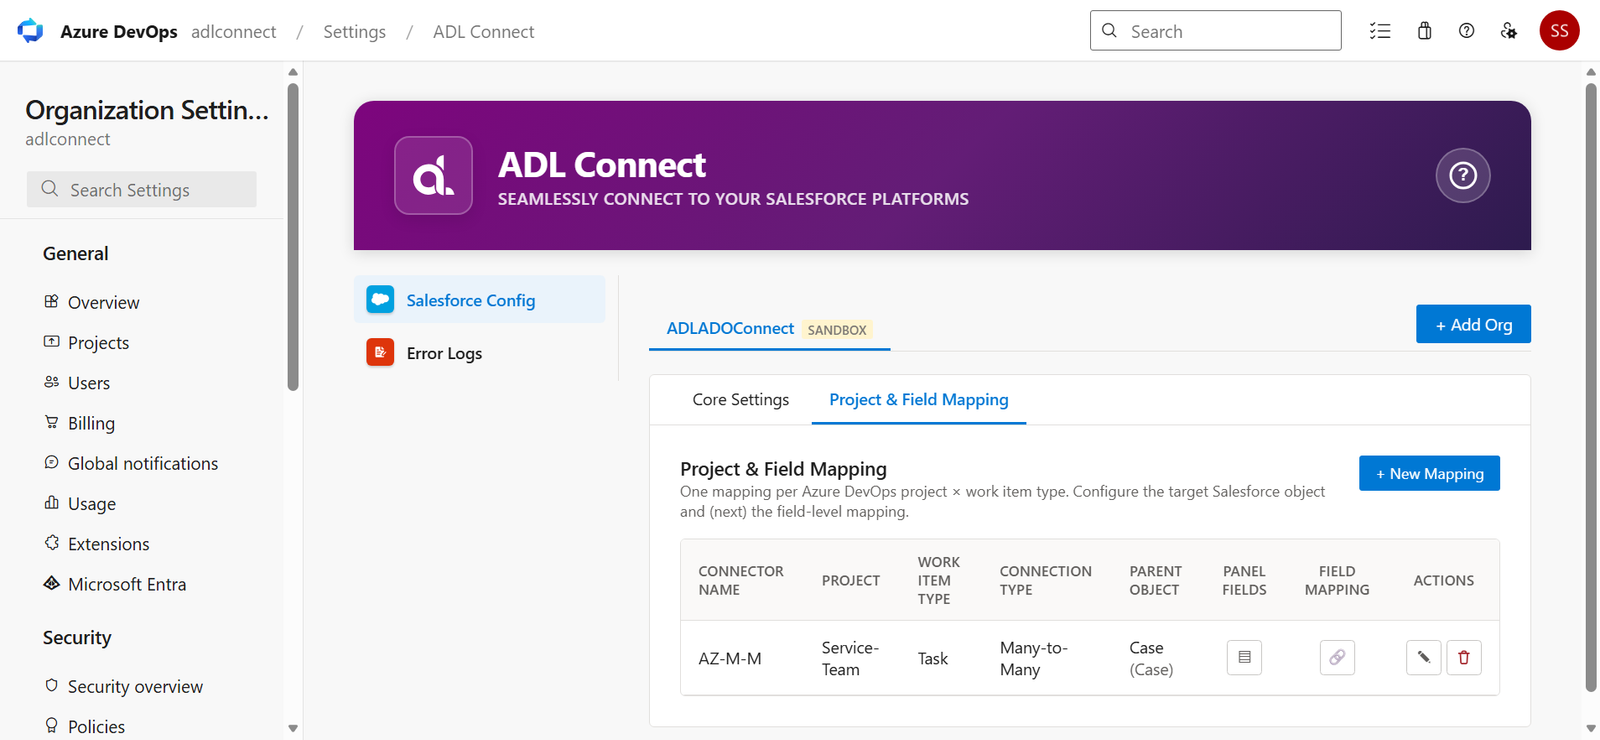
5. Next Steps
The mapping row is now active but not yet usable on Azure DevOps issues — two more configuration steps are recommended before opening an Azure DevOps issue:
- Configure Panel Fields (grid icon) — required for the Salesforce Details panel to display any rows for this parent on Azure DevOps issues.
- Configure Field Mapping (link icon) — define which Azure DevOps fields populate which Salesforce fields when creating or syncing records.
Repeat the + New Mapping process for every (Project + Work Item Type + Parent Object) combination you want to enable. For example, if you want Tasks in the same Azure DevOps project to link to both Cases and Accounts, create two separate mappings—one for each parent object.
Configure Field Mapping — Map Azure DevOps Fields to Salesforce Fields
After creating a mapping row under Project & Field Mapping, the next step is to define how individual Azure DevOps fields map to fields on the DevOpsRecord__c object and (optionally) to fields on the parent Salesforce object (e.g., Case, Account, Opportunity, Lead). These mappings determine what data is carried into Salesforce when a record is created from Azure DevOps, and what flows back when records are synced.
1. Open the Field Mapping Editor
From the Project & Field Mapping table, locate the mapping row you want to configure and click the Field Mapping icon (link icon) in that row.
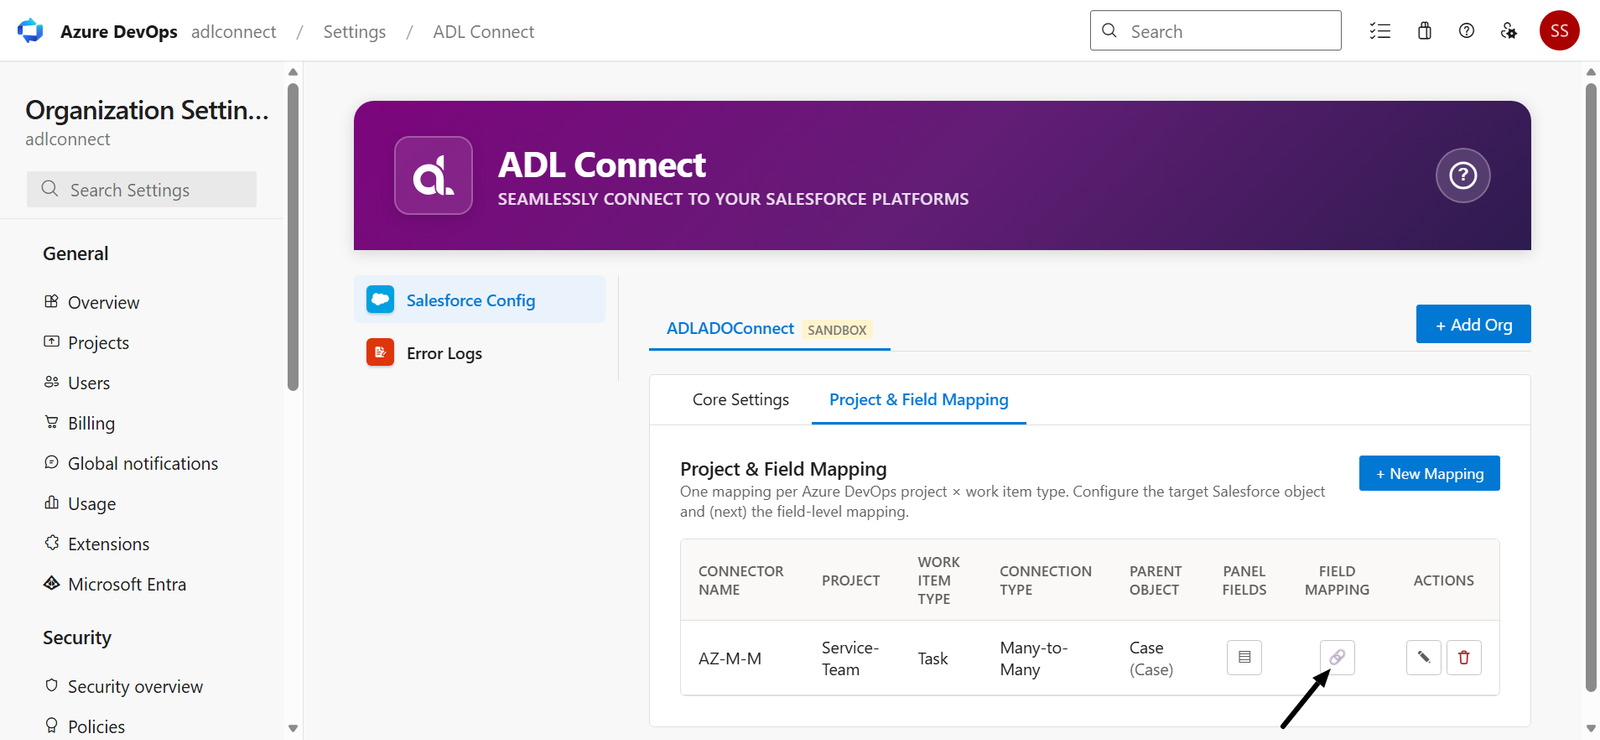
The Field Mapping modal opens.
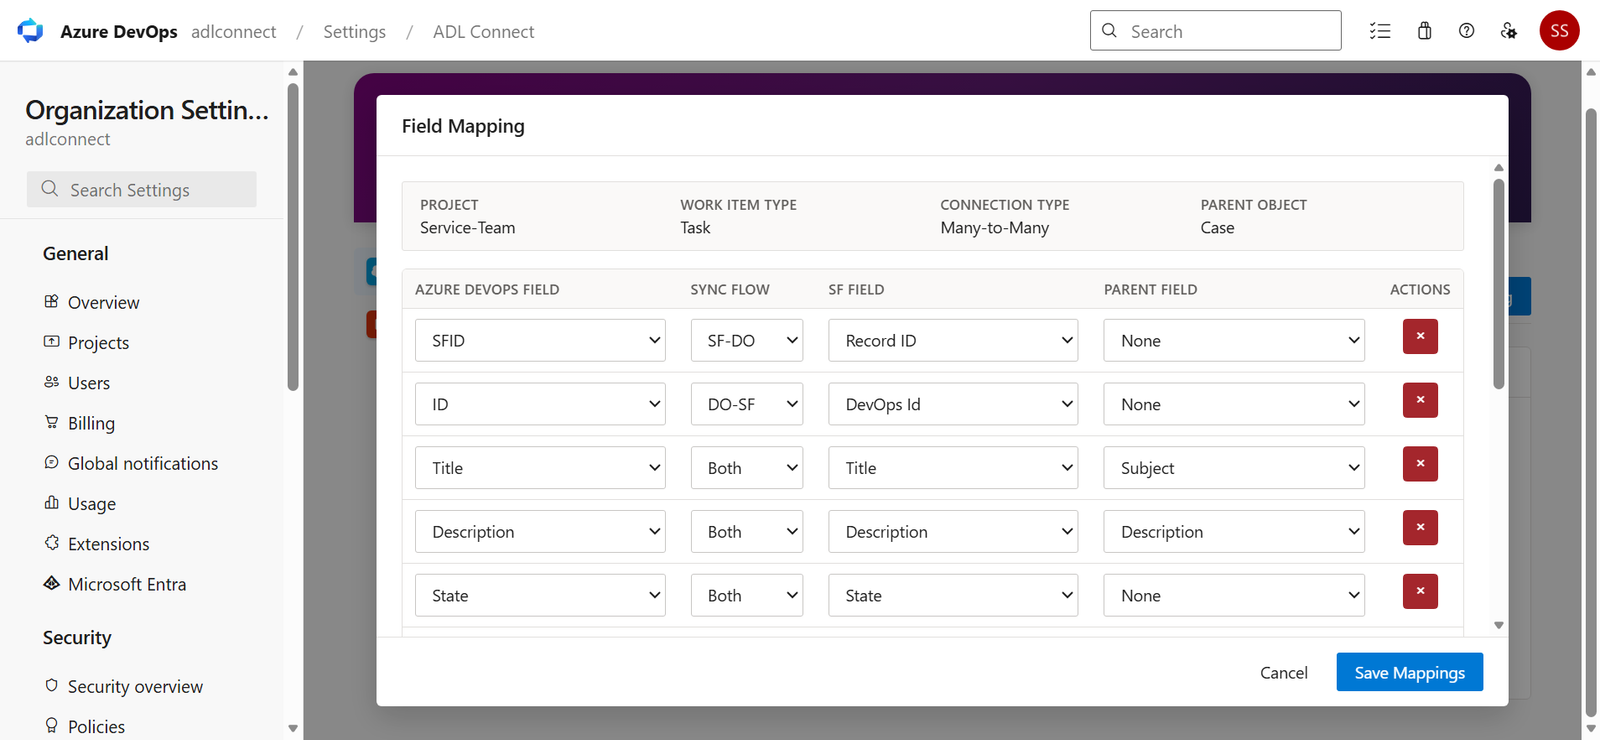
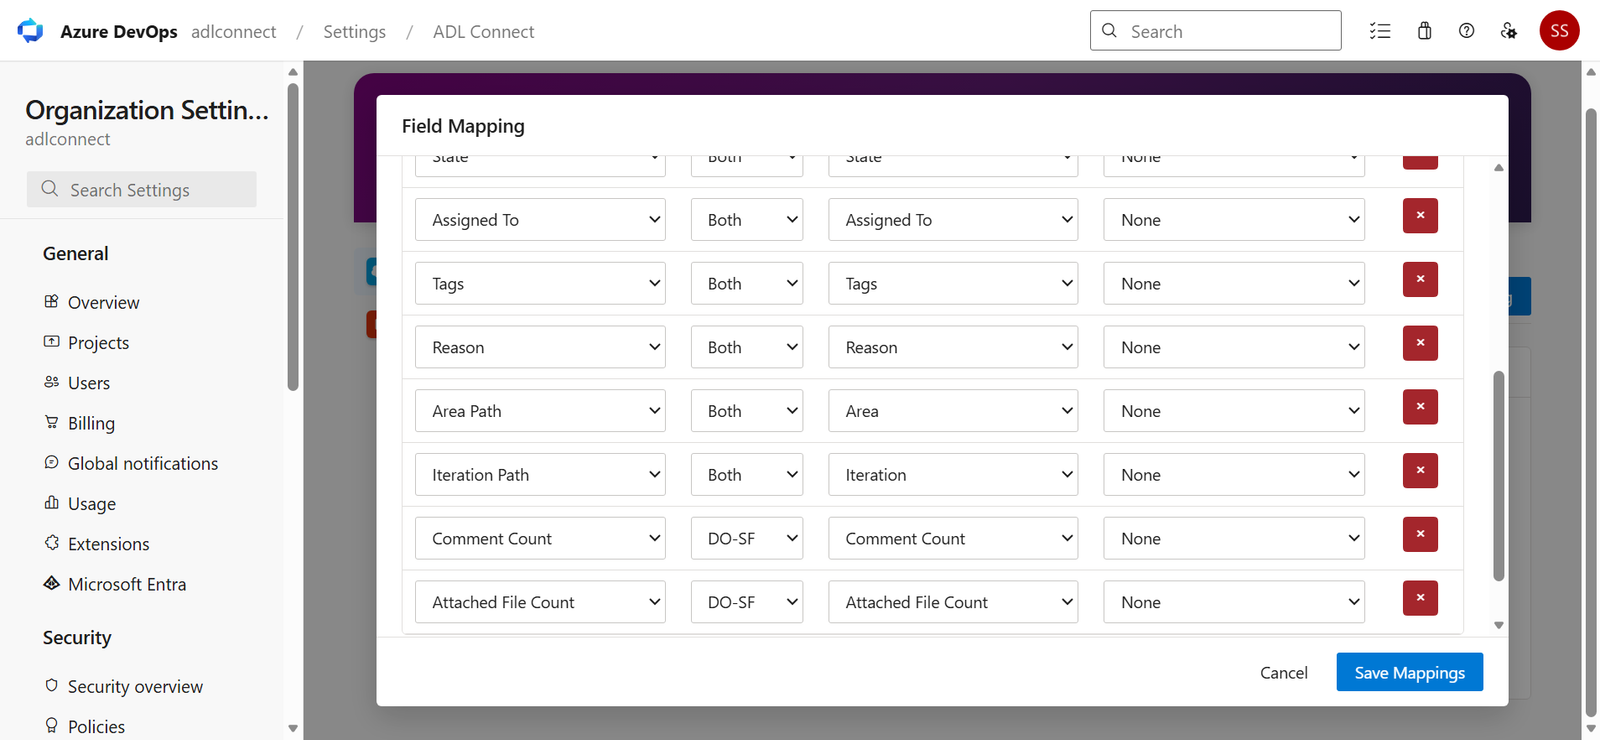
The modal header confirms the scope of the mapping:
- Project — e.g., Service-Team
- Work Item Type — e.g., Task
- Salesforce Object — ADL_AzureDevOps__DevOpsRecord__c (the canonical Azure DevOps mirror object)
- Parent Object — e.g., Case
The Field Mapping dialog provides the editor where you define the Azure DevOps → DevOpsRecord__c → Parent Object mapping rows.
An instructional line beneath the header reads:
Map each Azure DevOps field to a DevOpsRecord__c field and optionally a field on the selected parent Salesforce object. Select "None" for the Parent Field if no mapping is needed.
2. Understand the Five Columns
Each row in the Field Mapping editor has five columns:
Here is a clean, structured index of the Azure DevOps to Salesforce mapping table configuration.
Field Mapping Index
| Index | Column Name | Purpose & Function | Required / Optional | Key Options / Values |
| 1 | Azure DevOps Field | Defines the source field on the Azure DevOps work item. | Required | ID, Title, Description, State, Assigned To, Tags, Reason, Area Path, Iteration Path, or Custom Fields. |
| 2 | Sync Flow | Dictates the direction of data synchronization between systems. | Required | • SF-DO (Salesforce → Azure DevOps)• DO-SF (Azure DevOps → Salesforce)• Both (Bi-directional) |
| 3 | SF Field | The destination field on the custom Salesforce object where data is stored. | Required | Must map to ADL_AzureDevOps__DevOpsRecord__c. |
| 4 | Parent Field | An additional destination field on a linked parent record in Salesforce. | Optional | Select specific parent fields (e.g., on Case, Account, or custom objects) or select None. |
| 5 | Actions | Row management control. | N/A | Click Delete (×) to remove the field mapping row. |
The Third and Fourth rows are:
- Azure DevOps Field = Title
- Sync Flow = Both
- SF Field = Title
- Parent Field = Subject
and
- Azure DevOps Field = Description
- Sync Flow = Both
- SF Field = Description
- Parent Field = Description
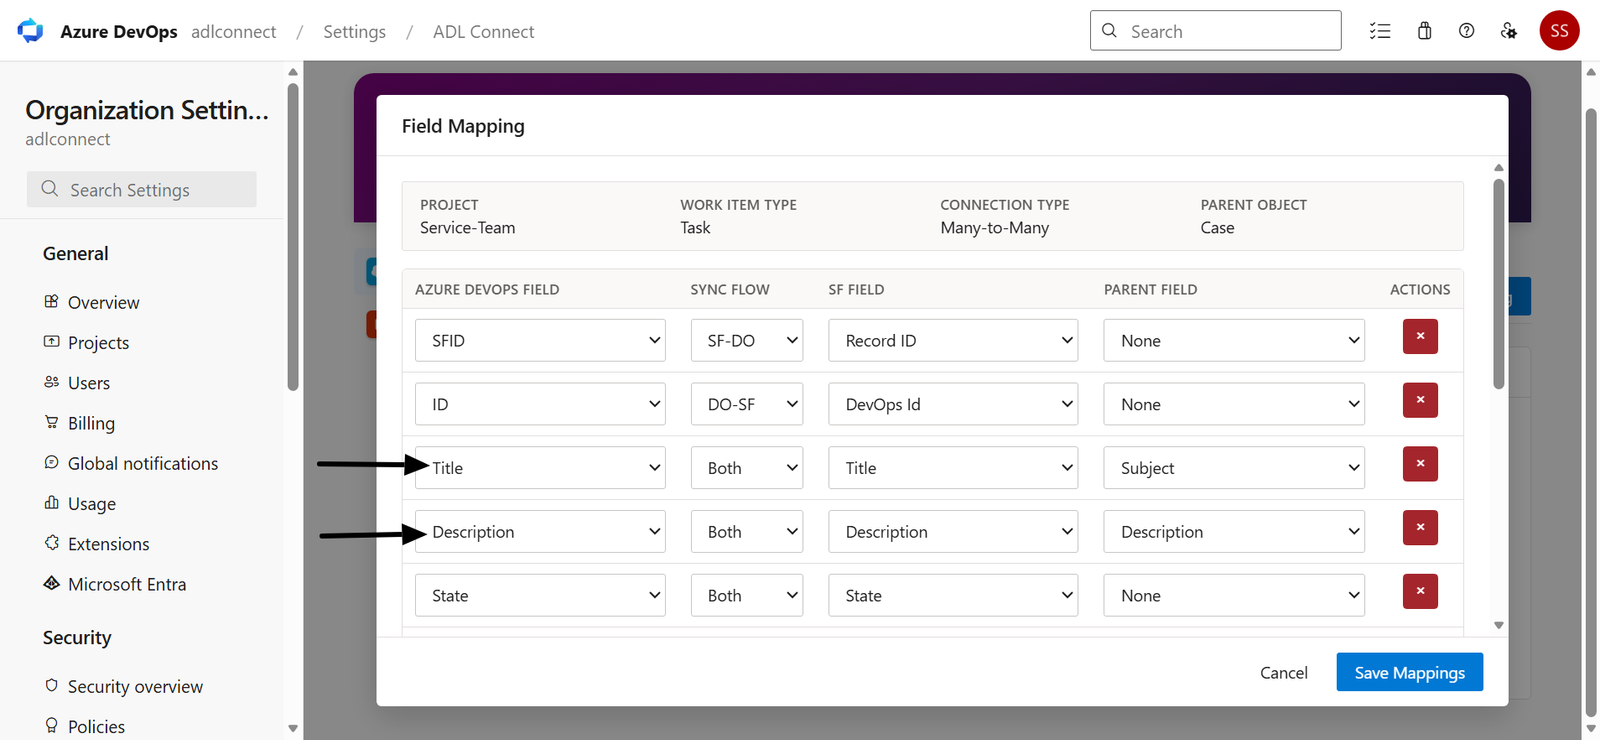
These mappings establish the unique relationship between the Azure DevOps work item and its corresponding DevOpsRecord__c record. The ID → DevOps Id mapping acts as the external identifier used by the synchronization engine and should not be removed, as all sync operations rely on it.
3. Add Field Mapping Rows (Optional)
Click + Add Row to add a new mapping. Repeat for every Azure DevOps field you want to map.
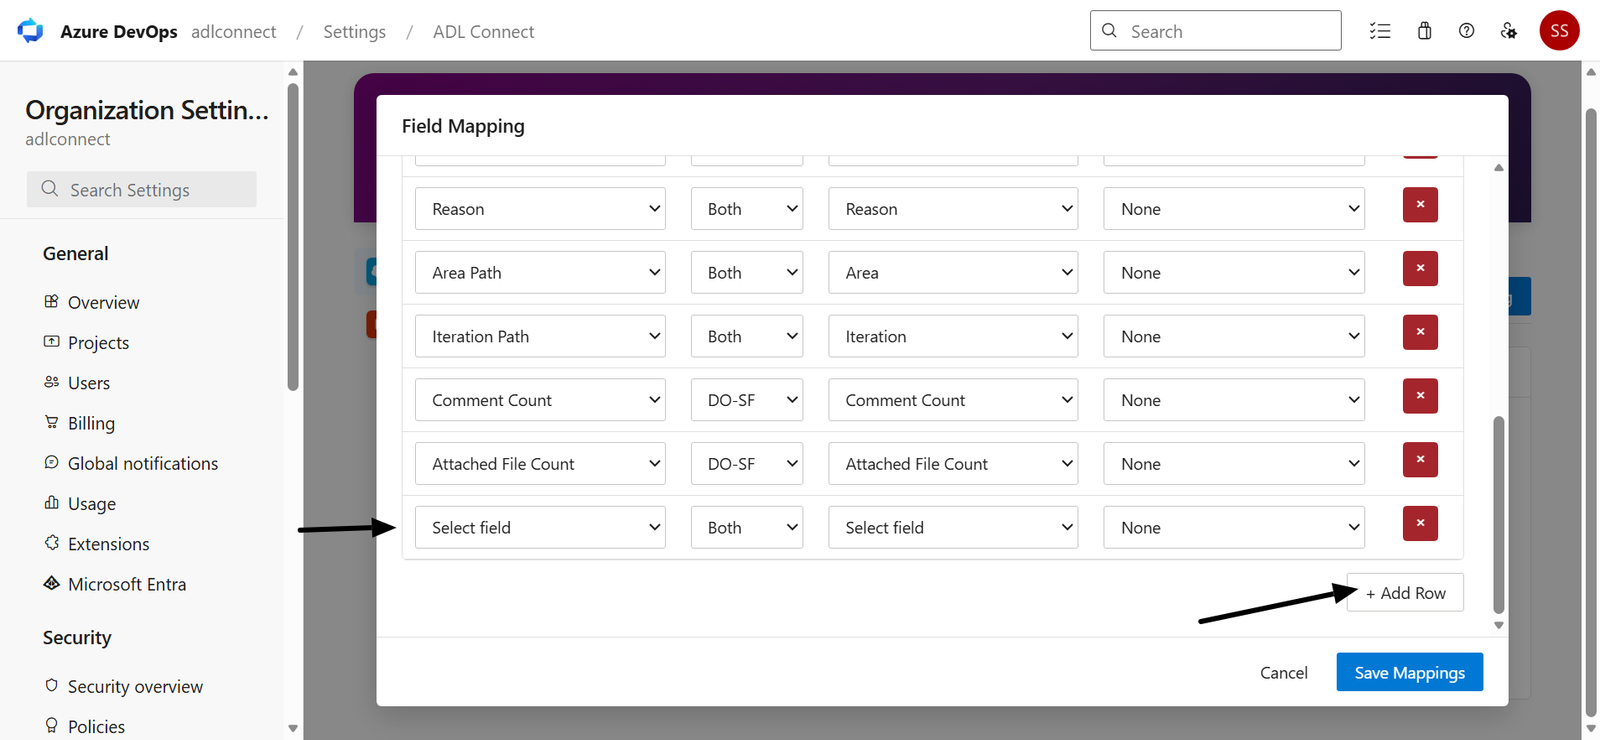
For each new row:
- Azure DevOps Field — Select the Azure DevOps work item field from the dropdown (for example, Title, Description, State, Assigned To, Tags, Reason, Area Path, Iteration Path, or any available custom field). The dropdown is populated from the live field list of the selected Azure DevOps project and work item type.
- Sync Direction — Choose how the field should synchronize:
- SF-DO – Sync from Salesforce to Azure DevOps.
- DO-SF – Sync from Azure DevOps to Salesforce.
- Both – Keep the field synchronized in both directions.
- Salesforce Mirror Field — Select the corresponding field on the Azure DevOps record object (for example, Title, Description, State, Assigned To, Tags, or another mapped field).
- Parent Object Field (Optional) — Optionally map the value to a field on the selected Salesforce parent object (such as Case, Account, or another configured parent). For example:
- Title → Case Subject
- Description → Case Description
- State → Status
- Leave this value as None if the field should only synchronize between Azure DevOps and the integration record.
Tip: The Parent Object Field is optional. Select a Salesforce field only if you want the Azure DevOps value to be copied to the parent Salesforce record. Otherwise, leave it as None.
- To create another mapping, click + Add Row and repeat the process.
- To remove a mapping row, click the red × button at the end of the row.
- After configuring all required mappings, click Save Mappings to save the configuration, or click Cancel to discard your changes.
4. Configure Field Mappings
In the Field Mapping dialog, configure how Azure DevOps work item fields map to Salesforce fields.
For each mapping row:
- Salesforce Field – Select the Salesforce field to synchronize (for example, Title, Description, State, Assigned To, or a custom field).
- Sync Direction – Choose how data should flow:
- SF-DO – Synchronize from Salesforce to Azure DevOps only.
- DO-SF – Synchronize from Azure DevOps to Salesforce only.
- Both – Synchronize changes in both directions.
- Azure DevOps Field – Select the corresponding Azure DevOps work item field (for example, Title, Description, State, Assigned To, Tags, Reason, Area, or Iteration).
- Salesforce Mirror Field – Select the Salesforce field that stores the synchronized Azure DevOps value, if applicable. Choose None if no mirror field is required.
- Click the Delete (✕) button to remove an existing mapping.
- Click + Add Row to create additional field mappings.
- After configuring all required mappings, click Save to store the field mapping configuration.
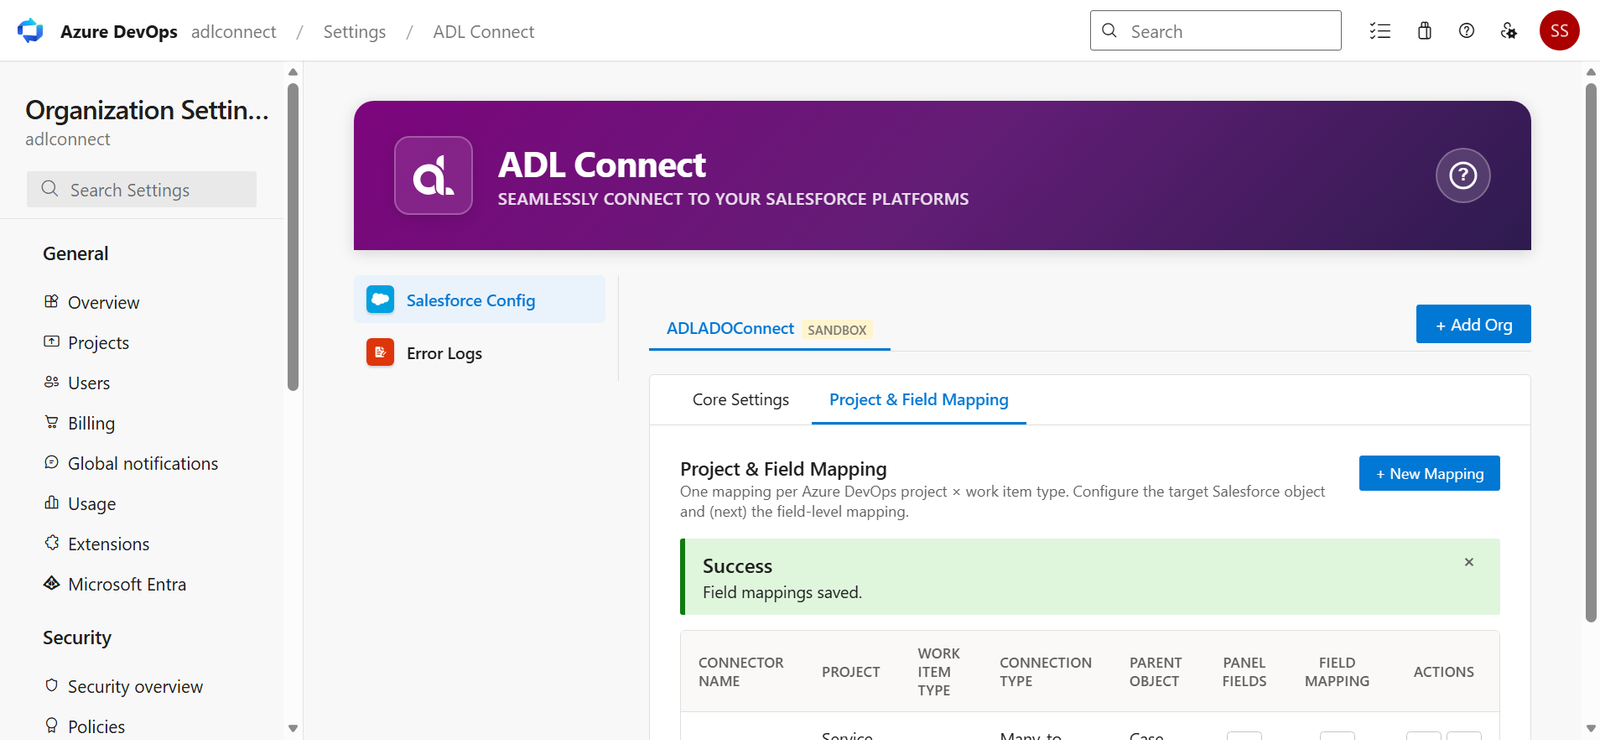
Note: Configure only the fields required for your integration. Ensure the integration user has the necessary read and write permissions for every Salesforce field included in the mapping.
5. Next Steps
With field mappings saved:
- Open an Azure DevOps work item matching the configured Project and Work Item Type — the Salesforce Details panel will now display the enabled actions (+ New, Search, and Feed, depending on the mapping configuration). Creating a new Salesforce record will prefill values from the mapped Azure DevOps fields; linking an existing Salesforce record will populate the panel using the configured field mappings.
- Verify the mapped fields — changes made to mapped fields in either Azure DevOps or Salesforce will synchronize according to the configured sync direction (SF-DO, DO-SF, or Both) defined in the Field Mapping.
Re-open the Field Mapping editor at any time to add, remove, or modify mapping rows as your Salesforce schema or Azure DevOps work item fields evolve. Existing linked records continue to synchronize using the updated mappings on the next synchronization event.
Configure Issue Panel Fields — Choose Columns Shown on the Issue Panel
After saving the Field Mapping, the final configuration step for each mapping row is to define which Salesforce fields appear as columns on the Azure DevOps issue panel for records of this parent object. This step is required — until at least one field is selected, linked records of this parent will not render on the Azure DevOps work item panel.
The Issue Panel Fields editor is scoped per mapping row, so you can show different columns for Cases than for Accounts or Opportunities, even within the same Azure DevOps project and work type.
1. Open the Issue Panel Fields Editor
From the Project & Field Mapping table, locate the mapping row and click the Panel Fields icon (grid icon) in the Panel Fields column.
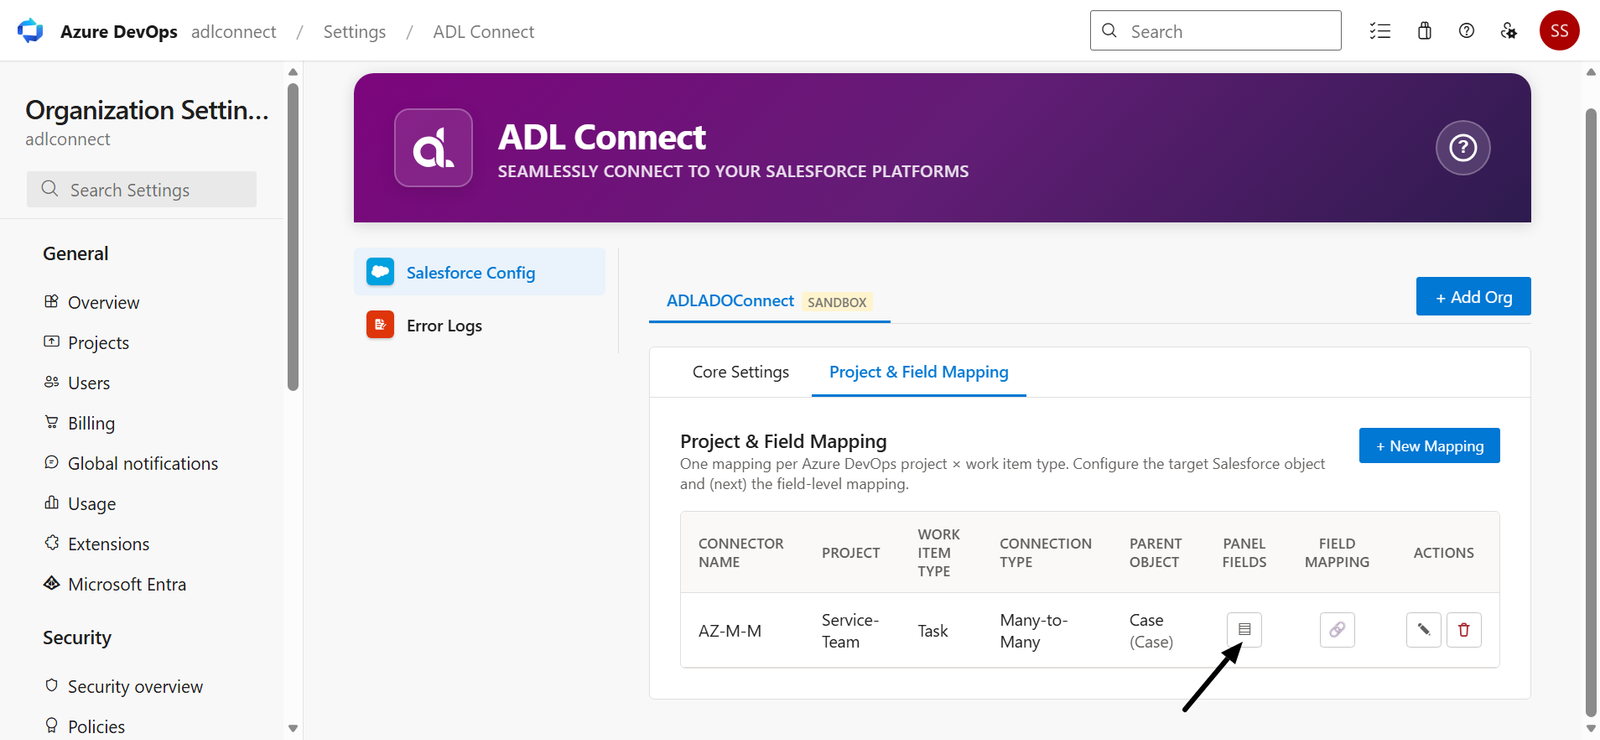
The Issue Panel Fields — Task modal opens (the work type from the mapping row appears in the title).
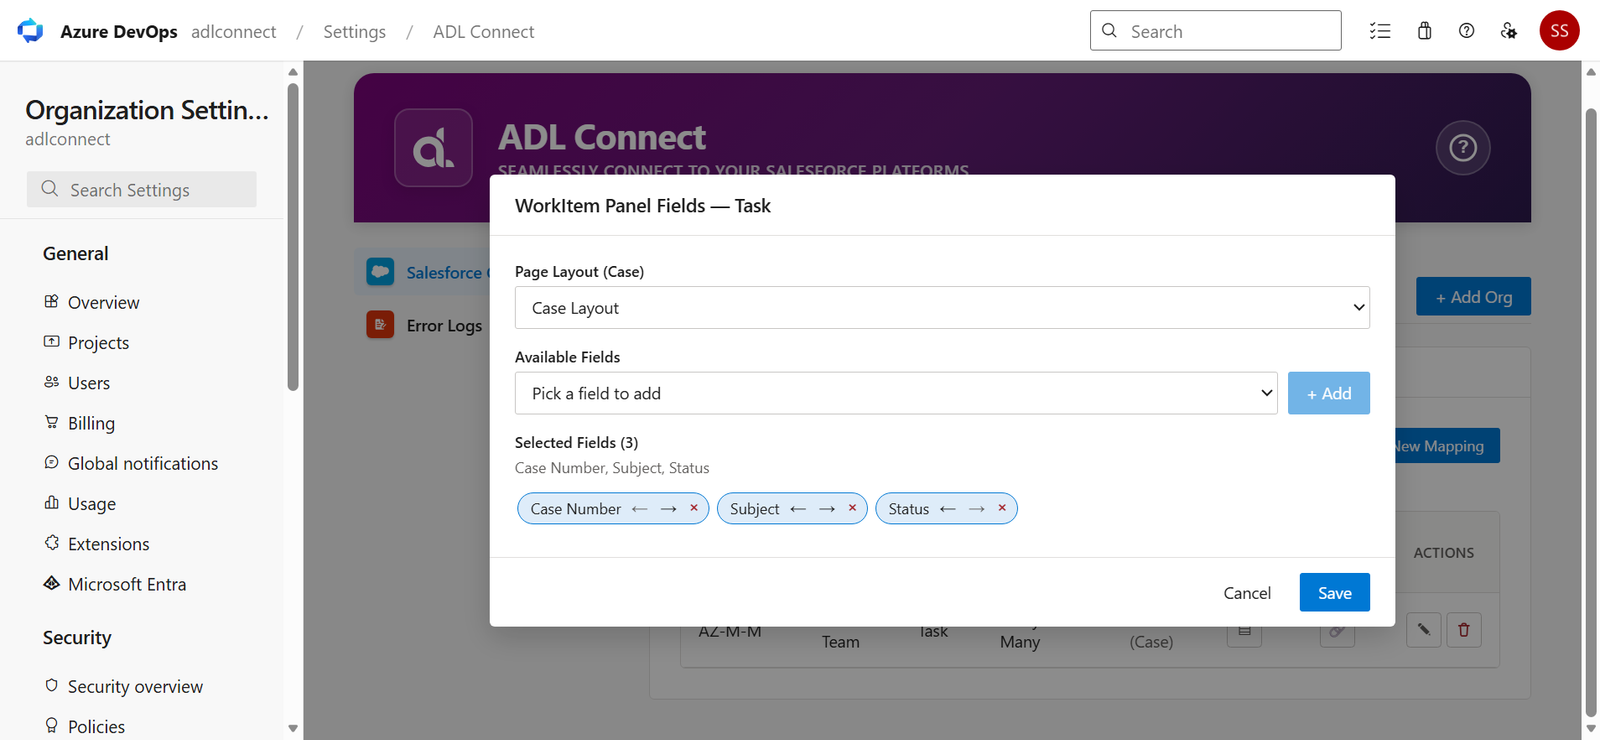
The modal contains three sections:
- Page Layout (Case) — Select the Salesforce page layout whose fields will be available for display on the Azure DevOps work item panel.
- Available Fields — Choose a field from the dropdown, then click + Add to include it in the panel.
- Selected Fields — Displays the fields that will appear on the Azure DevOps work item panel. You can reorder the selected fields using the left/right arrow controls or remove a field using the × icon.
The initial state shows:
- The selected page layout (for example, Case Layout).
- No fields are selected by default. Select a field from Available Fields and click + Add to move it to Selected Fields.
The Save button remains disabled until at least one field has been added to the Selected Fields list. Once one or more fields are selected, click Save to apply the panel field configuration.
2. Select a Salesforce Page Layout
Click the Page Layout (Case) dropdown.
The Page Layout dropdown lists the Salesforce page layouts available for the selected object in the connected Salesforce org.
In this example, the available layout is:
- Case Layout
Select the page layout that contains the fields you want to display on the Azure DevOps work item panel.
Once a page layout is selected, the Available Fields dropdown is automatically populated with the fields included in that layout. Only the fields exposed by the selected page layout are available for selection.
The selected layout determines which standard, and custom Salesforce fields can be added to the Selected Fields list and displayed on the Azure DevOps work item panel.
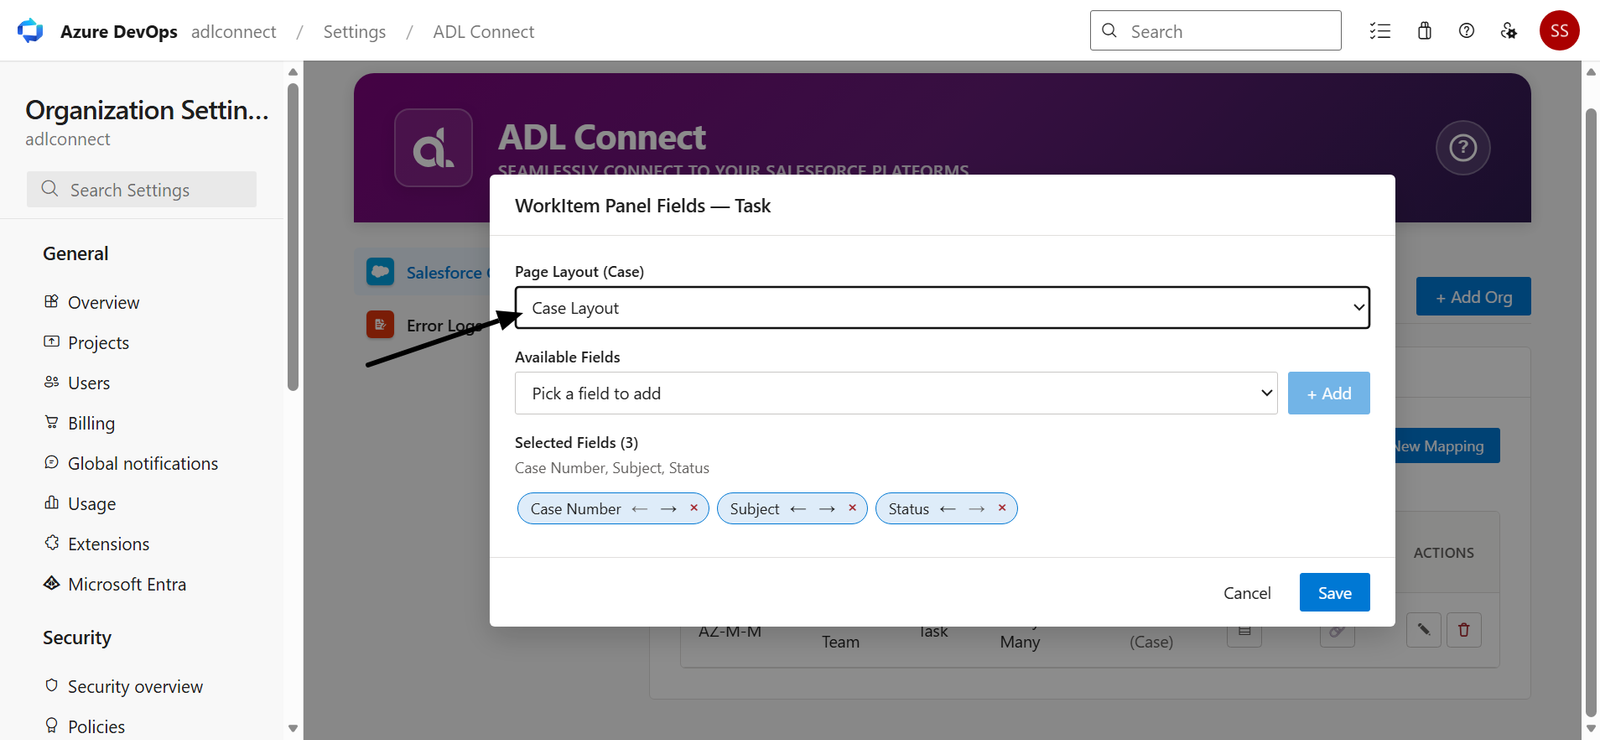
3. Add Fields to the Selected List
Click the Available Fields dropdown and either scroll through the list or type the field name to search for it.
After selecting a field, click the + Add button to move it to the Selected Fields list.
In this example, three fields have been added to the Azure DevOps work item panel:
- Case Number
- Subject
- Status
The Selected Fields (3) counter updates automatically as fields are added. A comma-separated summary of the selected fields is displayed above the chip list (for example, Case Number, Subject, Status) for quick review.
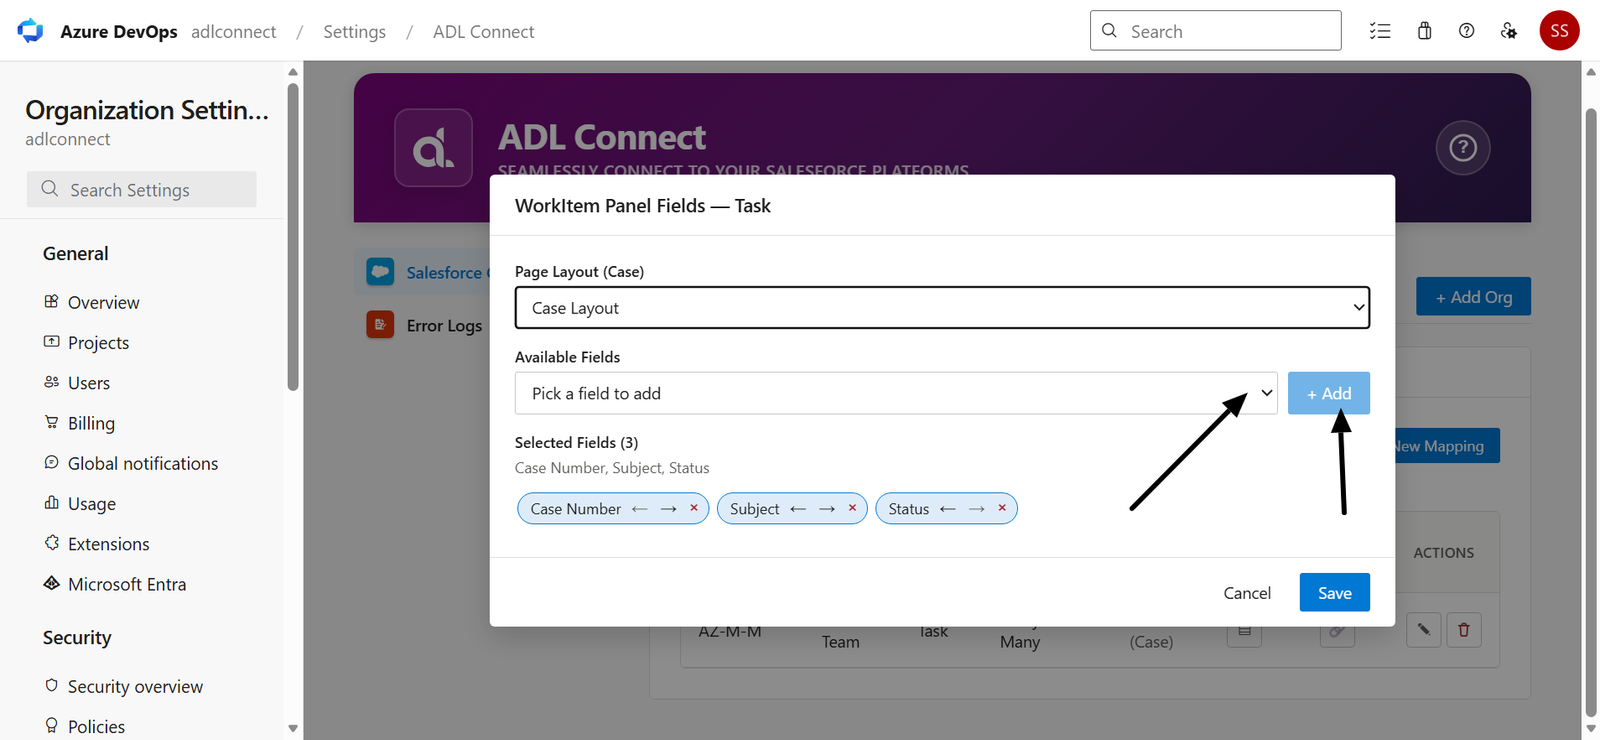
Reorder Fields
Each selected field is displayed as a chip containing ← and → controls. Use these controls to move a field left or right. The order of the chips determines the left-to-right display order of fields on the Azure DevOps work item panel.
Remove a Field
Click the × icon on a field chip to remove it from the Selected Fields list. The removed field becomes available again in the Available Fields dropdown and can be added back at any time.
After you have selected and arranged the required fields, click Save to apply the panel field configuration. Use Cancel to close the dialog without saving your changes.
4. Choose Fields That Are Useful at a Glance
Select fields that provide the most relevant information for users viewing the Azure DevOps work item panel. The panel is intended to present key Salesforce data in a compact, easy-to-read format.
Recommended field types include:
- Record identifiers — such as Case Number or Title, so users can quickly identify the related Salesforce record.
- Business-specific fields — custom fields that provide important context for your organization or business process.
- Short text, picklist, number, date, or checkbox fields — these display clearly within the panel and make information easy to scan.
Avoid selecting fields that contain large amounts of text or formatted content, as they can reduce the readability of the panel. Keep the panel focused on concise, high-value information.
Tip: Panel Fields only controls which Salesforce fields are displayed on the Azure DevOps work item panel. It does not affect data synchronization between Azure DevOps and Salesforce. Data synchronization is configured separately through Field Mapping, so a field can be displayed in the panel without being included in field mappings, and vice versa.
5. Save the Panel Configuration
Once the desired fields are selected and ordered, the Save button becomes active.
Click Save to persist the panel configuration against this mapping row.
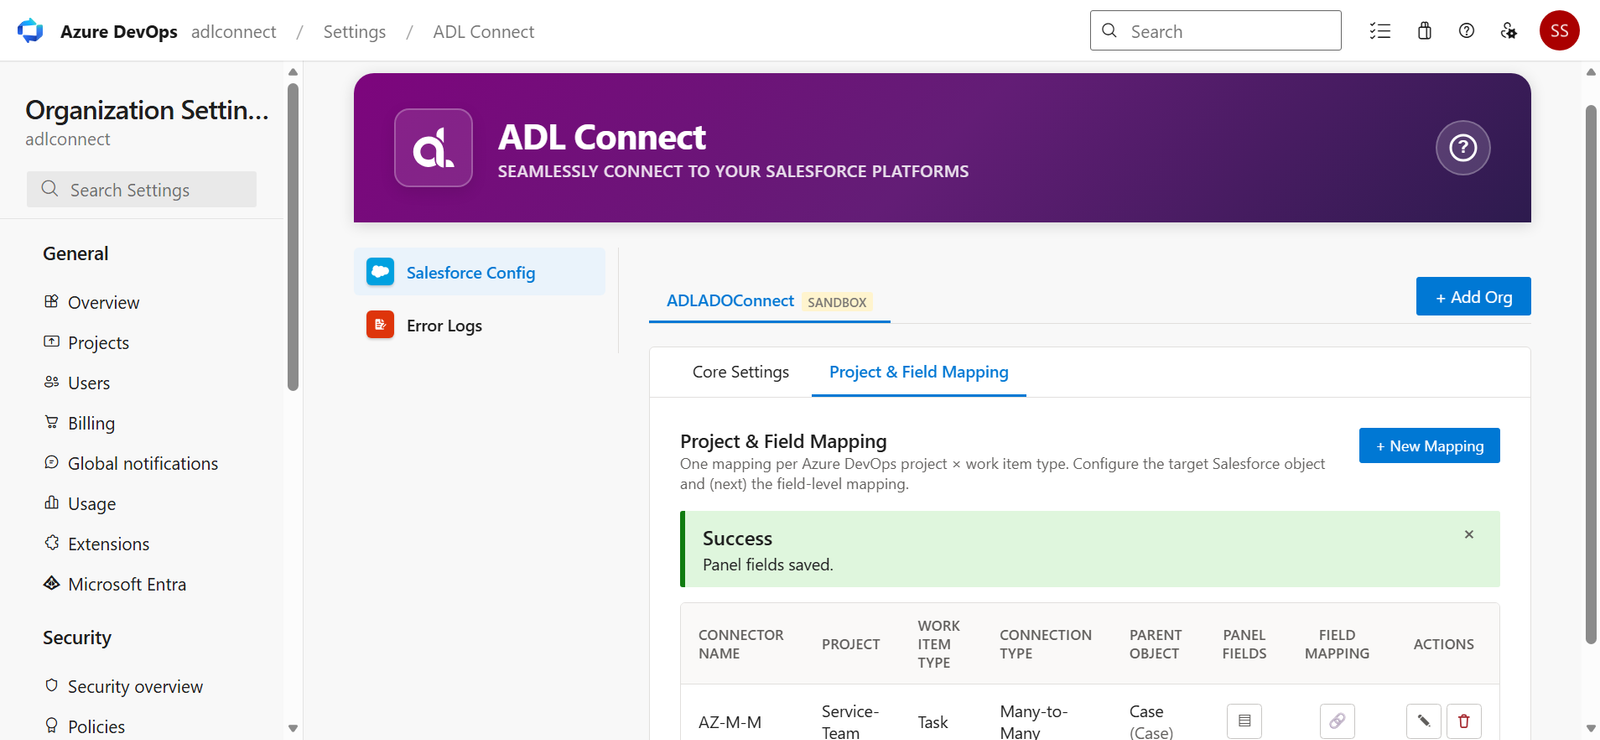
The modal closes and the mapping row in the Project & Field Mapping table reflects that Panel Fields are now configured (the grid icon remains enabled for further edits).
Creating a New Salesforce Record from an Azure DevOps Work Item
This step covers how to create a new Salesforce record (e.g., a Case) directly from an Azure DevOps work item using the Salesforce Details panel. This is useful when the required Salesforce record does not yet exist and needs to be created based on the work item details.
Prerequisites:
- A Project Mapping must exist for the current Azure DevOps Project and Work Item Type.
- The mapping must include the parent Salesforce object (e.g., Case) with its configured Panel Fields, Review Fields, and Field Mappings.
1. Open an Azure DevOps Work Item
Open an Azure DevOps work item that matches a configured (Project + Work Item Type) mapping. In this example, open the Task 548 – MARKET work item in the Service-Team project.
If the work item is newly created, click Save before continuing. Then, select the Salesforce tab to open the Salesforce Details panel. If a Salesforce record is not yet linked, the panel will appear, allowing you to create a new one.
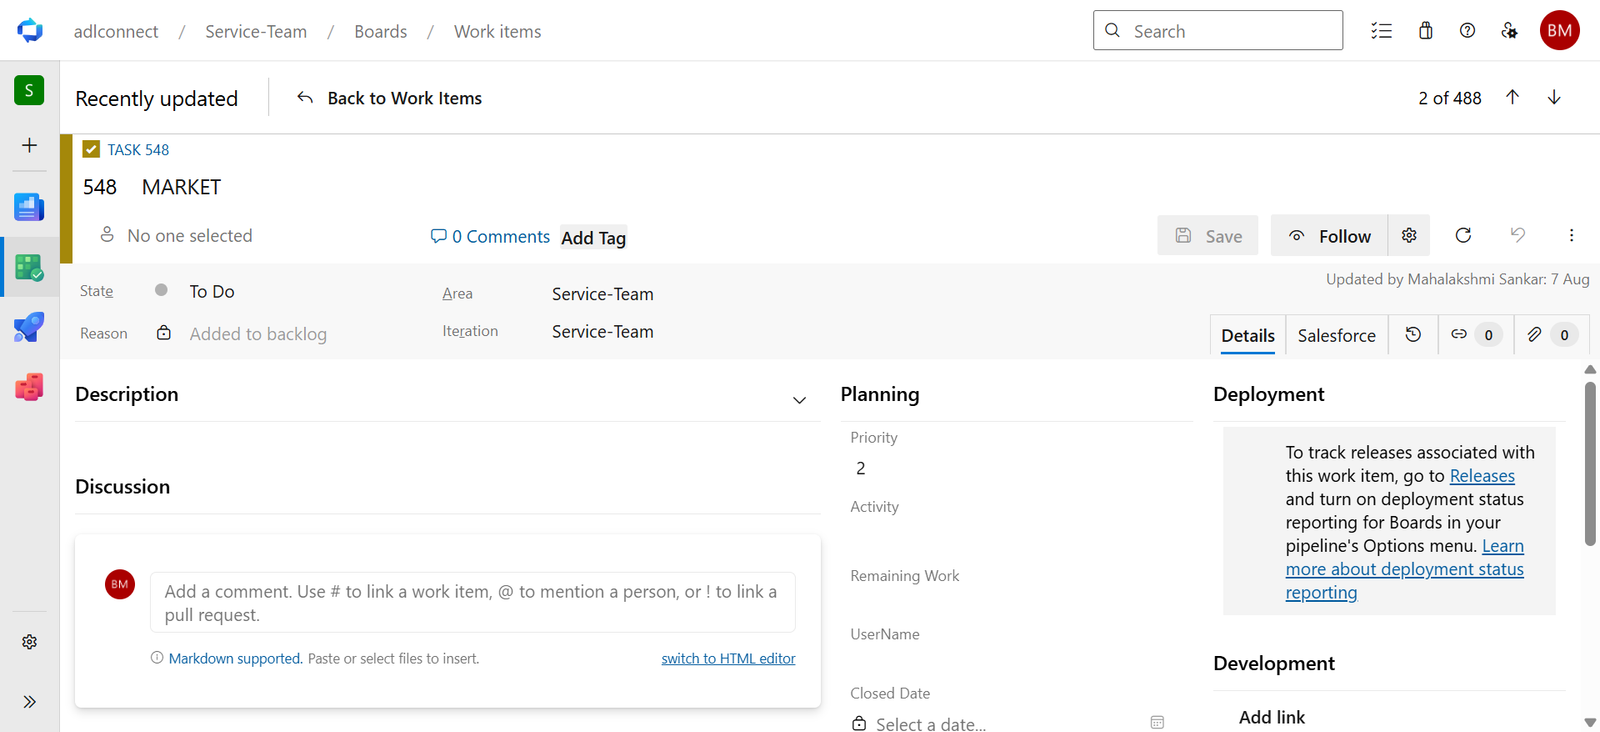
2. The Salesforce Details Panel
The Salesforce Details panel appears in the Salesforce Records section of the Azure DevOps work item. The panel provides all the tools needed to manage the relationship between Azure DevOps and Salesforce.
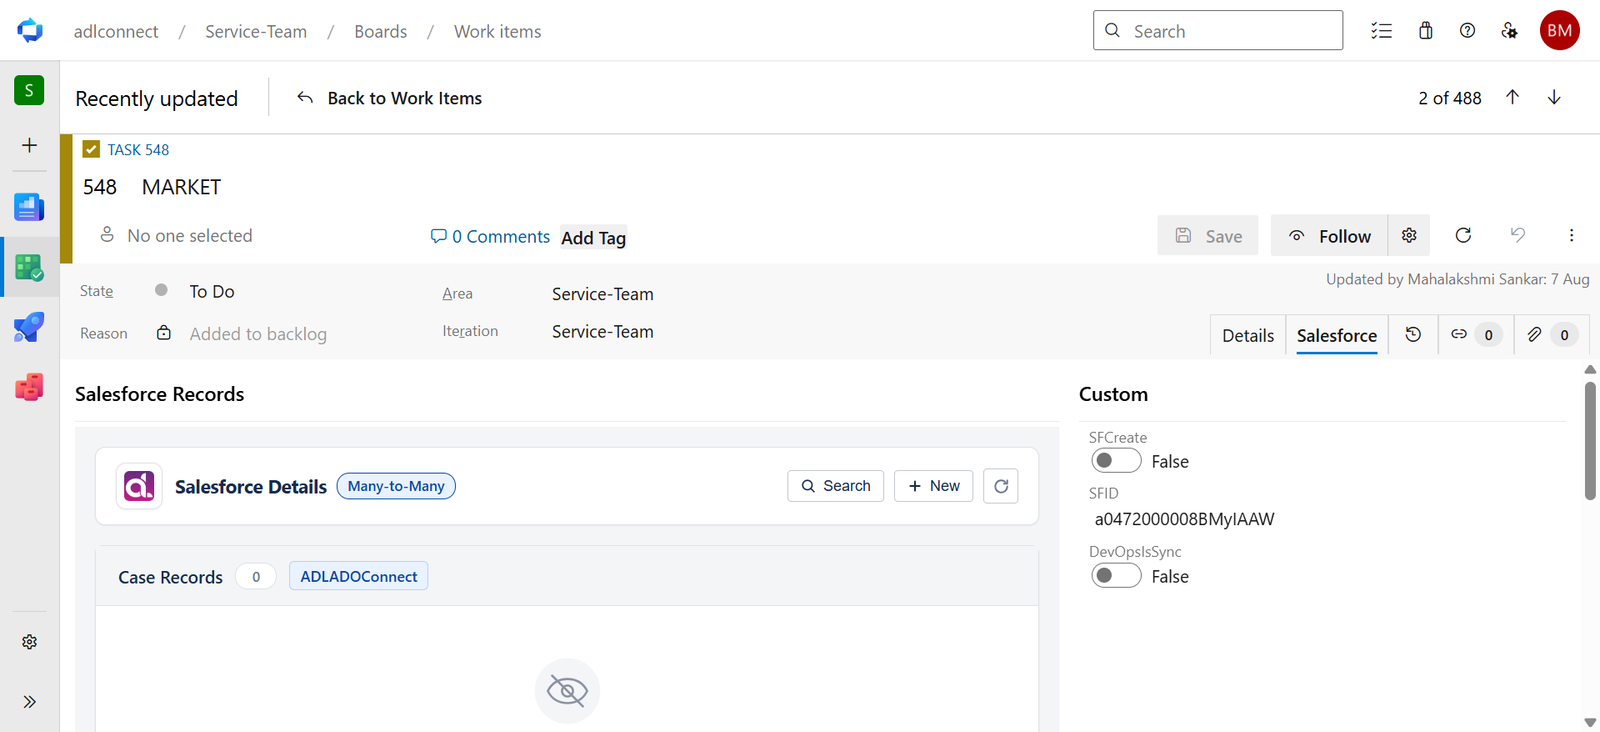
Key elements of the panel:
- Salesforce Details — The main panel header.
- Many-to-Many badge — Indicates that multiple links are supported between records in both systems.
- Refresh icon — Reloads the panel and retrieves the latest linked records.
- + New button — Used to create a new Salesforce record.
- Search button — Used to find and link an existing Salesforce record.
- Case Records section — Displays all linked Salesforce Case records.
- Open icon — Opens the Salesforce record in a new browser tab.
- Edit (pencil) icon — Opens the Review & Link dialog to update the linked record.
- Delete (trash) icon — Removes the link to the Salesforce record.
3. Create the New Record
To create a new Salesforce Case record from the current work item:
- Click the + New button in the Salesforce Details panel header.
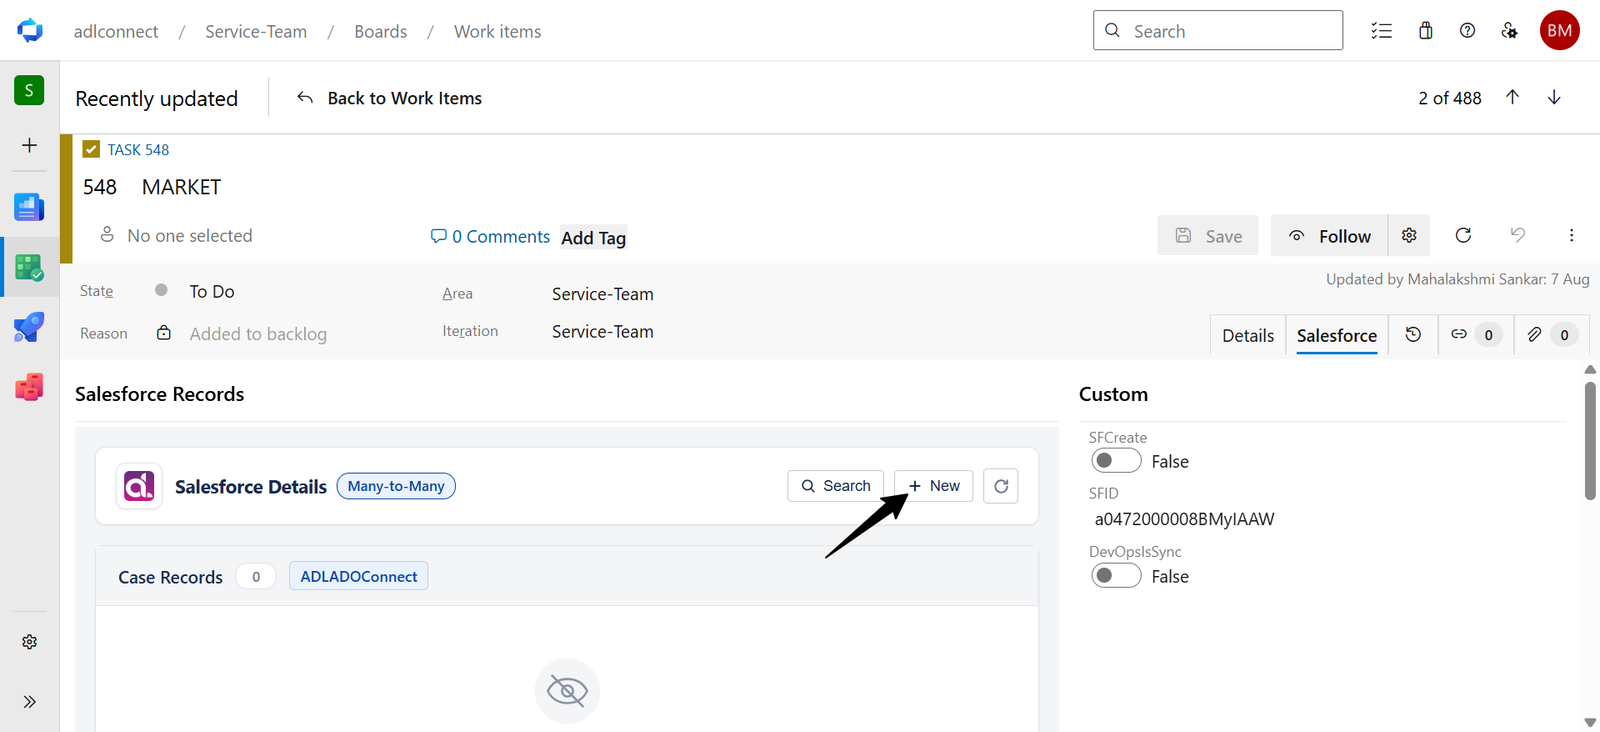
Review & Create Record Opens,
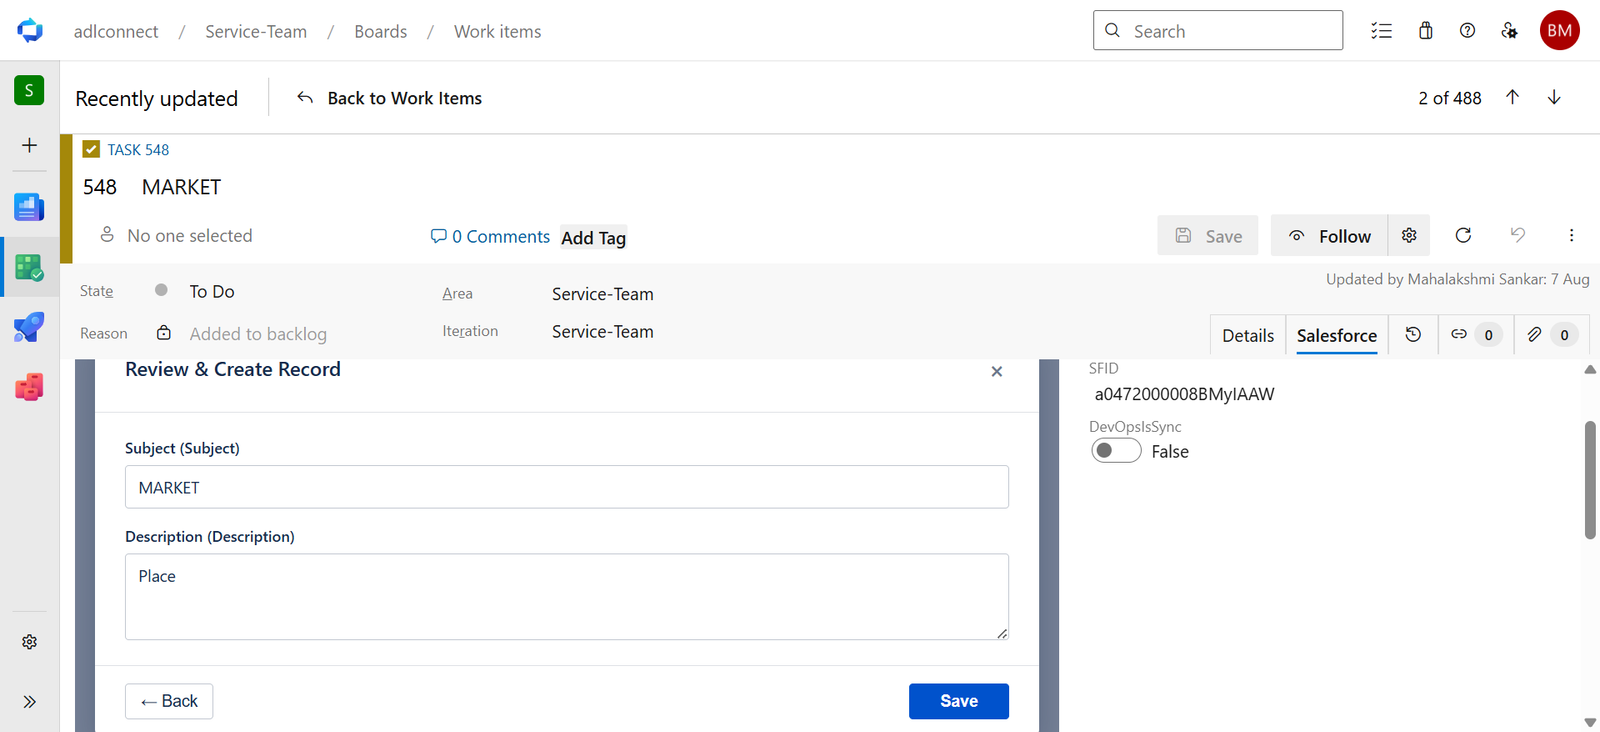
4. Finalize and Link the Record
If the Review & Create Record dialog is displayed:
- Review and adjust any fields in the Case Details section as needed.
- Click Save & Link to create the new Case record in Salesforce and link it to the current Azure DevOps work item.
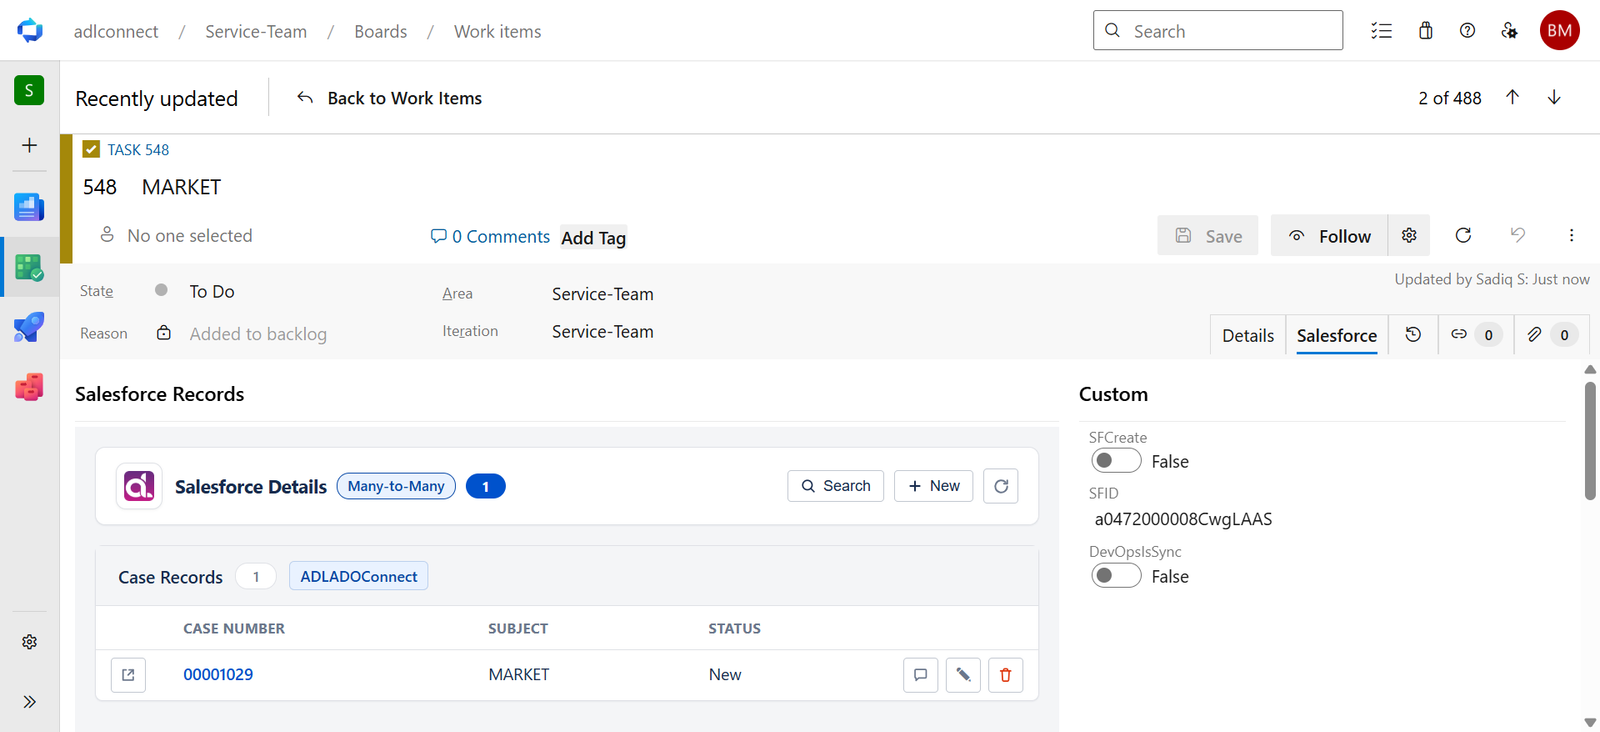
Upon successful creation, the Review & Create Record dialog closes, and the Salesforce Details panel is updated to show:
- The newly created Salesforce Case, including the generated Case Number (e.g., 00001029).
- The Case Records (1) in the panel header, indicating one linked record.
- The Delete (trash) icon, confirming that the record is now linked.
You have successfully created and linked a new Salesforce Case record from an Azure DevOps work item. The record relationship is now established and visible in both systems.
Viewing a Linked Salesforce Record — Details, Related, and Attachments
Beyond the summary columns displayed in the Salesforce Details panel, ADL Connect for Azure DevOps allows users to open a complete view of any linked Salesforce record without leaving Azure DevOps. The record detail dialog provides three tabs Details, Related, Attachments and Feed giving users access to the same Salesforce record information available on the configured page layout, directly within the Azure DevOps work item.
This view is intended for reviewing record information. To modify Salesforce fields, use the Edit (pencil) action available on the linked record in the Salesforce Details panel. The detail dialog is designed for viewing record details, exploring related records, and accessing attachments without navigating away from Azure DevOps.
1. Open the Record Detail Dialog
From the Salesforce Details panel on an Azure DevOps work item, locate the linked Salesforce record you want to inspect (for this example, a0472000008CwgLAAS) and click the Open icon (the box-with-arrow icon) at the beginning of the row.
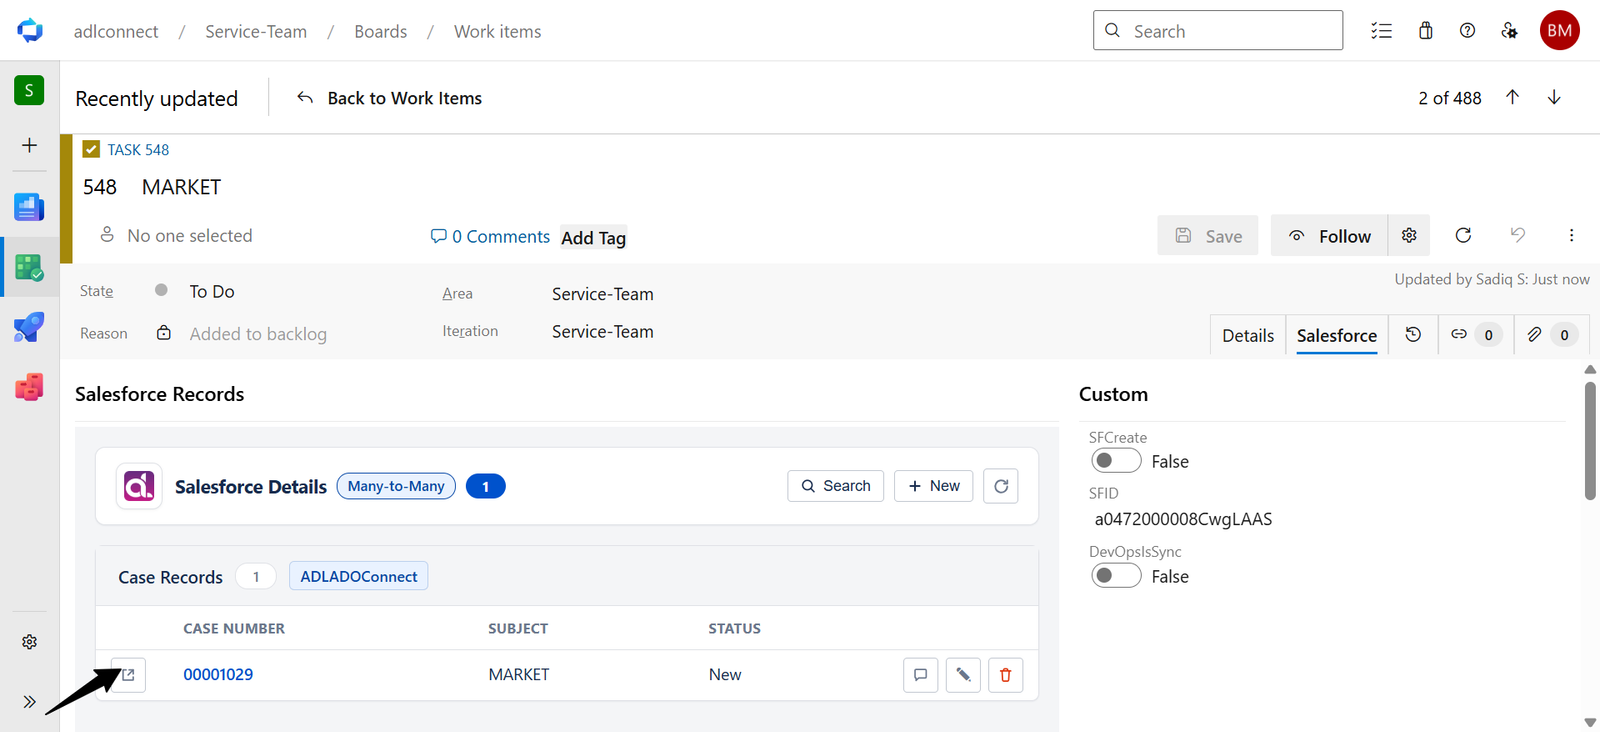
- Open icon (left of the row) → Opens the Record Detail dialog within Azure DevOps. This dialog provides a read-only view of the linked Salesforce record with the Details, Related, Attachments and Feed tabs, allowing you to inspect the record without leaving Azure DevOps.
- Edit (pencil) icon → Opens the Review & Link dialog, allowing you to update the configured review fields for the linked Salesforce record and save the changes back to Salesforce.
The Case record detail dialog opens, with the Details tab selected by default.
2. The Details Tab
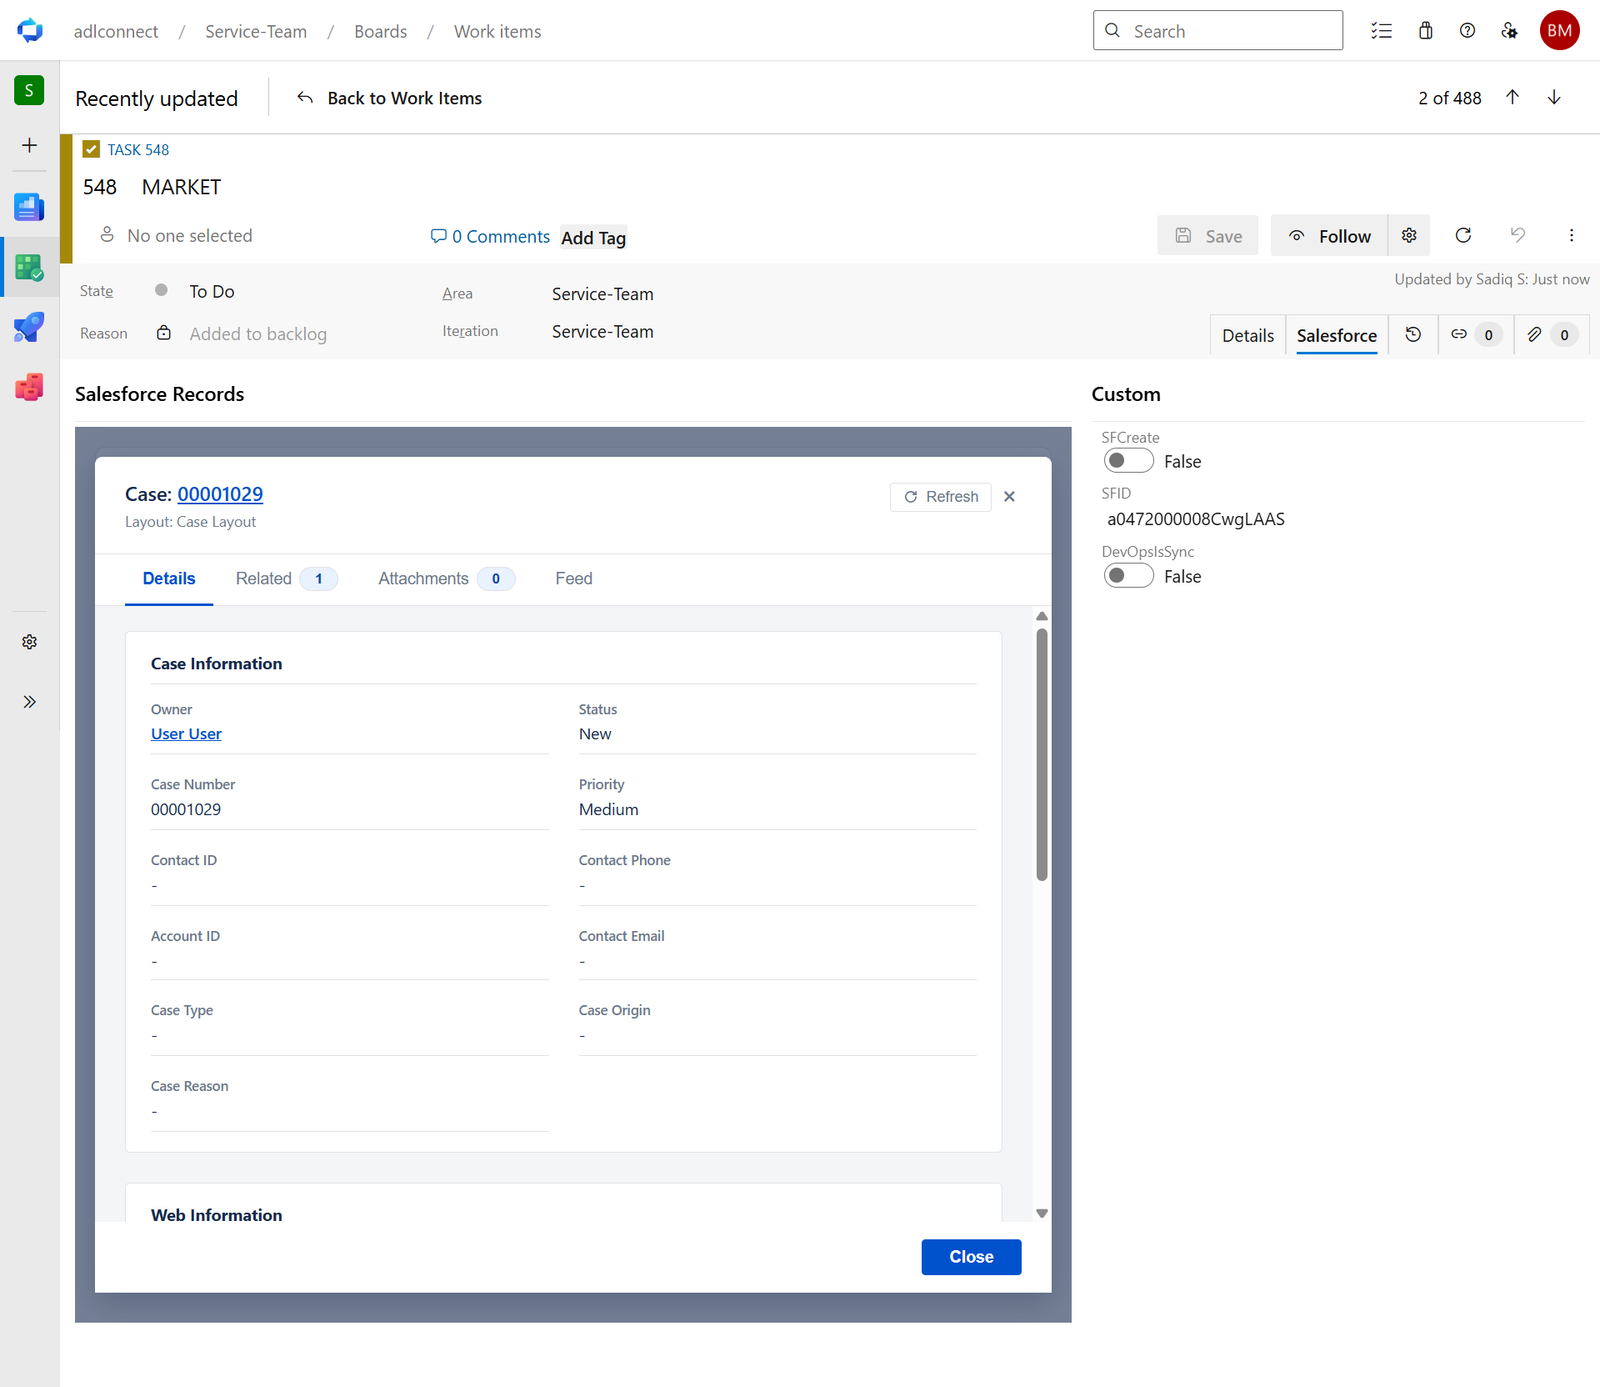
The Details tab displays the Salesforce record information using the Salesforce Page Layout configured for the object. The fields are organized into sections exactly as they appear in Salesforce, giving Azure DevOps users a familiar view of the record without leaving the work item.
Header elements:
- Case: 00001029 — Displays the Salesforce object name together with the selected record identifier.
- Layout: Case Layout — Indicates the Salesforce page layout used to render the record details. This is the same layout selected during the Panel Fields configuration.
- Tabs — The record detail dialog includes four tabs:
- Details
- Related
- Attachments
- Feed
The record fields are grouped according to the configured Salesforce page layout.
Information
| Field | Value |
| Case Number | 00001029 |
| Owner ID | User User |
| Subject | MARKET |
| Status | Not listed in the Case Details section (shows Created Date: 2026-08-14T10:16:19.000+0000 and Description: Place instead) |
System Information
| Field | Value |
| Created By ID | User User |
| Last Modified By ID | User User |
Fields that do not contain a value are displayed as -, making it easy to identify missing information. If the selected page layout contains additional sections or fields, the dialog scrolls vertically to display the complete record.
Why the page layout drives this view: The record detail dialog uses the configured Salesforce Page Layout, ensuring Azure DevOps users see the same field organization and grouping that Salesforce users see for the object. This provides a consistent experience across both applications without requiring a separate layout configuration in ADL Connect.
Click Close in the bottom-right corner to close the dialog and return to the Azure DevOps work item.
3. The Related Tab
Click Related to switch to the related records view.
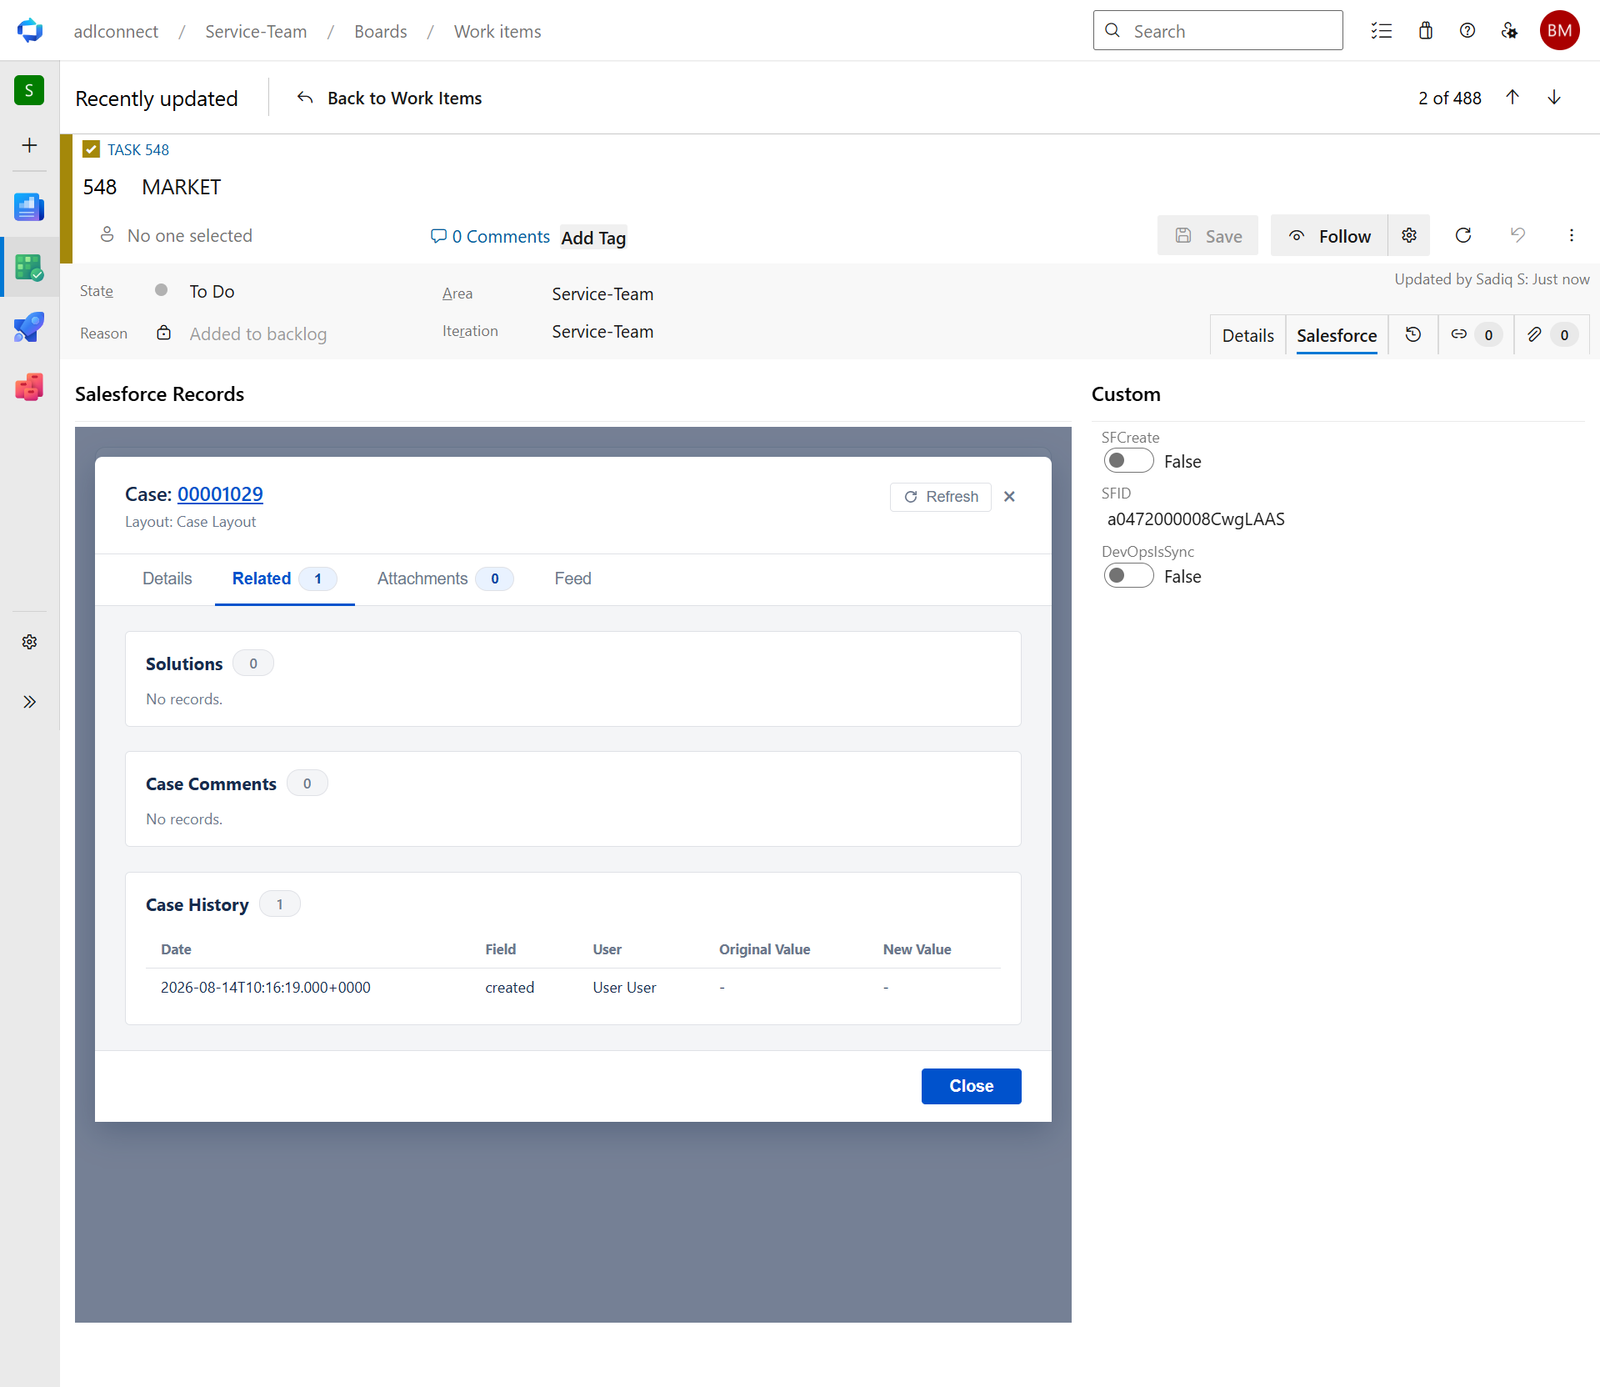
Here is the updated text accurately updated to match the details in the provided screenshot:
The Related tab displays Salesforce records that are related to the selected Case record (00001029). The related lists shown in this tab are determined by the configured Salesforce page layout and the relationships defined for the object.
In this example, the related sections displayed are:
- Solutions
0– Displays associated solutions. (Shows No records.) - Case Comments
0– Displays comments added to the case. (Shows No records.) - Case History
1– Displays history records for the Case. A count badge1indicates that one related record exists.
The Case History related list displays the following configured fields:
| Date | Field | User | Original Value | New Value |
2026-08-14T10:16:19.000+0000 | created | User User | - | - |
(Note: Under the Custom section on the right side panel, the SFID value displayed is a0472000008CwgLAAS.)
If no related records exist for a specific list, it displays No records.
Use this tab to:
- View the Salesforce records related to the selected Case record.
- Verify that the Azure DevOps work item has been successfully linked to the Salesforce record.
- Review related information without leaving Azure DevOps.
Note: The related lists displayed in this tab are retrieved directly from Salesforce using the integration user's permissions. If an expected related record or related list does not appear, verify that the integration user has Read access to the related Salesforce object and the fields configured for display
4. The Attachments Tab
Click Attachments to switch to the file attachment's view.
The Attachments tab displays all Salesforce files associated with the selected Case record. Users can switch between two display modes using the controls in the upper-right corner:
- List – Displays attachments in a table with file metadata.
- Thumbnail – Displays attachments as visual tiles with image previews (when available).
List View
The List view displays each attachment together with its metadata.
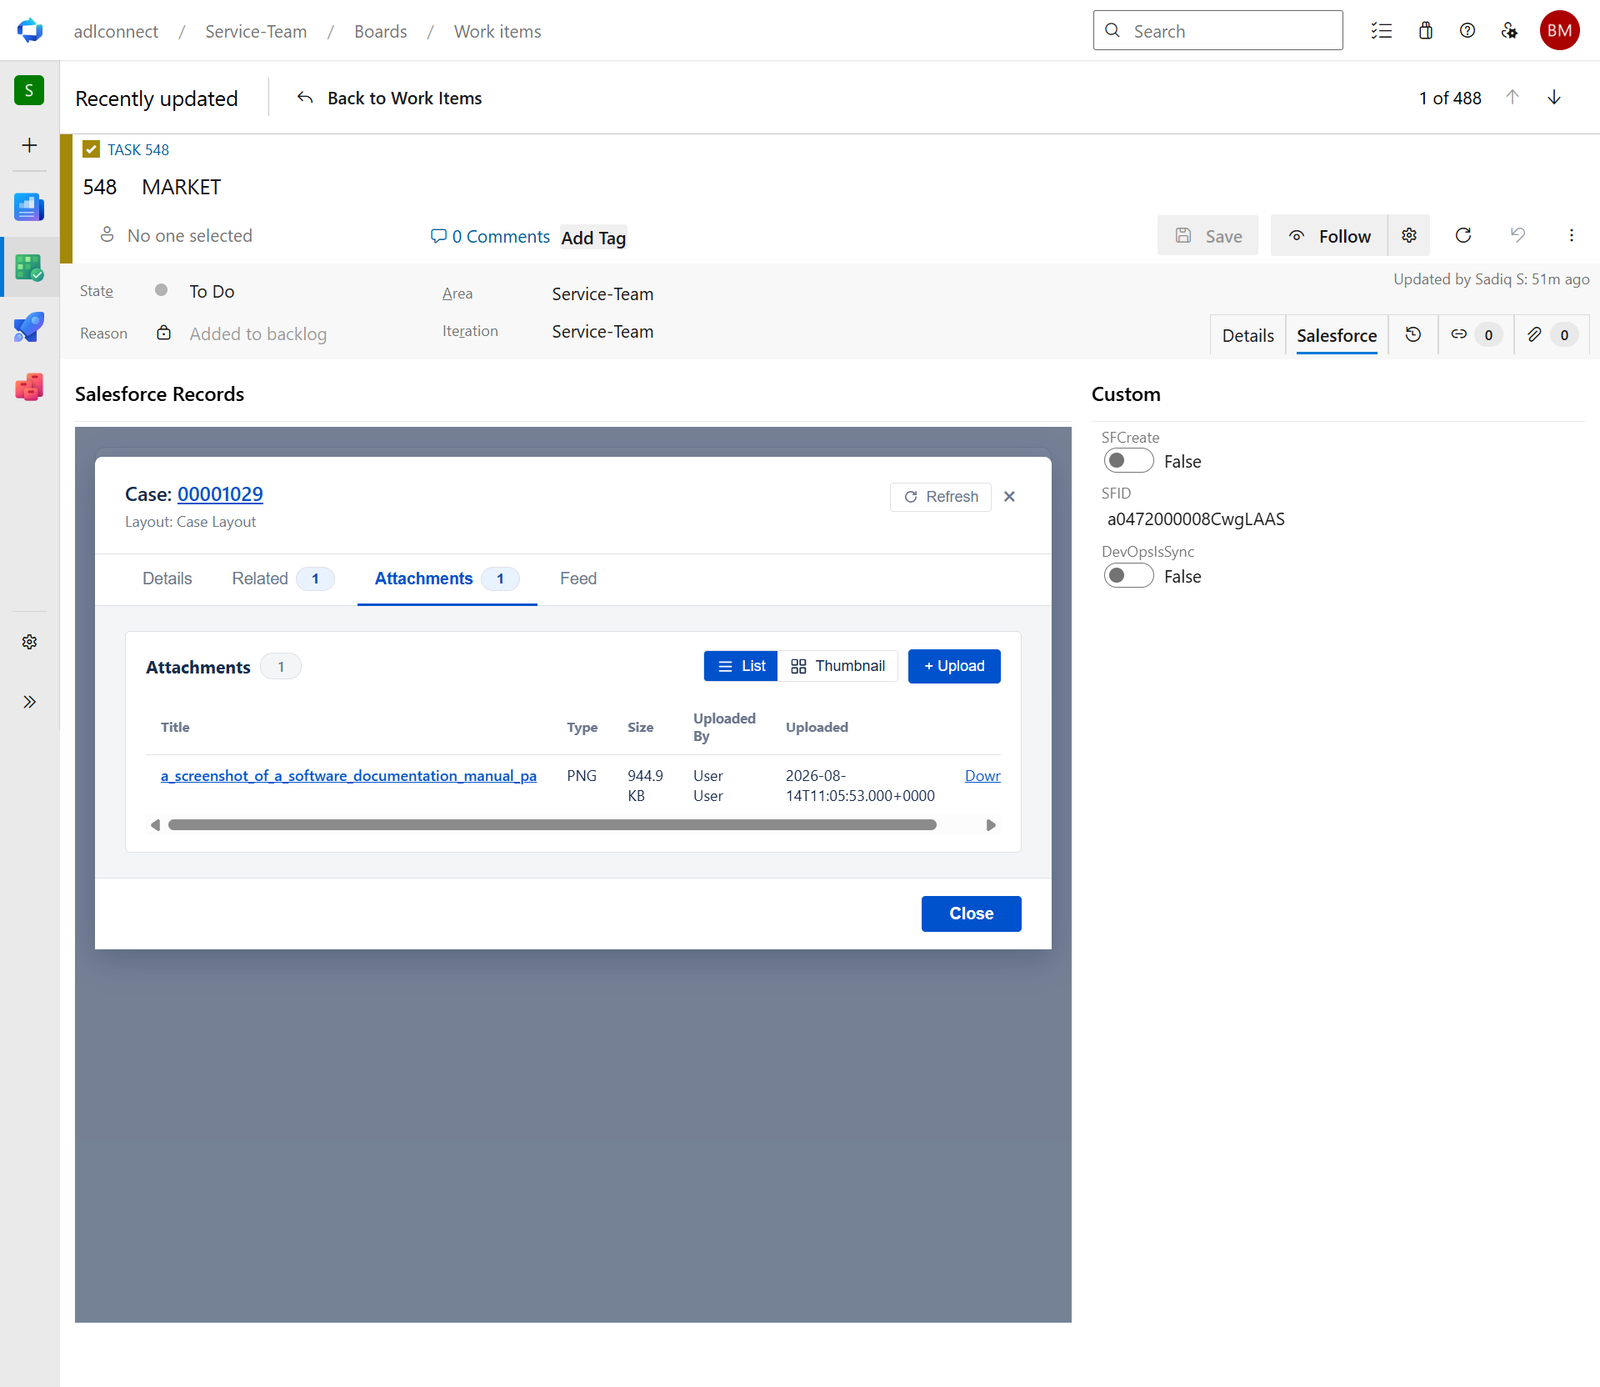
| Column | Description |
| Title | The name of the attachment stored in Salesforce. |
| Type | The file type (for example, PNG, PDF, DOCX). |
| Size | The file size (displayed with units, e.g., KB). |
| Uploaded By | The Salesforce user who uploaded the file. |
| Uploaded | The date and time the file was uploaded. |
| Download | Downloads the attachment directly from Salesforce. |
In this example, the attachment list contains:
| Field | Value |
| Title | a_screenshot_of_a_software_documentation_manual_pa |
| Type | PNG |
| Size | 944.9 KB |
| Uploaded By | User User |
| Uploaded | 2026-08-14T11:05:53.000+0000 |
The Attachments (1) badge indicates that one file is associated with the selected Salesforce record.
Thumbnail View
Click Thumbnail to switch to the visual attachment view.
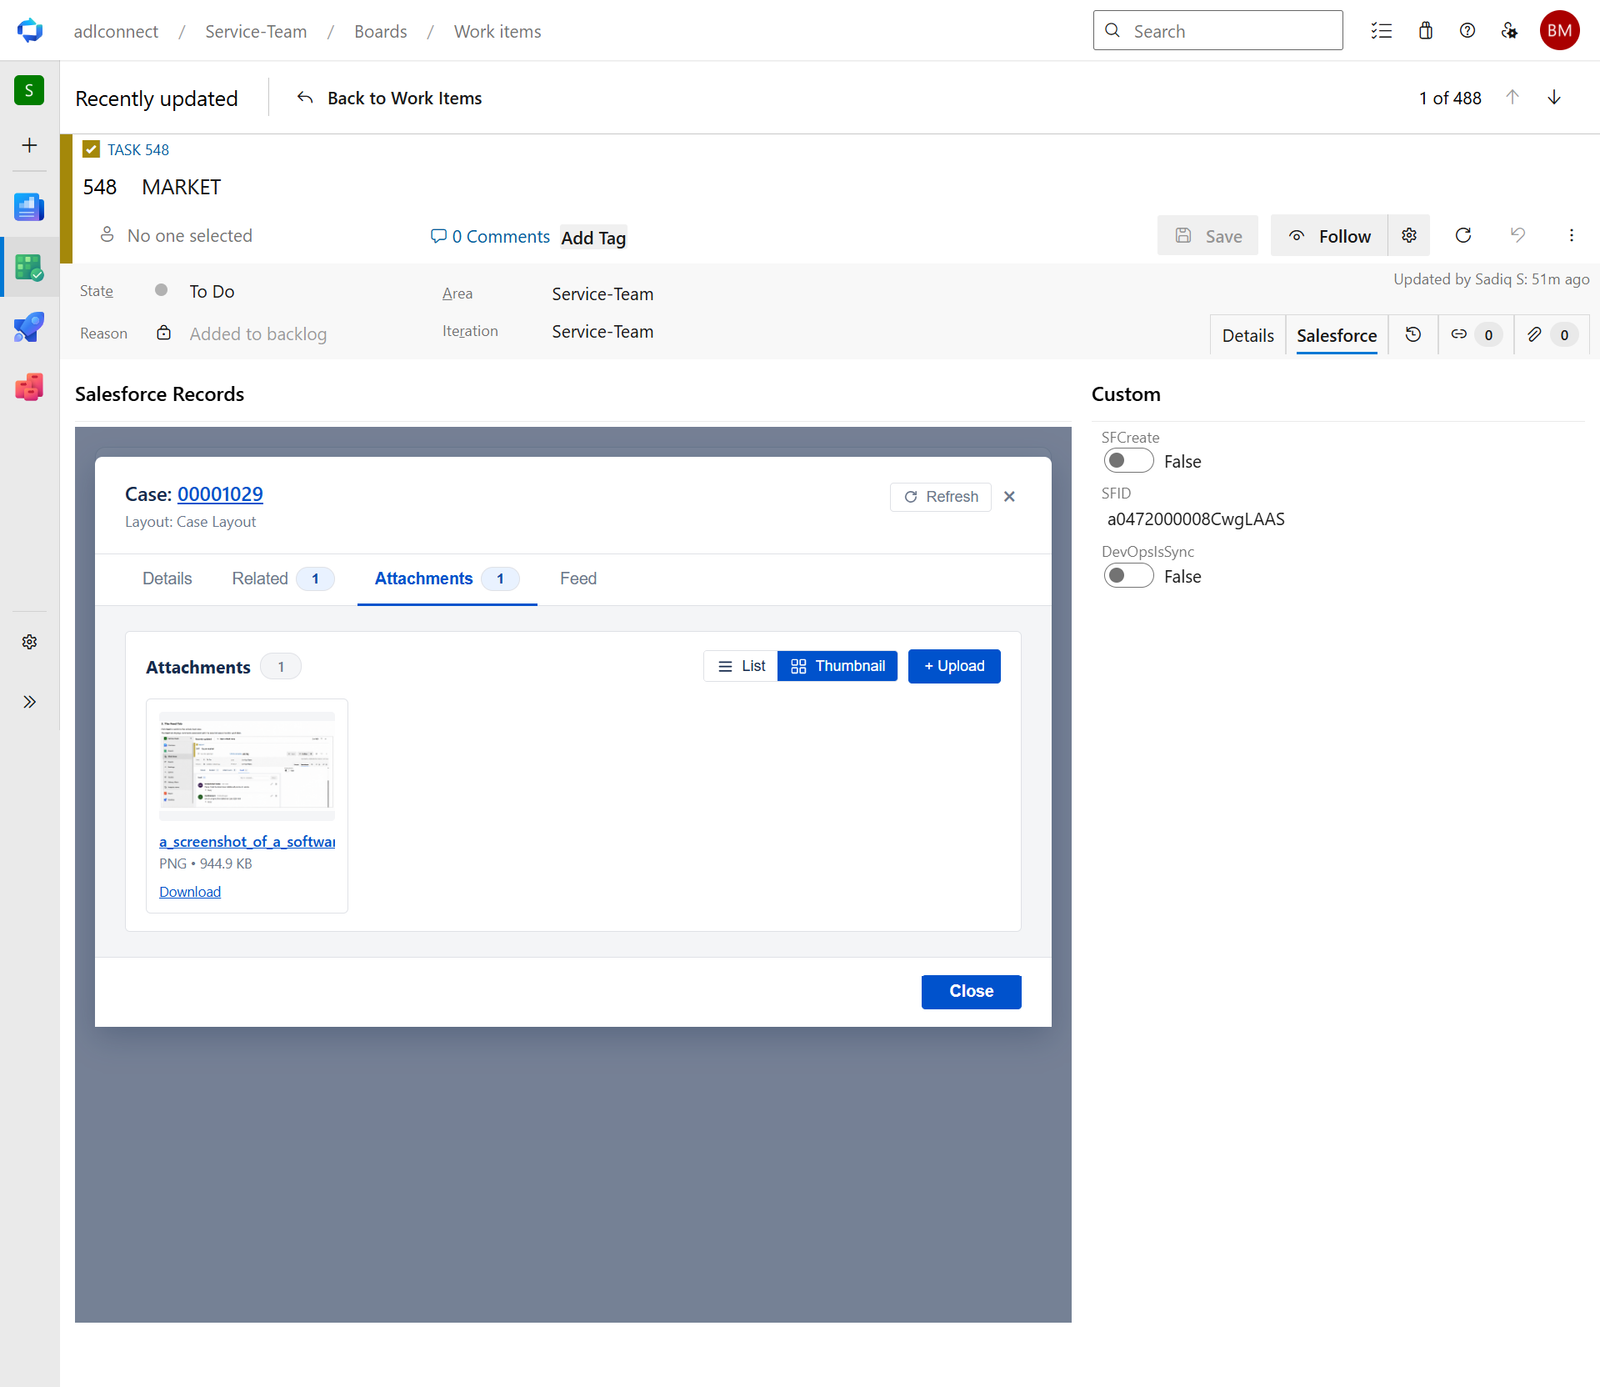
In Thumbnail view, image attachments are displayed as preview tiles, making them easier to identify visually. Each attachment tile includes:
- An image preview (or a file icon for non-image attachments).
- The attachment title (for example, a_screenshot_of_a_software_documentation_manual_pa).
- The file type and size.
- A Download link for downloading the file from Salesforce.
When to use each view
- List view is useful when reviewing attachment metadata such as the uploader, upload date, and file size.
- Thumbnail view is useful when working with image attachments, allowing users to identify files quickly through visual previews rather than file names alone.
5. The Feed Tab
Click Feed to switch to the comments view.
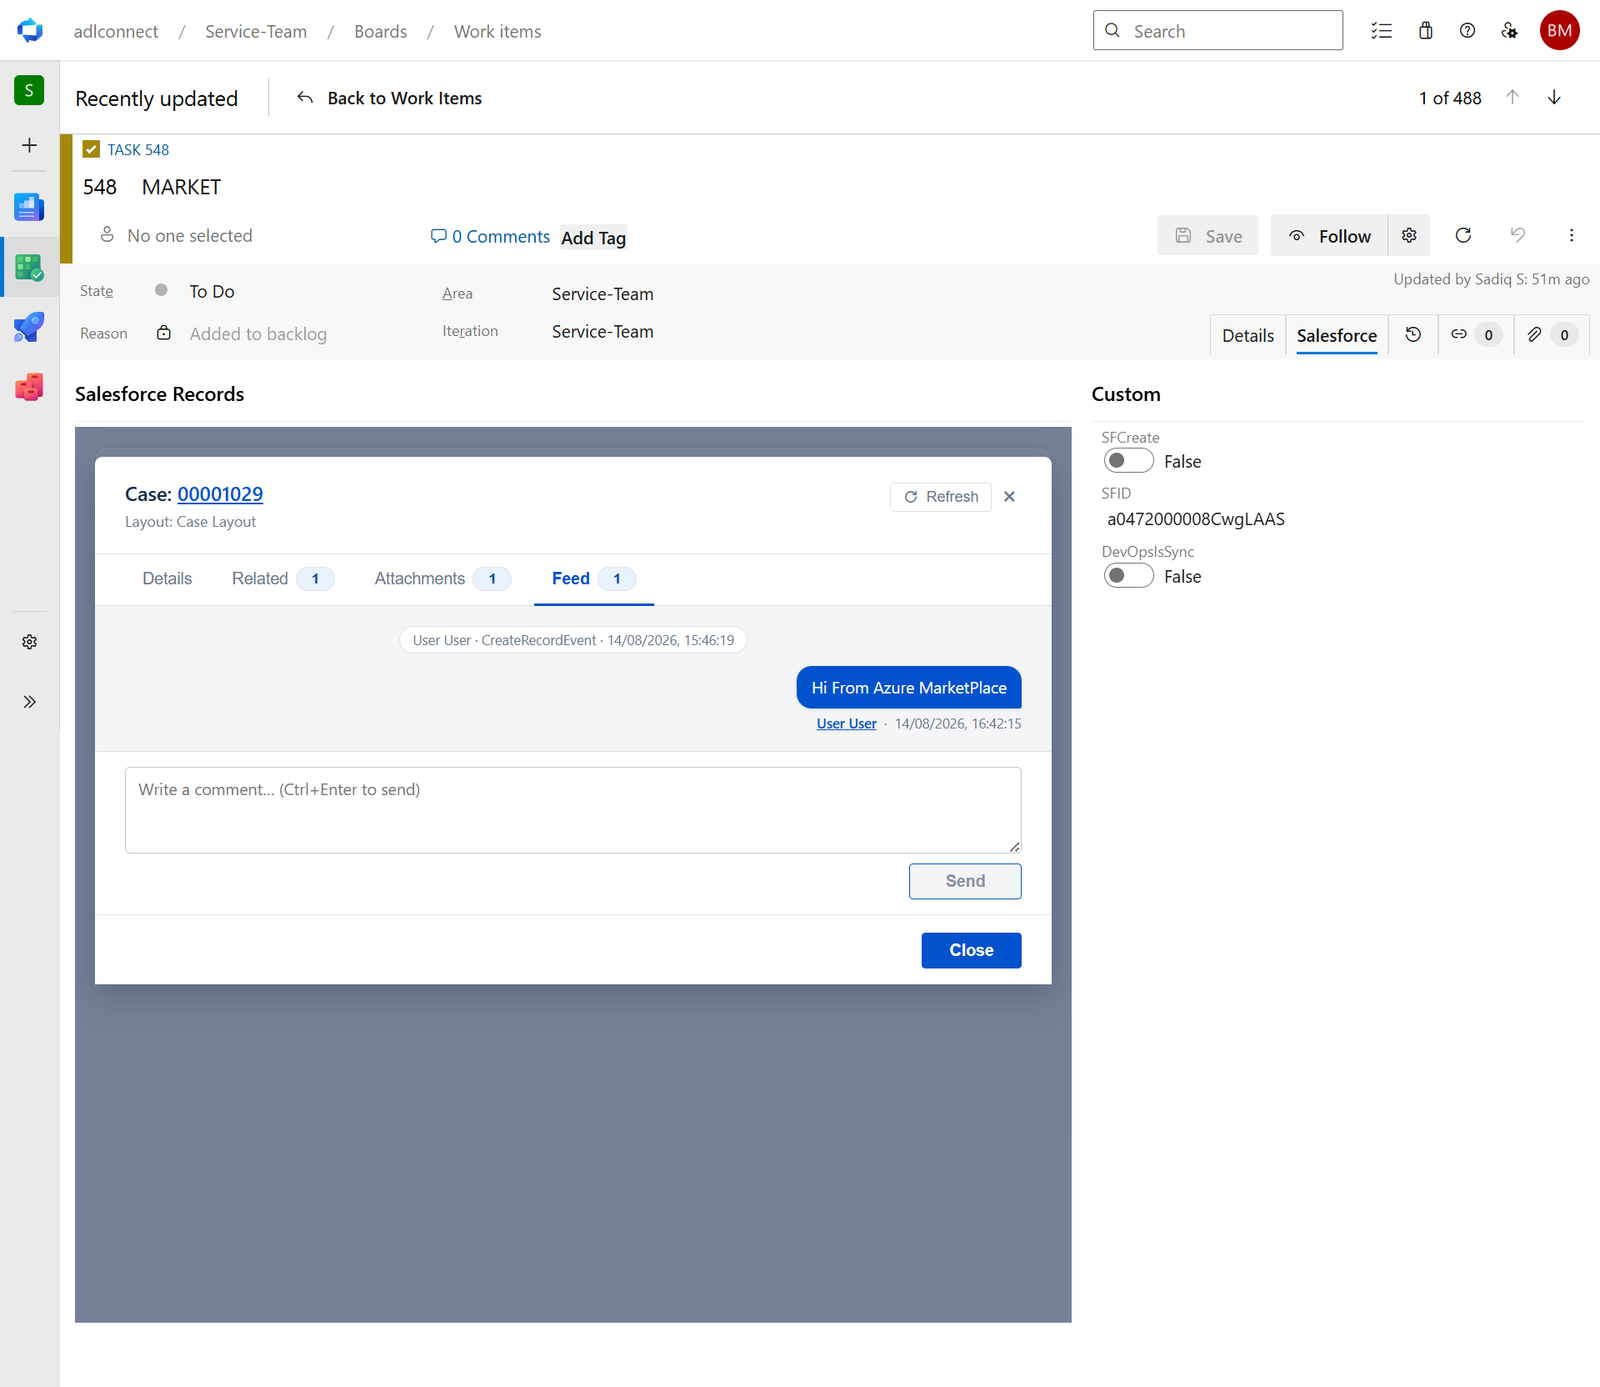
The Feed tab displays comments associated with the selected Azure DevOps work item. It allows users to view discussions, synchronization messages, and updates related to the work item directly within Azure DevOps.
In this example, the feed section displayed is:
- Work Item Comments – Displays comments and synchronization messages associated with the selected Azure DevOps work item.
A Feed (1) indicates that two comments currently exist.
The comments shown in this example are:
| Field / Event | Value / Text |
| System Event Tag | User User · CreateRecordEvent · 14/08/2026, 15:46:19 |
| User Comment | Hi From Azure MarketPlace |
| Comment Author | User User |
| Comment Timestamp | 14/08/2026, 16:42:15 |
If no comments exist, the feed displays No comments.
Use this tab to:
- View comments associated with the selected Azure DevOps work item.
- Review synchronization messages from Salesforce.
- Collaborate with team members by adding and replying to comments.
- Track discussion history without leaving Azure DevOps.
Note: The comments displayed in this tab are retrieved directly from Azure DevOps. If expected comments or synchronization messages do not appear, verify that synchronization is enabled and that the integration user has the required permissions in both Azure DevOps and Salesforce.
6. Closing the Record Detail Dialog
Click Close in the bottom-right corner of any tab to close the record detail dialog and return to the Azure DevOps work item.
The Salesforce Details panel remains unchanged because the record detail dialog is read-only. Viewing the record does not modify any Salesforce data or refresh the linked records list.
Whenever the record detail dialog is opened, it always displays the Details tab by default. If you want to view Related, Attachments, or Feed, simply select the appropriate tab after the dialog opens.
7. Quick Reference — Row Action Icons
The following actions are available for each linked Salesforce record displayed in the Salesforce Details panel:
| Control | Location | Action |
Open Record (00001029) | Primary header / row link | Opens the Salesforce record detail dialog directly within Azure DevOps, giving access to the Details, Related, Attachments, and Feed tabs. |
Refresh (Refresh icon) | Top-right of the record modal | Re-fetches and reloads the latest Salesforce record data directly into the Azure DevOps panel. |
Close (Close button / ×) | Modal header & bottom action bar | Closes the open Salesforce record detail modal dialog. |
| Edit (pencil icon) | Right side of the row | Opens the Review & Link dialog, allowing you to update configured fields and save changes back to Salesforce. |
Delete (trash / × icon) | Far right of the row | Removes the link between the Azure DevOps work item and the Salesforce record without deleting the Salesforce record itself. |
8. Practical Use Cases
- Review record information – Open the Details tab to view critical Salesforce fields such as
Subject(MARKET),Description(Place),Created Date,Owner ID, and other mapped fields without leaving Azure DevOps. - Verify linked records – Use the Related tab to confirm associated Salesforce objects (e.g.,
Solutions,Case Comments,Case History) linked to the selected record (00001029). - Access supporting files – Open the Attachments tab to view, preview, or download files (such as
.pngor.pdfattachments) directly from Salesforce. - View Salesforce feed activity – Open the Feed tab to inspect system events (e.g.,
CreateRecordEvent) and user comments (e.g.,"Hi From Azure MarketPlace") added to the record. - Update record information – Use the Edit control from the panel to modify configured review fields and sync updates back to Salesforce.
- Remove an association – Use the Delete action to unlink a Salesforce record from the Azure DevOps work item while maintaining the original record in Salesforce.
Tip: If the Layout displayed at the top of the record detail dialog (e.g.,
Layout: Case Layout) is not what you expected, verify the Page Layout configured for the corresponding Project Mapping in ADL Connect Configuration. The detail dialog uses the exact Salesforce page layout mapped in the configuration, so updates to the layout settings apply to all users viewing linked records in Azure DevOps.
Searching and Linking an Existing Salesforce Record from an AzureDevOps WorkItem
Searching and Linking an Existing Salesforce Record from an Azure DevOps Work Item
When the Salesforce record already exists—for example, a Case created by the support team or an Account created during customer onboarding—there is no need to create a duplicate record. The Search action in the Salesforce Details panel allows users to find an existing Salesforce record and link it directly to the current Azure DevOps work item.
Because ADL Connect supports many-to-many relationships, a single Azure DevOps work item can be linked to multiple Salesforce records, and a single Salesforce record can be linked to multiple Azure DevOps work items. This enables teams to associate all relevant Salesforce records with a work item while maintaining a single source of truth in Salesforce.
1. Click Search on the Salesforce Details Panel
Open the Azure DevOps issue and locate the Salesforce Details panel.
- Click the Search button (magnifying-glass icon) in the panel toolbar.
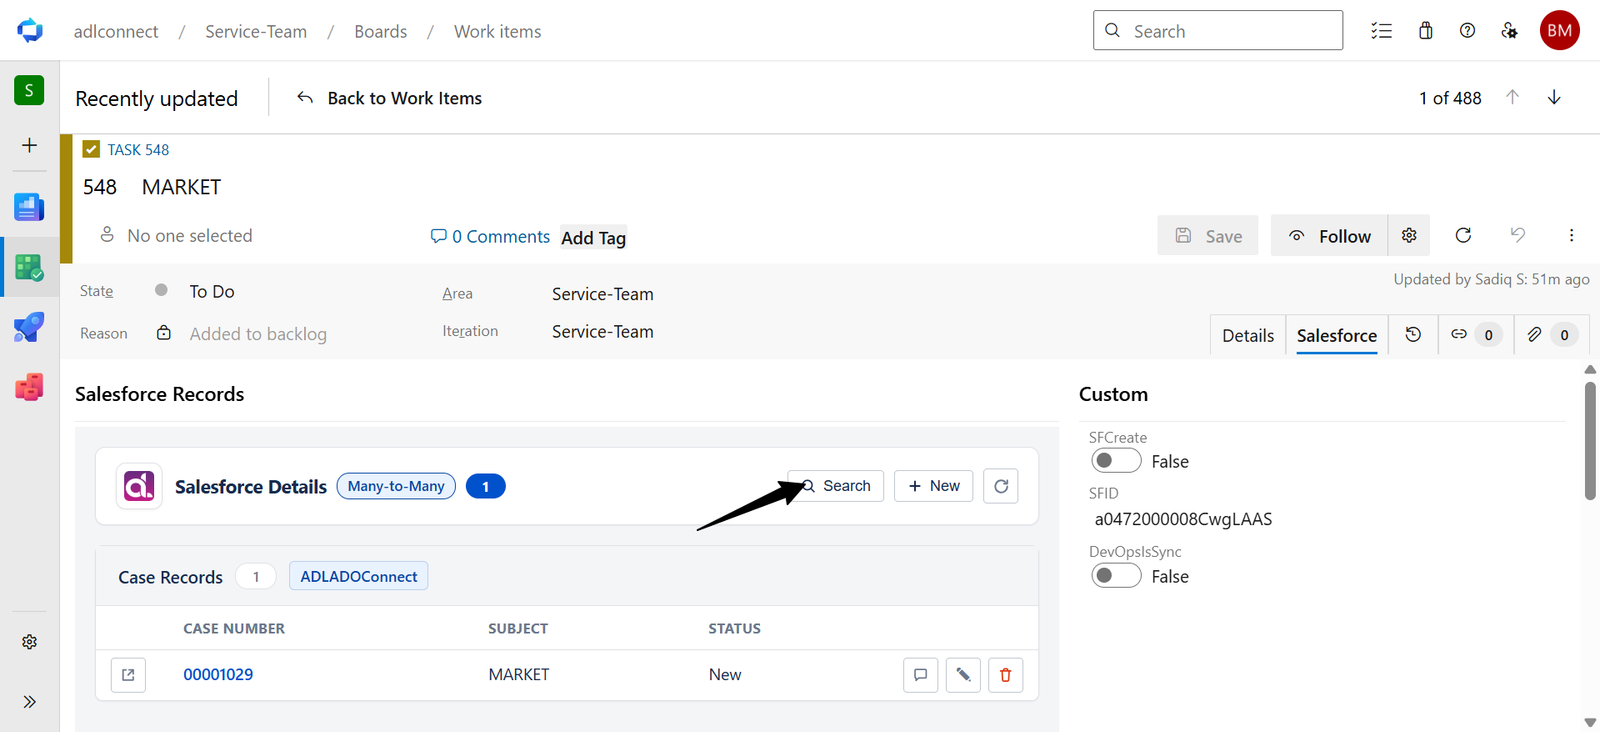
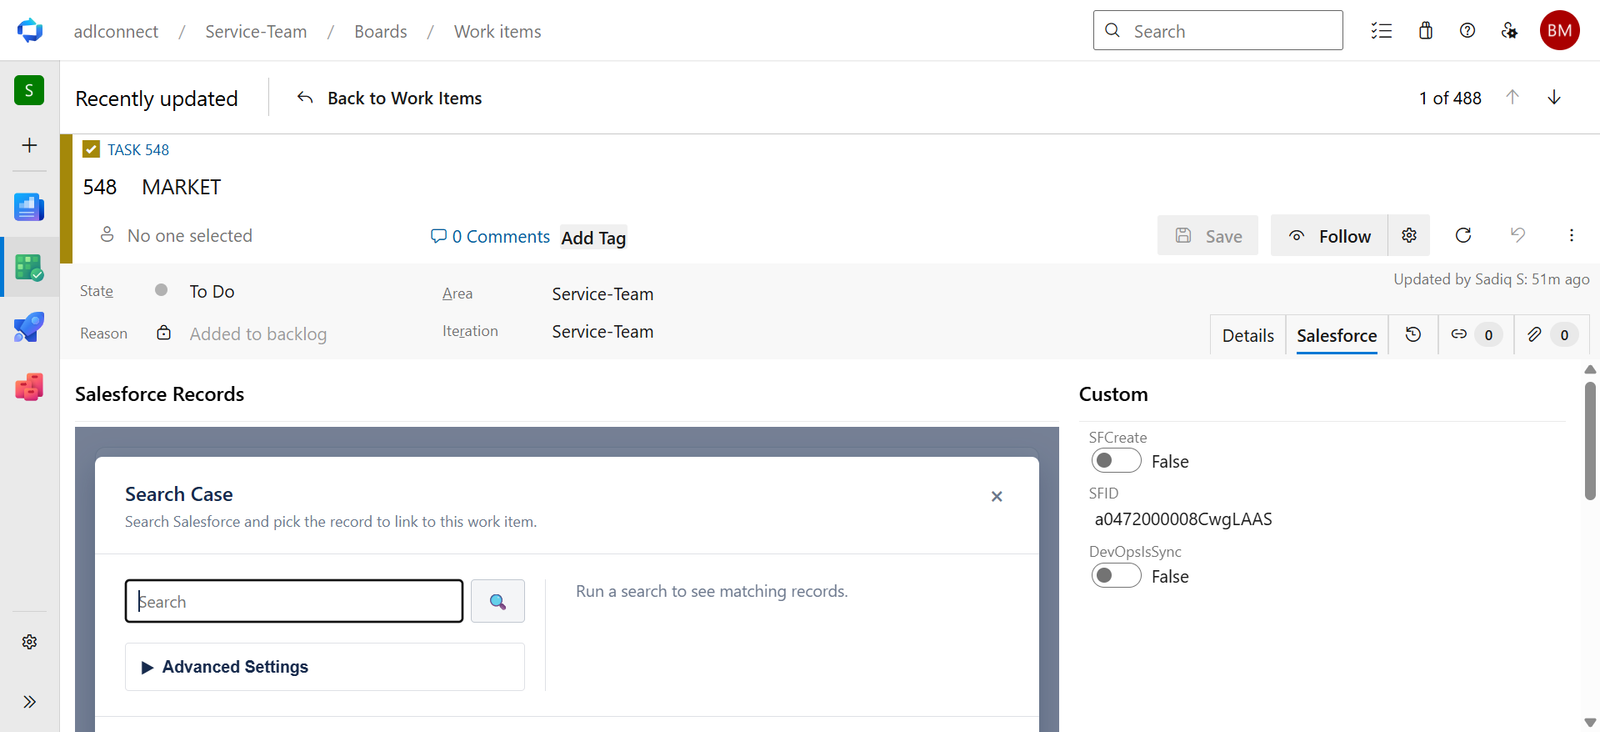
- The Search Case modal opens with the placeholder:
- Run a search to see matching records.
Two controls are available on the left:
- Search box — quick keyword search across the parent object's standard searchable fields.
- Advanced Settings (collapsible) — sort, pagination, and column controls for refined searches.
Note: The modal title and search scope are driven by the parent object configured on the mapping row. For the Task → Case mapping in this example, the modal searches Case records. If the mapping targets Account, the modal becomes Search Account, and so on.
2. Run a Search
Enter a search value in the Search box (for example, 00001028) and click the Search (magnifying glass) icon.
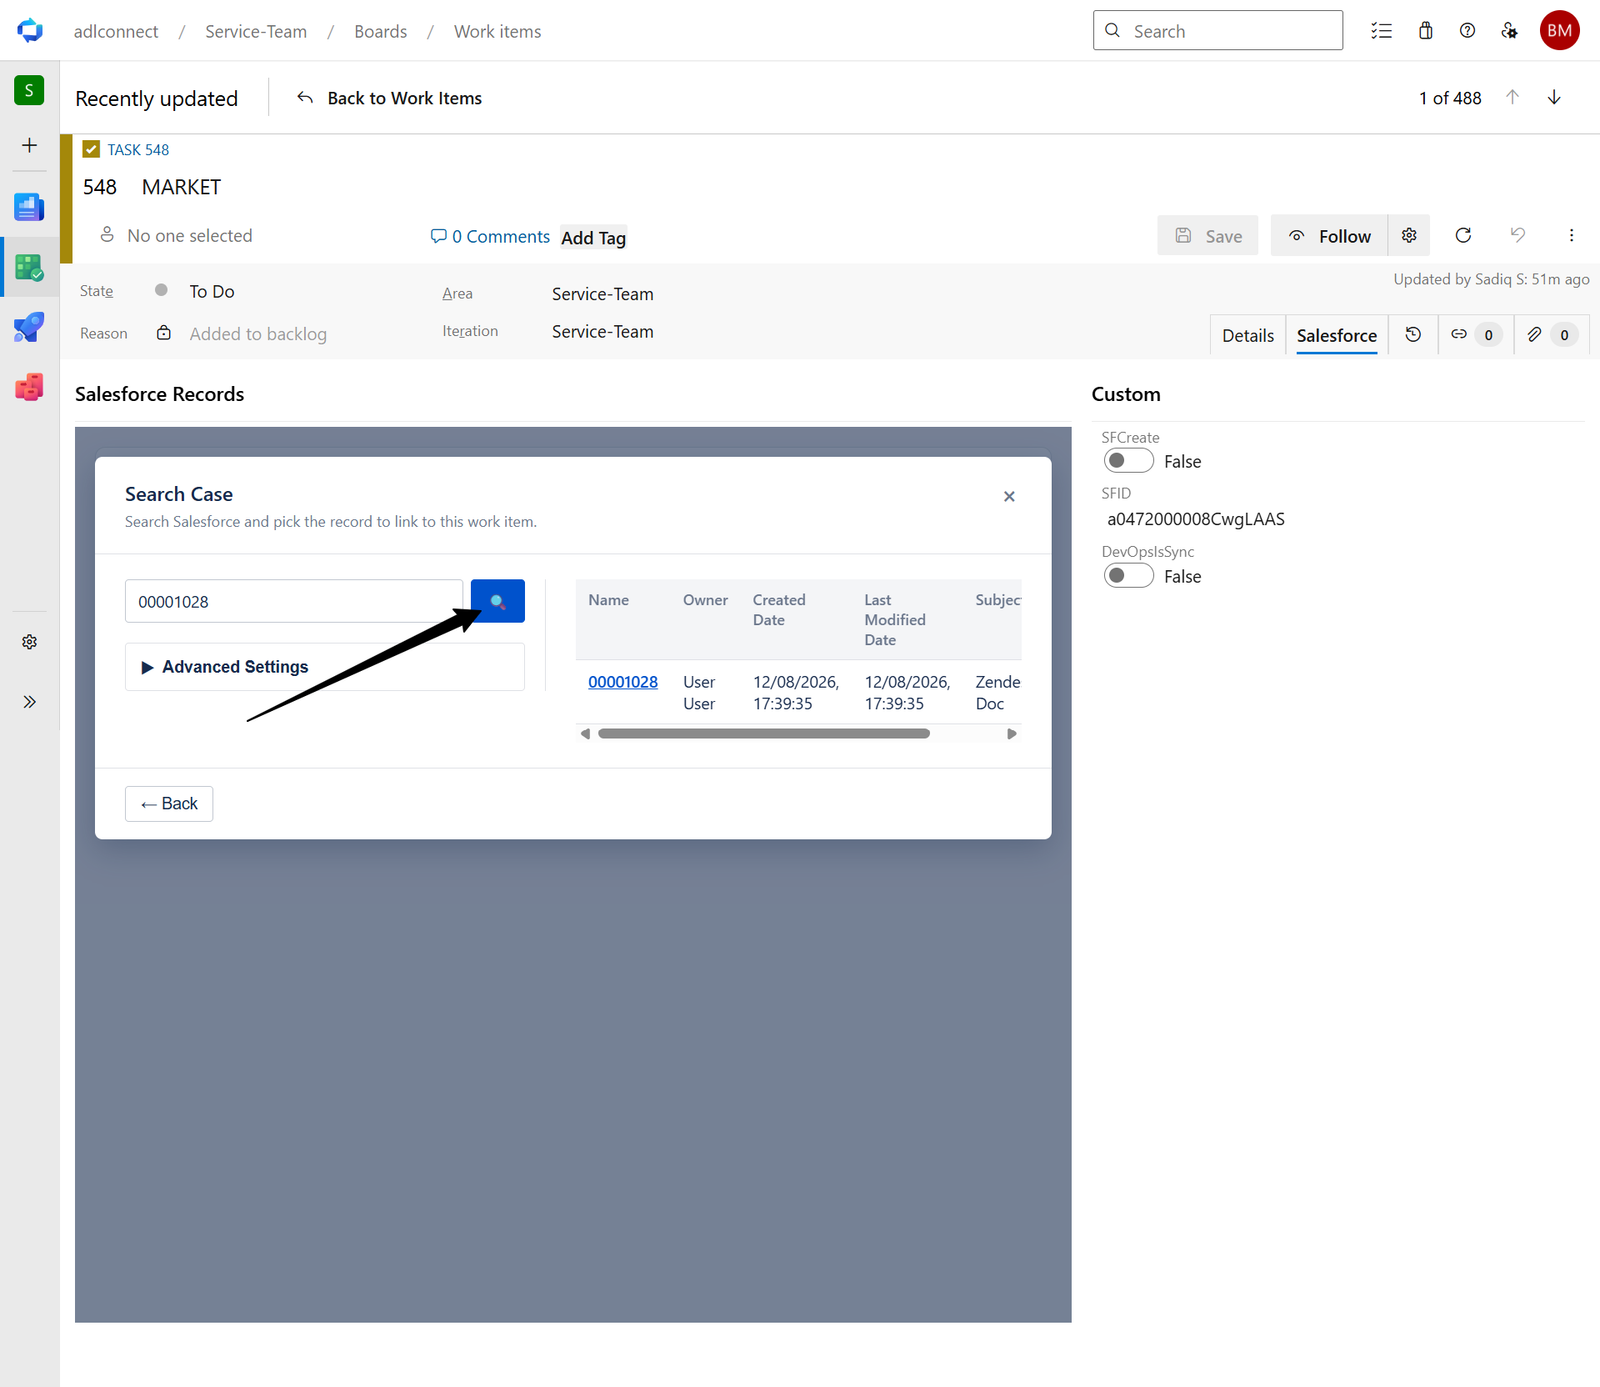
Matching Salesforce Case records are displayed in the results table. By default, the search returns up to 10 records and displays the columns configured in Advanced Settings.
In this example, one matching Case record is returned:
| Name | Owner | Created Date | Last Modified Date | Subject |
| 00001028 | User User | 12/08/2026, 17:39:35 | 12/08/2026, 17:39:35 | Zendesk Doc |
Advanced Settings
Expand Advanced Settings to customize the search results.
The available options include:
- Order By – Select the field used to sort the search results and choose Ascending or Descending order.
- Limit Rows – Specify the maximum number of records returned per search (default: 10).
- Skip Rows – Skip a specified number of records when paging through large result sets.
- Add Columns – Add additional Salesforce fields to the results table.
- Selected Columns – Displays the columns currently shown in the search results. Remove a column by clicking the × on its chip.
After changing any of these settings, the search results are refreshed using the updated criteria.
Tip: If the default columns are not sufficient to identify the correct Salesforce record, add additional fields using Add Columns. The selected columns remain active while the Search Case dialog is open and return to the default configuration the next time the dialog is opened.
3. Select a Record to Link
Click the Name link of the Salesforce record you want to associate with the current Azure DevOps work item. In this example, the user selects a0FFf000003SRbR.
The Search Case dialog closes, and the Review & Link Case dialog opens with the selected record's current field values populated from Salesforce.
The Review & Link Case dialog is similar to the dialog used when editing a linked record, with a few important differences:
- The dialog title is Review & Link
- The Back button in the lower-left returns you to the search results without closing the search workflow, allowing you to select a different Salesforce record if needed.
- The primary action button is Save & Link, which links the selected Salesforce record to the current Azure DevOps work item.
The configured review fields are populated with the current values from the selected Salesforce record. In this example:
| Field | Value |
| Subject | Zendesk Doc |
| Description | Not displayed in this table view |
The values shown are retrieved directly from Salesforce when the record is selected. You can review or modify any editable fields before clicking Save & Link.
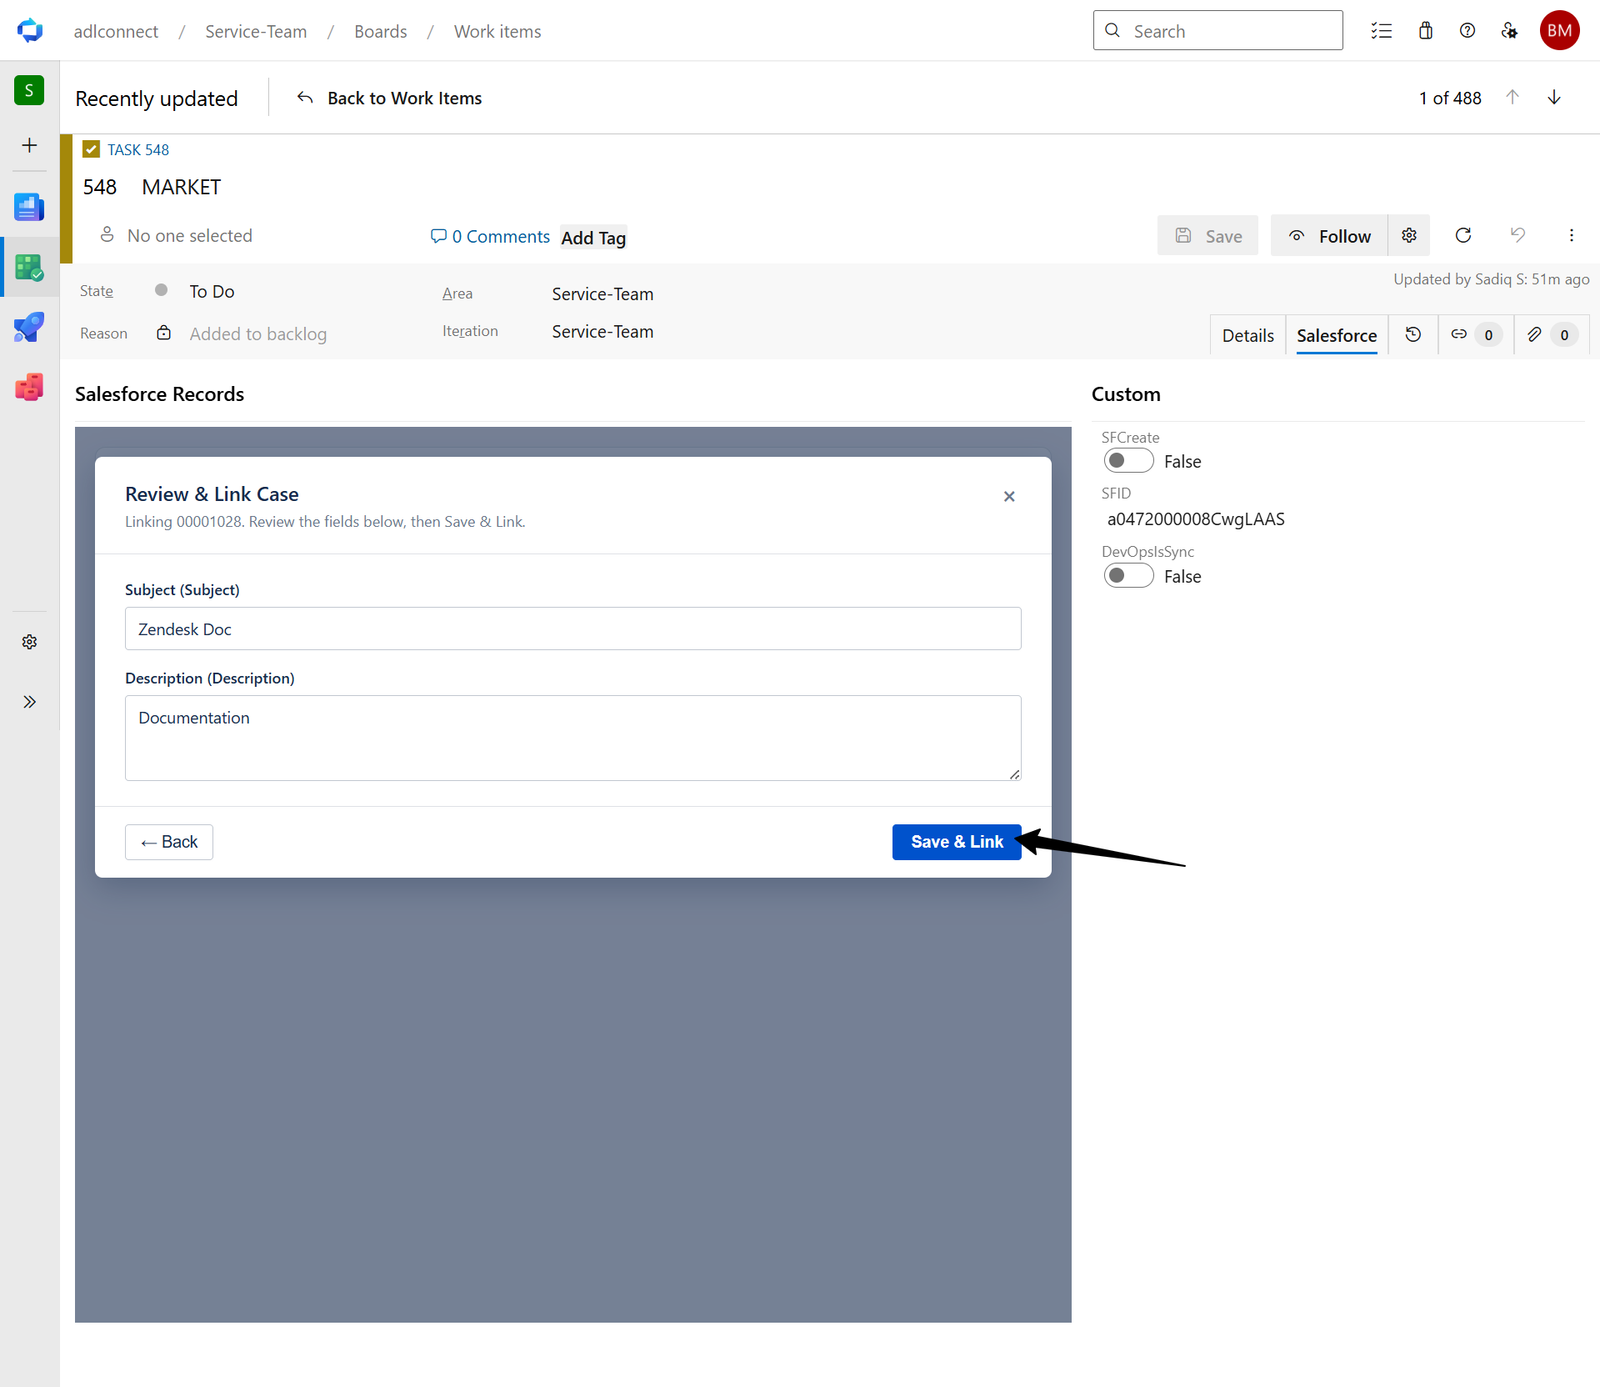
Why are the fields pre-populated?
Pre-populating the review fields allows users to verify the current Salesforce record information and make any necessary updates before linking it to the Azure DevOps work item. When Save & Link is clicked, any changes made in this dialog are saved to the existing Salesforce record, and the record is linked to the Azure DevOps work item. No new Salesforce record is created.
4. Behind the Scenes on Save & Link
When you click Save & Link, ADL Connect performs the following operations:
- Updates the existing Salesforce record – Any changes made to the editable fields in the Review & Link Case dialog are saved back to the existing Case record in Salesforce. Fields that were not modified remain unchanged.
- Creates a DevOpsRecordLink – ADL Connect creates a new DevOpsRecordLink record that associates the existing Salesforce Case record with the current Azure DevOps work item. If a corresponding DevOpsRecord mirror record does not already exist for the work item, it is created automatically before the link is established.
The Salesforce Case record itself is not duplicated. The same Salesforce record can be linked to multiple Azure DevOps work items while remaining a single record in Salesforce. This preserves a single source of truth and enables many-to-many relationships between Salesforce records and Azure DevOps work items.
5. The Linked Record Appears in the Salesforce Details Panel
After you click Save & Link, the Review & Link Case dialog closes, and the Salesforce Details panel is refreshed. The newly linked Salesforce record is now displayed together with any existing linked records.
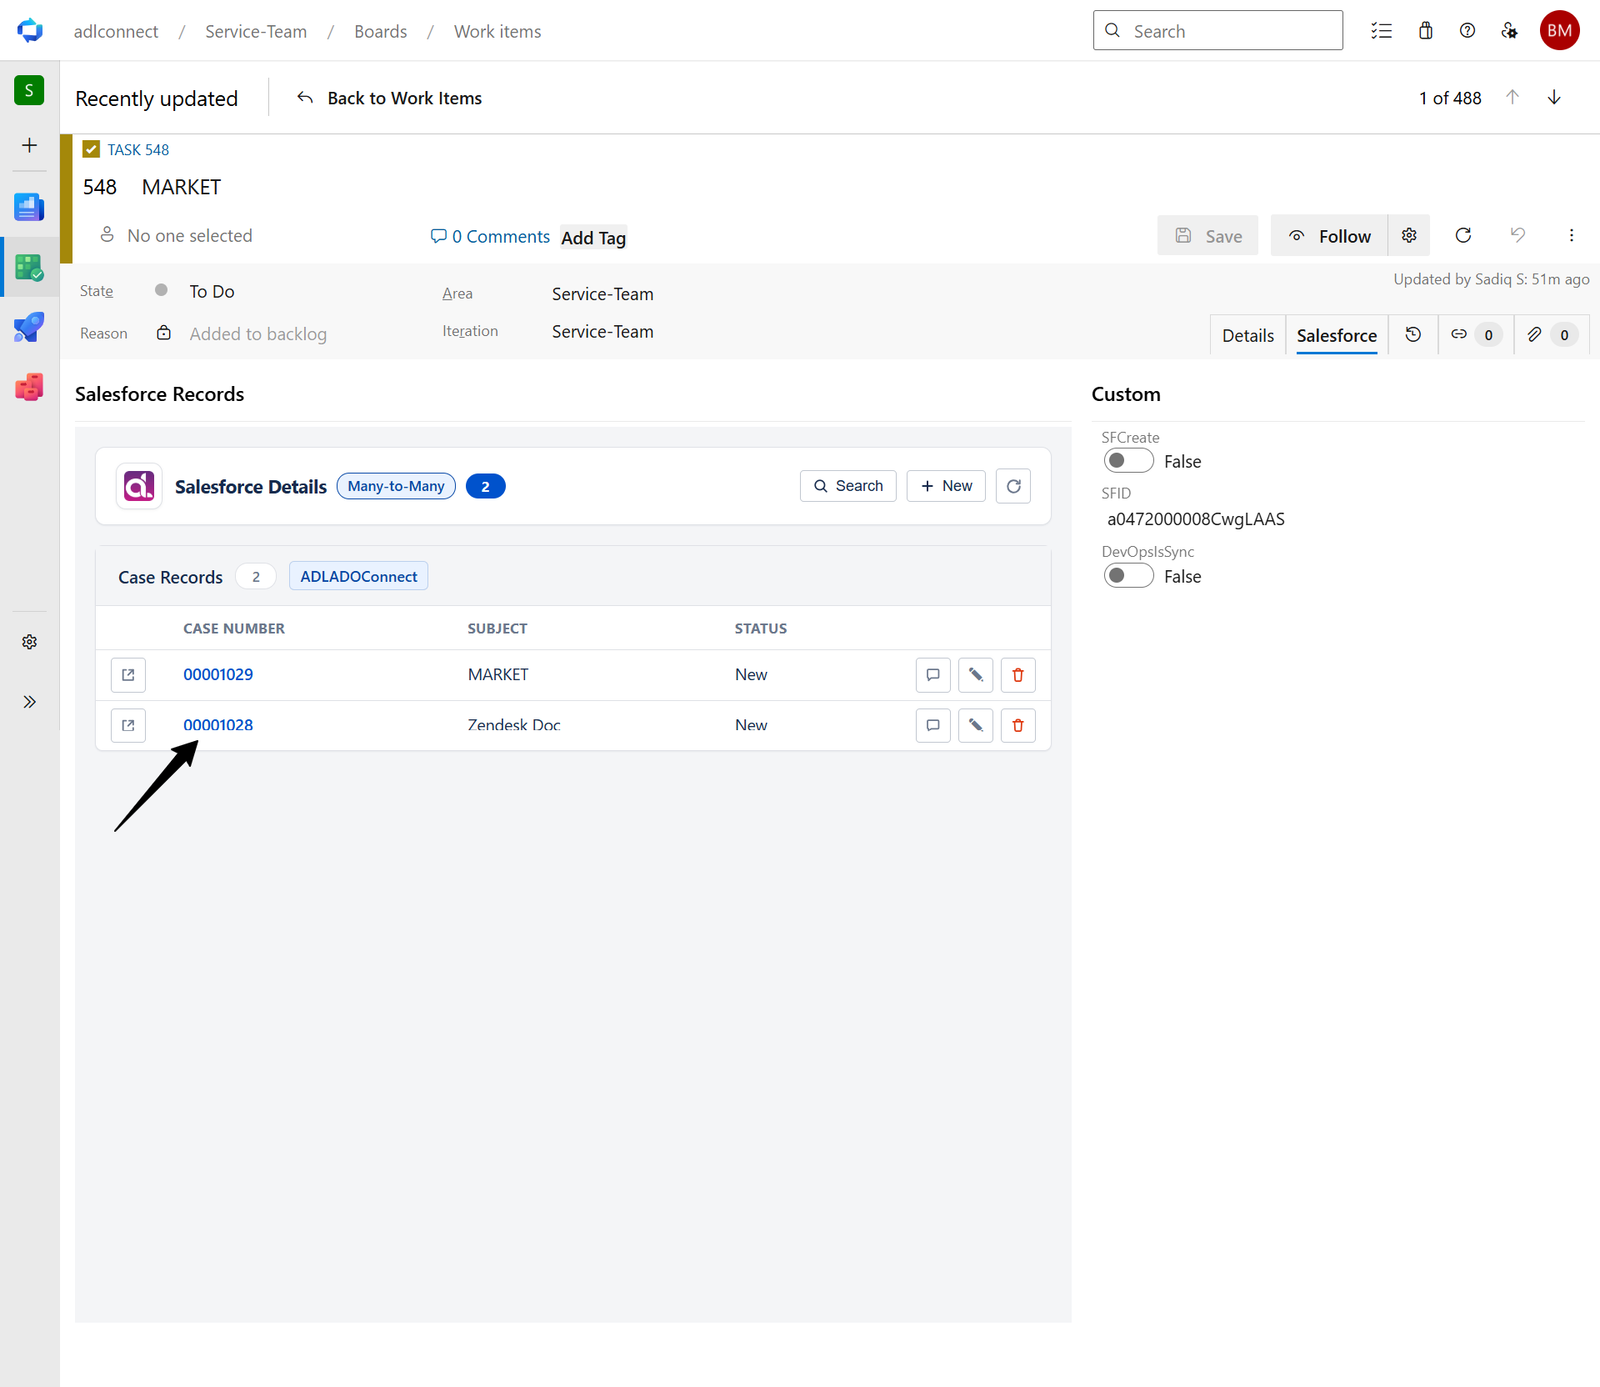
In this example, the panel now shows:
- Case Records (2) – The count badge indicates that two Salesforce Case records are linked to the current Azure DevOps work item.
- Each row displays the fields configured in the Panel Fields configuration:
- CASE NUMBER - 00001028
- SUBJECT – Zendesk Doc
- STATUS - New
Each linked record provides the following actions:
- Open (box-with-arrow icon) – Opens the Salesforce record details dialog within Azure DevOps.
- Edit (pencil icon) – Opens the Review & Link Case dialog, allowing you to update the configured review fields. Changes are saved directly to Salesforce.
- Delete (trash icon) – Removes the association between the Azure DevOps work item and the Salesforce Case record. The Salesforce record itself is not deleted.
The linked Salesforce record is now available to all users who can access the Azure DevOps work item, providing quick access to the associated Salesforce information without leaving Azure DevOps.
6. Practical Use Cases
- Avoid duplicate records – Before creating a new Salesforce record, use Search to determine whether the required Case record already exists, then link it instead of creating a duplicate.
- Link multiple Salesforce records – Associate multiple Case records with a single Azure DevOps work item when additional business context is required.
- Update while linking – Review and update the selected Salesforce record in the Review & Link dialog before saving the link.
- Maintain many-to-many relationships – Link the same Salesforce record to multiple Azure DevOps work items without creating duplicate Salesforce records.
- Quick access to Salesforce data – Open, review, edit, or remove linked Salesforce records directly from the Salesforce Details panel.
Tip: If your search does not return the expected Salesforce record, verify that:
- The integration user has Read access to the Salesforce object and the searchable fields.
- The search value is correct.
- The Azure DevOps Project Mapping is configured for the correct Salesforce organization and parent object in ADL Connect Configuration.